S’mores Hand Pies Recipe
Oh, I just have to tell you about this delightful S’mores Hand Pies Recipe—it’s honestly one of those treats that turns any ordinary day into a mini celebration. Imagine having all that gooey marshmallow, melty chocolate, and crispy graham cracker crust wrapped up in a perfectly portable hand pie. It’s like having a campfire classic but without the smoke and sticks, right in your own kitchen.
What makes this S’mores Hand Pies Recipe truly stand out for me is how effortlessly you can make them and how versatile they are for any occasion. Whether it’s for a cozy family dessert night or an outdoor picnic, these little pies travel well and taste even better when fresh or room temperature. Trust me, once you try this, you’ll want to bake them again and again!
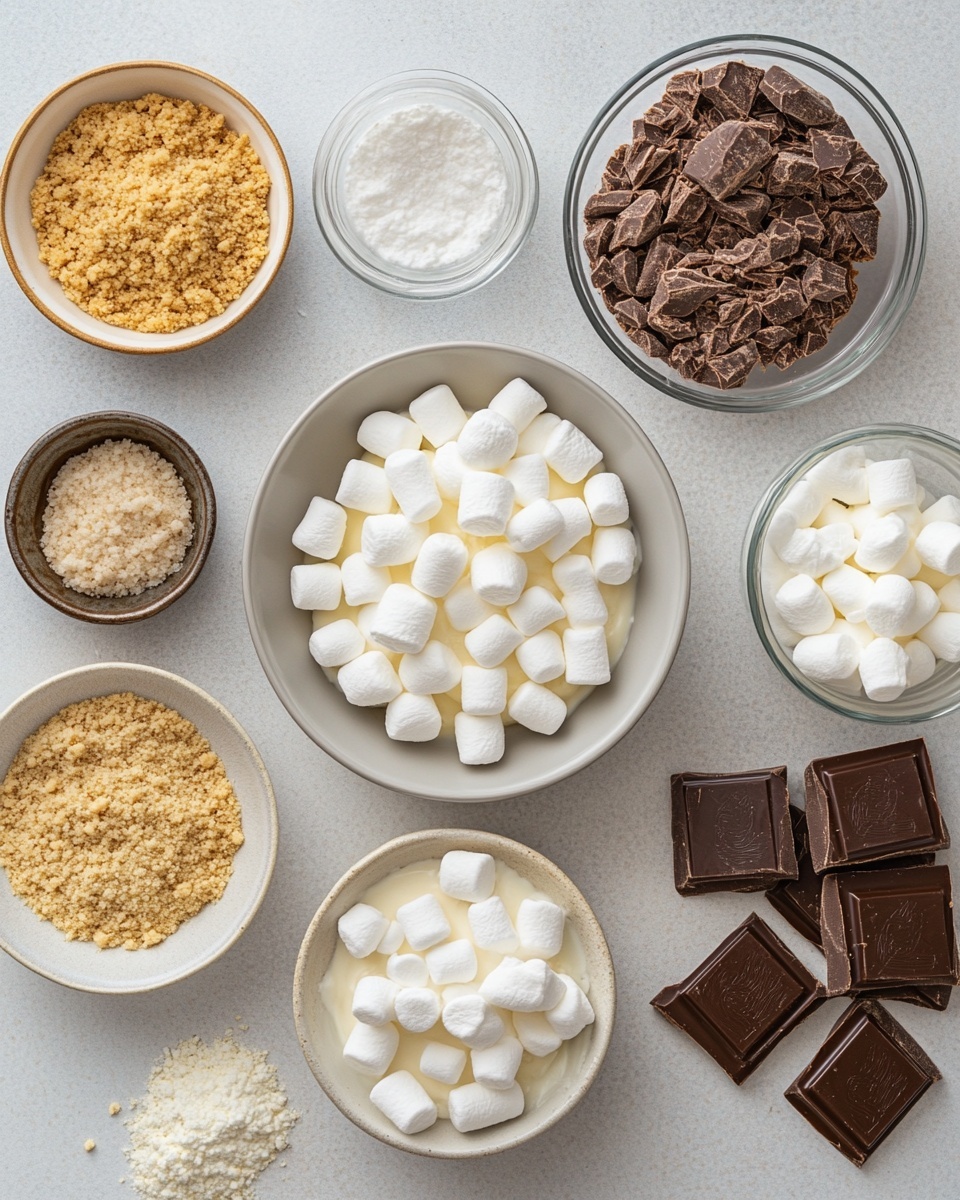
Ingredients You’ll Need
The ingredients here feel simple, but they come together beautifully to create that nostalgic s’mores flavor. Each one plays a critical role in balancing texture and taste, so choosing good quality items will really pay off.
- Refrigerated pie crust dough: Using pre-made dough saves so much time and effort, making this recipe approachable for anyone.
- Graham cracker crumbs: This gives you that signature crunchy base and adds a little extra sweetness and texture.
- Sugar: Divided between the crust coating and the filling to add just the right amount of sweetness without overpowering.
- Butter: Melted butter helps the graham cracker crumbs stick and gives the crust a rich flavor and golden color.
- Marshmallow crème: This is the star for that ooey-gooey marshmallow filling without the hassle of toasting actual marshmallows.
- Mini marshmallows: Adding texture and extra melty bits inside the filling is a game-changer.
- Chopped chocolate bar (like Hershey’s): Quality chocolate chunks melt perfectly inside these pies for maximum indulgence.
Variations
I love how customizable this S’mores Hand Pies Recipe is. Over time, I’ve tweaked mine depending on who’s eating and what I have on hand. Feel free to experiment—you might find a new favorite twist!
- Dark Chocolate or Milk Chocolate: I’ve swapped the standard Hershey’s for dark chocolate chips to add a richer depth, and it’s so luscious.
- Peanut Butter S’mores: Add a teaspoon of peanut butter inside for a nutty surprise—my family goes wild for this one.
- Gluten-Free Pie Crust: For friends with dietary restrictions, gluten-free crust options work great—just watch them closely in the oven.
- Seasonal Fruit Addition: Try adding thin slices of fresh strawberries or banana for an extra fruity touch that balances the sweetness perfectly.
How to Make S’mores Hand Pies Recipe
Step 1: Prep Your Workspace and Preheat the Oven
Start by preheating your oven to 450°F (that high heat helps you get the crust nice and golden). Line a cookie sheet with parchment paper, so cleanup’s a breeze and your hand pies won’t stick. This is a straightforward step, but having everything ready at the start really smooths out the process and keeps you from scrambling towards the end.
Step 2: Cut the Pie Crust Rounds
Unroll your refrigerated pie crust dough onto a clean surface. Grab a 3-inch round cutter—if you don’t have one, a small bowl or cup works fine—and cut out 16 rounds total (eight from each crust). I find using a sharp cutter and avoiding twisting helps keep the edges clean, making the sealing easier later on. Don’t worry if some rounds aren’t perfect circles—that rustic look is charming!
Step 3: Coat the Crust Rounds with Butter and Graham Cracker Mixture
In a shallow dish, mix the graham cracker crumbs with ¼ cup sugar. Brush both sides of eight rounds with melted butter, then dip and press each round gently into the crumb mixture so it sticks well. Put these coated rounds on your parchment-lined baking sheet—they’re the base for your filling. This step adds so much flavor and that irresistible graham cracker crunch.
Step 4: Mix the Marshmallow Chocolate Filling
Stir together the marshmallow crème, the remaining 2 tablespoons sugar, mini marshmallows, and chopped chocolate in a small bowl. This filling is what turns these hand pies into a dessert dream, with creamy, chewy, and melty bits all at once. For easy scooping, I like spraying my cookie scoop lightly with cooking spray—that keeps the stickiness from slowing you down.
Step 5: Assemble the Hand Pies
Spoon heaping tablespoons of the filling onto each of the graham-coated bottom crusts. Then brush the remaining eight rounds with melted butter and coat them in the graham cracker mixture as before—these will be your tops. Place them gently over the filling and pinch the edges to seal completely. If you want a neat finish, use the tines of a fork to crimp the edges—it helps seal and looks adorable.
Step 6: Bake Until Golden and Bubbling
Pop your hand pies in the oven for about 12 minutes, watching for a lovely golden brown color on the crust. Don’t worry if a little filling peeks out—that just means extra yum! Letting them cool slightly before digging in helps avoid burns because the inside stays piping hot.
How to Serve S’mores Hand Pies Recipe
Garnishes
I like to keep it simple with these hand pies—a light dusting of powdered sugar can add a pretty, snowy finish when serving indoors. For outdoor parties, I sometimes whip up a quick chocolate drizzle for extra decadence. Honestly, these are so flavorful on their own, they don’t need much.
Side Dishes
Pair these with a scoop of vanilla ice cream to dial up the indulgence, especially if you’re serving them warm. A simple glass of cold milk or hot cocoa rounds out the meal perfectly and adds to that cozy vibe.
Creative Ways to Present
For birthday parties or fun gatherings, I like laying out the S’mores Hand Pies on a rustic wooden board surrounded by graham cracker sticks and mini marshmallows for an inviting, “make-your-own” s’mores station vibe. It’s a huge hit with kids and adults alike!
Make Ahead and Storage
Storing Leftovers
If you have leftovers (which is rare in my house!), store the hand pies covered in an airtight container in the fridge. They stay tasty and moist for 2 to 3 days. Just bring them back to room temperature or warm them gently before enjoying.
Freezing
I’ve found freezing these pies before baking works like a charm. After assembling, freeze them on a cookie sheet for about 30 minutes, then transfer to a zip-top bag for up to 2 months. When you’re ready, bake straight from the freezer at 400°F for 15-20 minutes—super convenient for last-minute treats!
Reheating
To reheat, pop your hand pies in a 350°F oven for 8-10 minutes. This warms the filling thoroughly and crisps the crust back up—microwaving tends to make the crust soggy, so I avoid that if I can.
FAQs
-
Can I use homemade pie crust for the S’mores Hand Pies Recipe?
Absolutely! Homemade pie crust will work wonderfully if you prefer making your own. Just make sure it’s chilled and rolled out evenly for easy cutting and sealing. Keep in mind that homemade crust might bake a little faster or slower depending on thickness, so keep an eye on them while baking.
-
Is there a way to make the filling less sweet?
You can reduce the sugar in the filling slightly if you want, but keep a little to balance the marshmallow crème and chocolate flavors. Adding a pinch of salt to the filling can also help tone down sweetness and add complexity.
-
Can I use larger or smaller cutters for the hand pies?
You can, but keep in mind that larger pies will need a longer baking time and may be harder to seal, while smaller pies bake quickly but might not hold enough filling. I find 3-inch rounds the perfect balance for portion size and ease.
-
Can these hand pies be made vegan?
Yes! Use a vegan pie crust, dairy-free chocolate, and a vegan marshmallow creme substitute. Melted vegan butter or coconut oil can replace regular butter for coating the crust. It makes a delicious plant-based treat!
Final Thoughts
Every time I bake this S’mores Hand Pies Recipe, I’m reminded why it’s become a favorite go-to dessert in my kitchen. It’s simple enough to whip up on a whim but full of that nostalgic, comforting flavor we all crave. I hope you’ll give these a try soon—they’re guaranteed to bring smiles and maybe even a little messy, joyous indulgence. Happy baking!
Print
S’mores Hand Pies Recipe
- Prep Time: 20 minutes
- Cook Time: 15 minutes
- Total Time: 35 minutes
- Yield: 8 hand pies 1x
- Category: Dessert
- Method: Baking
- Cuisine: American
Description
These delicious S’mores Hand Pies combine the classic flavors of graham crackers, melted chocolate, and gooey marshmallows encased in buttery, flaky pie crusts. Perfectly portable and easy to make, these pies are baked until golden brown with a sweet, crunchy coating. Ideal for dessert or a fun treat, they capture the nostalgic campfire s’mores experience in a neat handheld pastry.
Ingredients
Pie Crust and Coating
- 1 box refrigerated pie crust dough, room temperature
- ½ cup graham cracker crumbs
- ¼ cup sugar (for coating)
- 4 tablespoons butter, melted
- Additional 2 tablespoons sugar (for filling)
Filling
- ½ cup marshmallow crème
- ¼ cup mini marshmallows
- 6 ounces chopped chocolate bar (such as Hershey’s)
Instructions
- Preheat Oven: Heat your oven to 450°F (232°C) and line a cookie sheet with parchment paper to prevent sticking and allow even baking.
- Prepare Pie Dough Rounds: Unroll the refrigerated pie crust and use a 3-inch round cutter to cut out sixteen circles, eight from each crust sheet.
- Mix Coating: In a shallow dish like a pie plate, combine the graham cracker crumbs with ¼ cup of sugar.
- Butter and Coat Bottom Rounds: Brush both sides of eight dough rounds with melted butter. Dip each side into the crumb and sugar mixture, pressing lightly to adhere the coating. Arrange these coated rounds on the prepared baking sheet.
- Prepare Filling: In a small bowl, stir together marshmallow crème, 2 tablespoons sugar, mini marshmallows, and chopped chocolate until combined.
- Add Filling: Spoon a heaping tablespoon of the marshmallow-chocolate mixture onto each coated dough round on the baking sheet.
- Butter and Coat Top Rounds: Brush the remaining eight dough rounds with melted butter on both sides and dip them into the graham cracker coating as before. Place these on top of the filled rounds and press the edges together to seal. For a decorative finish, crimp the edges with the tines of a fork.
- Bake: Bake the assembled hand pies in the preheated oven for about 12 minutes or until golden brown and crispy.
- Serve and Store: Enjoy warm or at room temperature. Store leftovers covered in the refrigerator for 2-3 days.
Notes
- Use a 1.5-inch (or 1 tablespoon) cookie scoop to easily portion out the filling and drop it onto the pie dough rounds.
- Lightly spray the cookie scoop with cooking spray before scooping the marshmallow mixture to prevent sticking.
- You can freeze assembled hand pies before baking by placing them on a parchment-lined cookie sheet for 30 minutes, then transferring to a freezer bag for up to 2 months. Bake frozen pies at 400°F for 15-20 minutes without thawing.
Keywords: S’mores, Hand Pies, Dessert, Baking, Graham Crackers, Marshmallow, Chocolate, Easy Treat