Simple Scone Recipe
If you’ve been searching for a no-fuss, comforting treat to whip up any time of day, this Simple Scone Recipe is just what you need. It’s got that perfectly crumbly, tender crumb with a little crunch on the outside—a texture that always feels like a warm hug from the oven. Whether you’re planning a cozy weekend brunch or craving a sweet snack alongside your afternoon tea, these scones come together quickly and never disappoint.
I first stumbled on this Simple Scone Recipe during a lazy Saturday morning baking session, and it instantly became one of my go-to recipes. What I love most is how adaptable it is—you can keep it classic or toss in chocolate chips or berries for a fresh twist. If you’re new to baking scones, I promise you’ll enjoy how simple and straightforward this recipe is, making your kitchen smell amazing and your taste buds very happy.
Ingredients You’ll Need
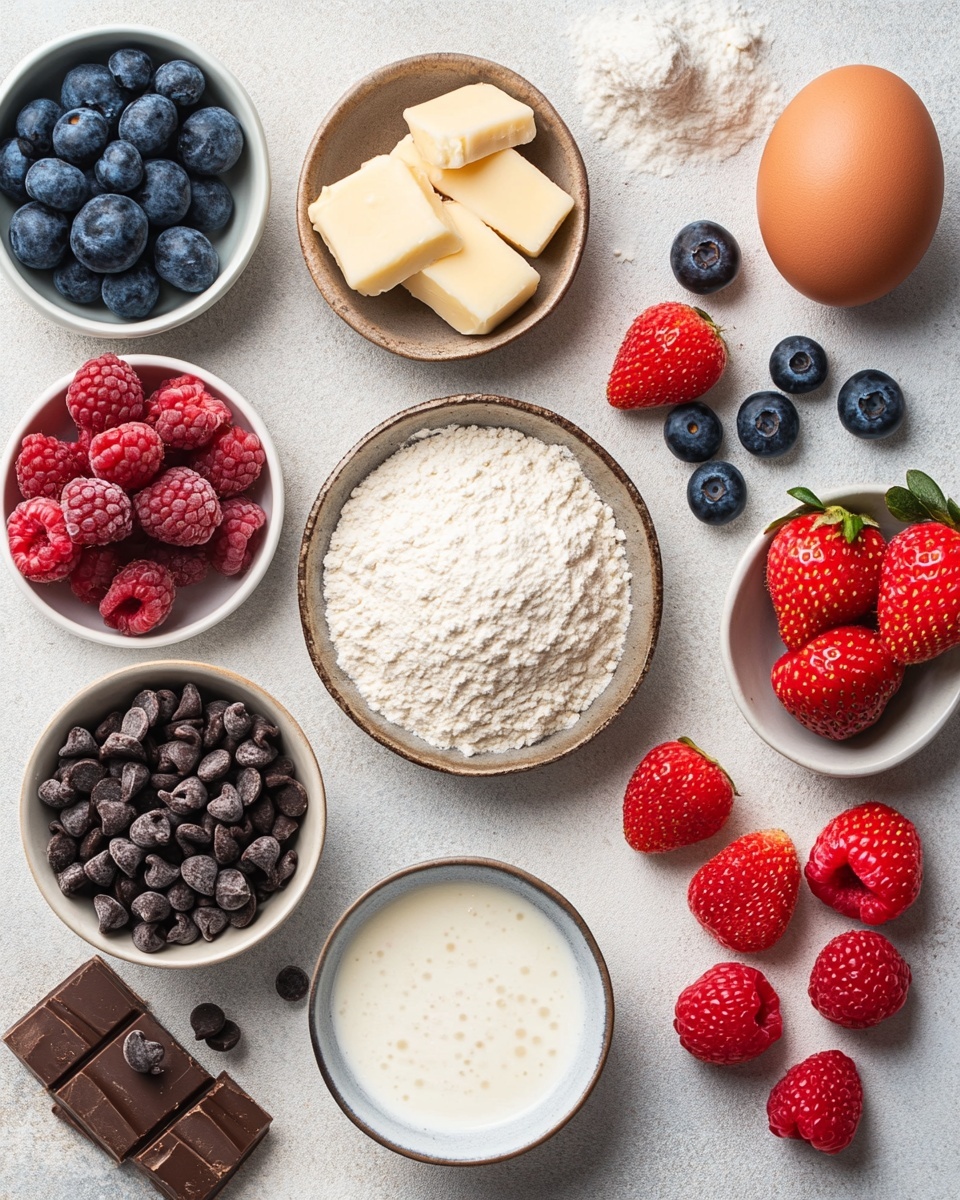
The magic behind these scones lies in a few simple pantry staples that come together so well. A couple of tips when shopping: always use cold butter for flaky layers and opt for fresh or frozen berries if you plan to add fruit, but be sure to adjust flour accordingly to keep the dough from turning too wet.
- All-purpose flour: The base of your scone dough, it creates that perfect structure without being too dense.
- Granulated sugar: Adds just the right touch of sweetness without overpowering.
- Baking powder: Essential for giving your scones the lovely lift and fluffiness.
- Salt: Enhances flavor and balances the sweetness.
- Cold unsalted butter: Key to flaky layers, so keep it well chilled and cut into cubes before mixing.
- Buttermilk: Adds moisture and tenderness, bringing that subtle tangy note that brightens the scones.
- Vanilla extract: A little splash elevates flavor beautifully.
- Large egg: Binds everything together for the right dough consistency.
- Add-ins (optional): Chocolate chips or fresh berries like raspberries, blueberries, or strawberries—fresh or frozen works, just remember to tweak the flour to keep the dough balanced.
Variations
While I adore the classic scone for its simplicity, I’ve found it fun to mix things up depending on the season and my mood. You can easily customize this Simple Scone Recipe to fit your tastes or dietary needs—it’s really forgiving and welcomes creativity.
- Berry Blast: Adding frozen raspberries or fresh blueberries gives a tart burst that brightens the scone. Just remember to add extra flour (¾ cup for raspberries, ¼ cup for blueberries) to balance the moisture. I love these during summer mornings with a dollop of clotted cream.
- Chocolate Chip Delight: Mixing in mini chocolate chips turns these into a sweet breakfast treat or dessert. The chips melt beautifully but don’t make the dough too wet, so no flour adjustment needed.
- Gluten-Free Version: I’ve swapped in a 1:1 gluten-free flour blend and got terrific results. Just treat the dough gently and keep your baking powder fresh for best rise.
- Vegan Option: Swap buttermilk with a plant-based milk and a teaspoon of vinegar, replace butter with cold coconut oil, and use a flax egg instead of a chicken egg.
How to Make Simple Scone Recipe
Step 1: Mix Dry Ingredients and Cut in Butter
Start by combining your flour, sugar, baking powder, and salt in a large bowl. Then add the cold, cubed butter. Here’s a tip I swear by: use your fingertips or a pastry cutter to work the butter into the flour until the mixture looks like coarse peas. This part sets the stage for those flaky, tender layers you want. Don’t overmix—tiny lumps of butter are what you’re after.
Step 2: Add Wet Ingredients and Mix Gently
Create a well in the center of the dry mix and pour in the buttermilk, vanilla extract, and the egg. Use a spatula to stir everything gently until the dough just comes together. If you’re adding fruit or chocolate chips, fold them in carefully now. The dough will be thick and sticky, which is exactly right.
Step 3: Knead, Fold, and Shape
Lightly flour your work surface and turn out the dough. Gently knead a few times to incorporate any loose flour. If it’s too sticky, sprinkle 1-2 tablespoons of flour carefully—but don’t add too much or your scones might get tough. Now, the fun part: fold the dough in half, press down lightly, turn 90 degrees, and fold again. Repeat this folding 4-5 times to create those flaky layers reminiscent of puff pastry.
Shape the dough into a disc, around 8-10 inches wide and 1.5 to 2 inches tall. Pop it in the fridge for about 5-10 minutes so it firms up, making it easier to cut.
Step 4: Cut and Chill Before Baking
Slice the disc into 8 equal wedges with a sharp knife or pizza cutter. Place them on a lined baking sheet, leaving enough space for each scone to puff up. This chill step is crucial—freeze the scones for 30 minutes before baking. I know it feels like a waiting game, but it really helps with the rise and texture.
Step 5: Brush and Bake Until Golden
Just before baking, brush the scone tops with an egg wash (beat together one egg and a tablespoon of water). This little step gives you that shiny, golden crust. You can also use buttermilk or heavy cream if you prefer a subtler finish. If you like, sprinkle coarse sanding sugar on top for extra sparkle and crunch.
Bake at 400º F for 20-26 minutes until the scones turn a beautiful light golden color. Once out of the oven, let them cool slightly—they’re best enjoyed warm.
How to Serve Simple Scone Recipe
Garnishes
I’m a big fan of classic accompaniments like clotted cream and strawberry jam—simple, but absolutely divine. Sometimes, I’ll spread a little whipped honey butter or drizzle some lemon glaze if I’m in the mood for tangy sweetness. Garnishing with fresh berries or a sprinkle of powdered sugar also adds a lovely touch for guests.
Side Dishes
These scones pair perfectly with a hot cup of tea or coffee—trust me, that combo can brighten any morning. For a fuller brunch, I like to serve them alongside scrambled eggs, crispy bacon, or a fresh fruit salad. They’re great little handheld treats to complement savory dishes too.
Creative Ways to Present
For a special occasion, I’ve layered these scones on dessert stands, topped with whipped cream and fresh berries, turning them into pretty little shortcakes. You can also glaze them with orange or lemon icing for a colorful pop. Wrapping a few in parchment paper tied with twine makes a thoughtful gift for friends or neighbors.
Make Ahead and Storage
Storing Leftovers
I usually keep any leftover scones in an airtight container on the counter for up to two days—just be sure they’re completely cooled first. If you want them to last longer, the fridge works well for up to five days, but I recommend warming them slightly before eating.
Freezing
Freezing is a lifesaver with this Simple Scone Recipe. I freeze them before baking by placing the cut scones on a baking sheet until solid, then transferring them to a freezer bag. They keep for up to two months. When you’re ready to enjoy, bake straight from the freezer, just add a few extra minutes to the baking time—easy and convenient!
Reheating
To bring back that fresh-baked taste, I pop leftover scones in a preheated oven at 350ºF for about 5-7 minutes. This method crisps up the edges while warming the center without drying them out. Microwaving works in a pinch, but the texture isn’t quite as lovely.
FAQs
-
Can I make this Simple Scone Recipe dairy-free?
Absolutely! Swap the buttermilk for a plant-based milk mixed with a teaspoon of vinegar or lemon juice to mimic the tanginess. Use a dairy-free butter substitute that’s cold and firm for the best flaky texture. The rest of the recipe stays the same and you’ll still get tasty, buttery scones.
-
Why does the recipe call for freezing the scones before baking?
Freezing the scones solidifies the cold butter inside the dough, which helps create steam pockets during baking, making the layers flakier and the rise better. It also helps the scones hold their shape so they don’t spread too much in the oven.
-
How do I adjust the recipe if adding fresh fruit?
Fresh fruit adds extra moisture, so you need to increase the flour to keep the dough from becoming too wet. For raspberries, add ¾ cup (90 grams) extra flour; for blueberries or strawberries, add ¼ cup (30 grams). This adjustment helps maintain the dough’s structure and ensure your scones bake up nicely.
-
Can I prepare the dough ahead of time?
Yes! You can shape and cut the dough, then refrigerate it overnight. When ready, bake straight from the fridge. This can save you time on busy mornings and still delivers fresh, warm scones.
-
What’s the secret to flaky scones?
Using cold butter and folding the dough several times (lamination) to create layers is key. Also, chilling the dough before baking helps the butter stay solid so it steams and separates the dough into flaky layers during baking.
Final Thoughts
This Simple Scone Recipe has become a comforting classic in my home, perfect for sharing with friends or savoring quietly on a lazy morning. It’s straightforward enough for beginners but flexible enough to suit your flavor cravings. I can’t recommend it enough if you want that perfect balance of fluffy, tender, and just a little buttery crunch. Give it a try—you’ll be amazed at how easy it is to bake scones that taste like a bakery treat right in your own kitchen.
Print
Simple Scone Recipe
- Prep Time: 10 minutes
- Cook Time: 26 minutes
- Total Time: 36 minutes
- Yield: 8 scones 1x
- Category: Breakfast, Snack
- Method: Baking
- Cuisine: British
Description
This simple scone recipe creates tender, flaky scones perfect for breakfast or tea time. With a buttery dough enhanced by buttermilk and vanilla, these scones can be customized with optional add-ins like chocolate chips or fresh berries. The dough involves a lamination technique to create delicate flaky layers, yielding light and golden scones that are easy to prepare and bake.
Ingredients
Plain Scones:
- 2 ¼ cups (270g) all-purpose flour
- ½ cup (99g) granulated sugar
- 1 Tbsp baking powder
- ½ tsp salt
- ½ cup (113g) cold unsalted butter, cubed
- ½ cup (118ml) buttermilk
- 1 tsp vanilla extract
- 1 large egg
Add-Ins (Optional, total 1-1.5 cups):
- 1 cup (170g) chocolate chips (mini preferred)
- 1 cup (170g) white chocolate chips
- 1 cup (120g) fresh raspberries, broken into pieces and frozen
- 1 cup (150g) blueberries
- 1 cup (167g) strawberries, chopped
Instructions
- Adjust flour for fruit add-ins: If using raspberry scones, add an additional ¾ cup (90g) flour. For blueberry or strawberry scones, add ¼ cup (30g) extra flour to balance moisture from fresh fruit.
- Combine dry ingredients & cut in butter: In a large bowl, mix flour, sugar, baking powder, and salt. Add cold cubed butter and use hands or a pastry cutter to work it into the flour until pea-sized lumps remain.
- Add wet ingredients and mix: Create a well in the dry mixture and add buttermilk, vanilla extract, and egg. Gently stir with a spatula until dough is thick and sticky. Fold in any chosen add-ins carefully at this stage.
- Knead the dough: Turn dough onto a silicone mat or clean counter. Gently knead to incorporate flour fully, adding 1-2 tablespoons more flour if too sticky.
- Lamination for flaky layers: Fold dough in half, press lightly, turn 90 degrees, and fold again. Repeat folding and turning 4-5 times to create layers.
- Shape and chill: Form dough into an 8-10 inch disc about 1.5-2 inches high. Refrigerate for 5-10 minutes to firm up.
- Cut into wedges: Using a knife or pizza cutter, slice the chilled disc into 8 equal wedges.
- Arrange on baking sheet: Place scones 2-3 inches apart on a baking sheet lined with silicone mat or parchment paper.
- Freeze before baking: Freeze scones for 30 minutes. Begin preheating oven to 400ºF during the last 5 minutes of freezing.
- Brush with wash and optionally sugar: Brush tops with egg wash (1 large egg mixed with 1 Tbsp water), buttermilk, or heavy cream. Sprinkle coarse sanding sugar if desired.
- Bake the scones: Bake in preheated oven for 20-26 minutes until lightly golden brown. Remove and allow to cool before serving.
Notes
- Gluten-Free: Substitute with 1:1 gluten-free flour blend like King Arthur’s Gluten Free Measure for Measure Flour for excellent results.
- Storage: Keep scones in an airtight container at room temperature up to 2 days or refrigerate for up to 5 days.
- Make Ahead: Shape and cut the dough, then refrigerate overnight. Bake directly from the fridge next day.
- Freezing: Freeze unbaked scones on a baking sheet till solid, transfer to freezer bag for up to 2 months. Bake from frozen, adding 2-3 minutes to baking time.
Keywords: simple scone recipe, basic scones, bakery-style scones, breakfast scones, berry scones, chocolate chip scones