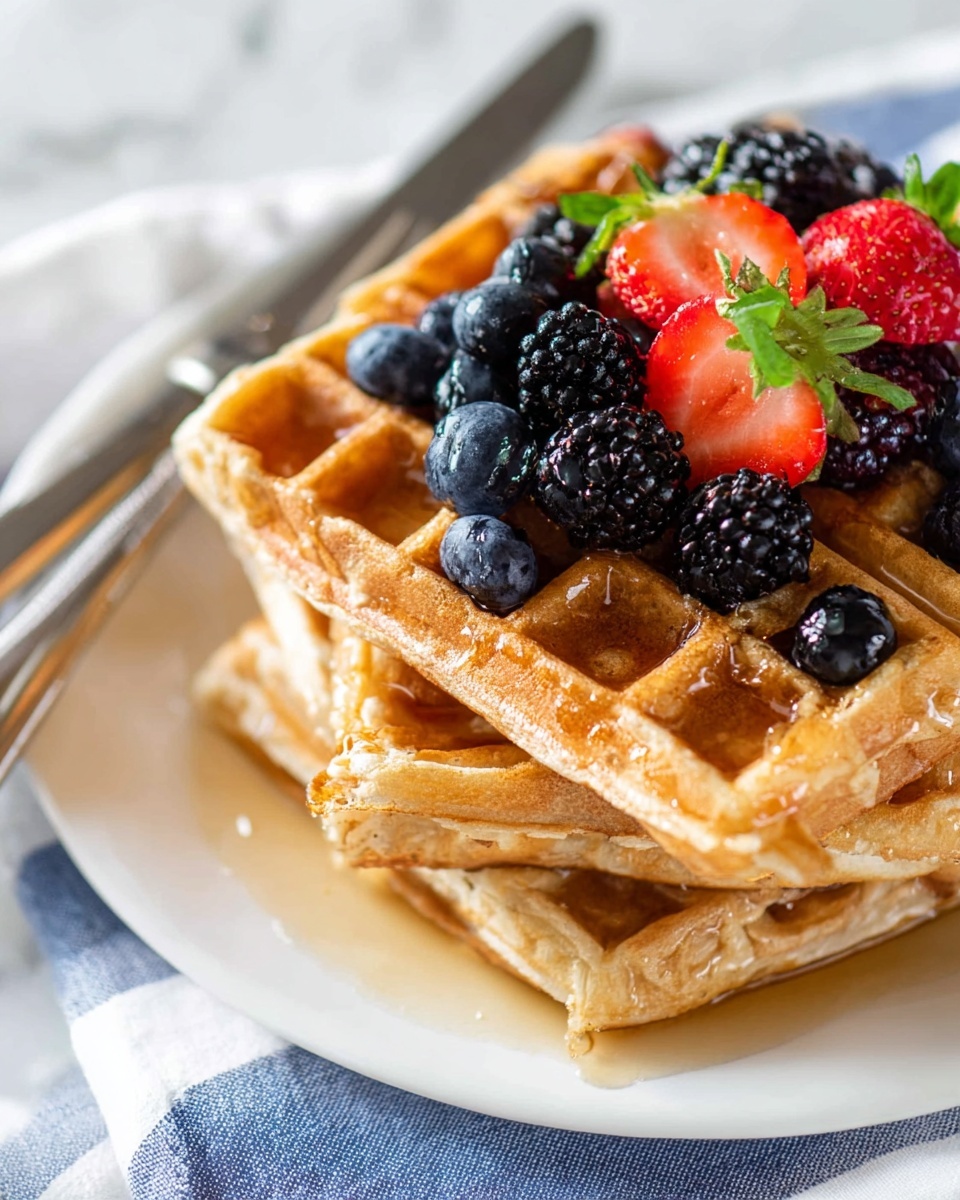
Homemade Freezer Waffles Recipe
If you’ve ever wished for a breakfast that’s quick, delicious, and homemade, this Homemade Freezer Waffles Recipe is going to be your new best friend. These waffles come out perfectly golden and fluffy, but the real magic is that you can freeze them ahead of time and just pop them in the toaster whenever you want a hassle-free morning. I love prepping a batch on Sunday, so we’re never rushing to get breakfast on the table during the busy week.
What I especially appreciate about this recipe is how versatile it is—you can customize your waffles just the way you like and still keep the convenience of freezer storage. Whether you’re feeding a family or meal prepping for one, these waffles strike the perfect balance between homey and convenient, making them absolutely worth trying.
Ingredients You’ll Need
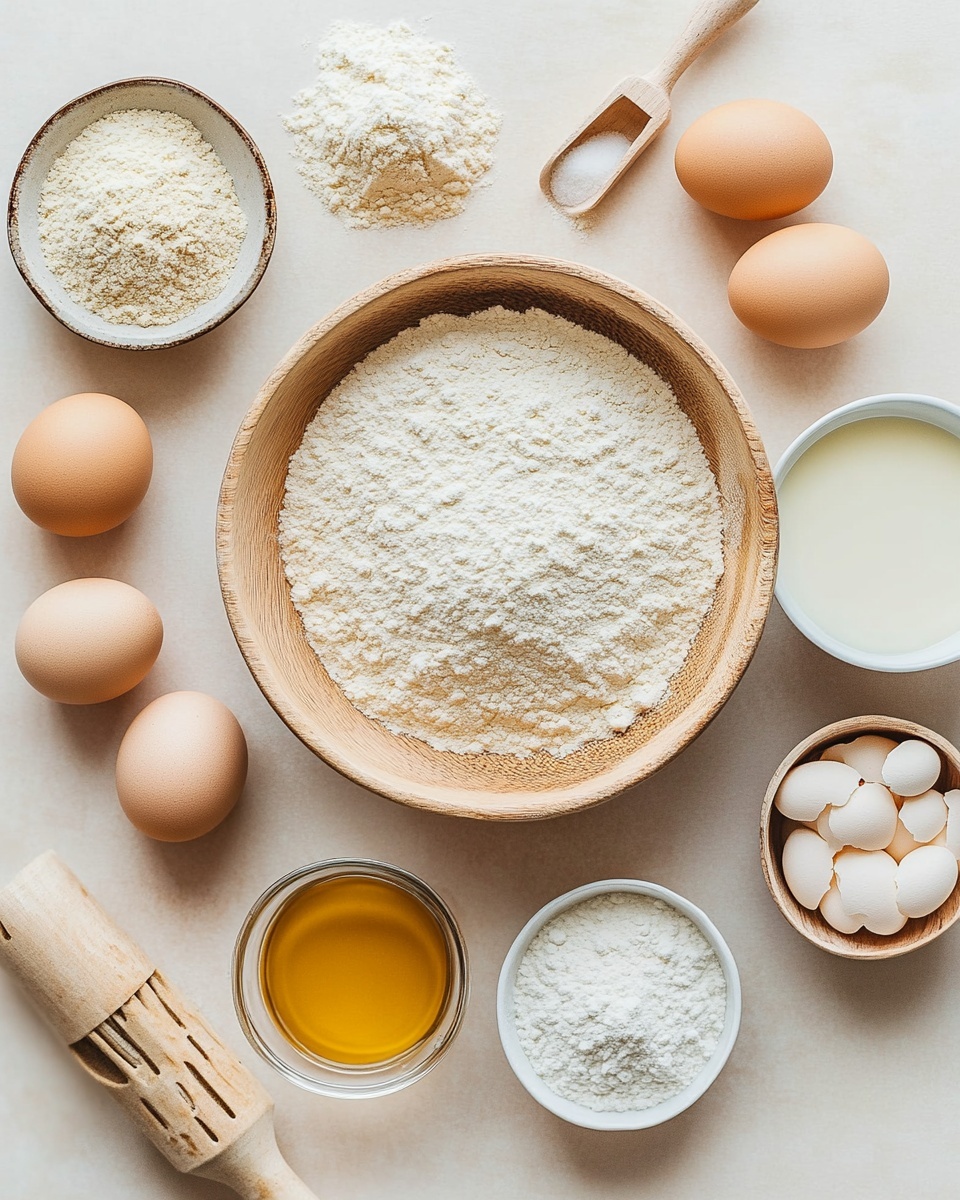
Each ingredient in this Homemade Freezer Waffles Recipe works together to create waffles that are crisp on the outside and tender inside. Plus, they’re simple pantry staples you likely already have, making this recipe a smooth experience from start to finish.
- All-purpose flour: The foundation that gives structure and the classic waffle texture.
- Cornstarch: This is my secret weapon for extra crispiness once frozen waffles are reheated.
- Granulated sugar: Just enough sweetness to balance the batter without overpowering.
- Baking powder: Essential for that light, fluffy rise you expect in a waffle.
- Salt: Enhances the flavors without being noticeable on its own.
- Milk (any kind): I usually use whole milk, but almond or oat milk work wonderfully if you want a dairy-free option.
- Vegetable oil (or avocado oil/melted coconut oil): Keeps the batter moist and ensures even browning in the waffle iron.
- Eggs (separated): Separating them and folding in beaten egg whites is key to a light, airy waffle.
- Vanilla extract: Adds a warm and inviting aroma that makes the waffles taste extra special.
Variations
I love making this Homemade Freezer Waffles Recipe my own depending on the occasion or what’s in my pantry. Don’t hesitate to mix things up a bit—you’ll enjoy how versatile these waffles can be!
- Gluten-free version: I’ve swapped in a 1:1 gluten-free flour blend easily; just add a splash more milk if your batter feels thick. It still freezes and reheats beautifully.
- Flavor twists: Try adding cinnamon or a little lemon zest to brighten the batter. I once stirred in fresh blueberries for a fruity surprise that my kids adored.
- Sweeten differently: Swap the granulated sugar for maple syrup or honey for a richer, natural sweetness. Just adjust the wet ingredients a little to keep the batter consistency right.
How to Make Homemade Freezer Waffles Recipe
Step 1: Whisk the Dry Ingredients
Grab a large bowl and whisk together your flour, cornstarch, sugar, baking powder, and salt until evenly combined. This step is essential so your leavening is evenly distributed, giving you waffles that rise beautifully and cook evenly. Trust me, skipping this can lead to uneven texture or weird clumps.
Step 2: Mix the Wet Ingredients
In a separate bowl, combine the milk, oil, egg yolks, and vanilla extract. I always use a fork or whisk to break up the yolks smoothly so everything blends nicely. This mixture adds moisture and flavor and creates the tender crumb I love in homemade waffles.
Step 3: Combine Wet and Dry
Gently pour the dry ingredients into the wet mixture and stir just until combined. Try not to overmix here—some small lumps are okay. Overmixing can make waffles tough, and we definitely want them light and fluffy!
Step 4: Beat the Egg Whites
Using a clean bowl and a hand mixer, beat the egg whites until soft peaks form. This is a game-changer for extra fluffy waffles—you’re literally folding in air. I like to fold the egg whites in by hand with a spatula gently so the batter stays airy and puffy.
Step 5: Cook and Cool the Waffles
Heat your waffle iron and lightly grease it. Use about a scant ¼ cup batter per mini waffle (or more for larger sizes), and cook until just lightly golden. For freezing, I cook mine a touch less than usual—just enough to set them but not get overly crispy, so they reheat perfectly later. Once cooked, transfer waffles to a wire rack so they cool evenly without getting soggy underneath.
Step 6: Freeze for Later
Once waffles are completely cool, pop them into a freezer-safe bag or container. Make sure you flatten them in a single layer or separate with parchment paper to prevent sticking. They’ll stay fresh in the freezer for up to 6 months—talk about convenient prep!
How to Serve Homemade Freezer Waffles Recipe
Garnishes
I’m a sucker for simple garnishes like a pat of butter, a drizzle of maple syrup, and a dusting of powdered sugar. On weekends, I often pile on fresh berries and a spoonful of whipped cream—that combo feels like a cozy brunch without much effort.
Side Dishes
For a balanced breakfast, I often serve these waffles with scrambled eggs or crispy bacon on the side. Sometimes I add a fresh fruit salad to keep things light and refreshing. Trust me, these waffles hold up well next to savory or sweet sides.
Creative Ways to Present
When entertaining, I like to make waffle stacks with layers of Nutella and sliced bananas in between. For a festive touch, sprinkle some chopped nuts or a little cinnamon sugar on top. It’s always fun to elevate simple freezer waffles into something a bit more special.
Make Ahead and Storage
Storing Leftovers
I store leftover waffles in an airtight container in the fridge if I plan to eat them within a couple of days, but usually, I go straight to freezing for longer storage. Keeping them sealed tightly prevents freezer burn and keeps them tasting fresh.
Freezing
The freezing step is what really sets this Homemade Freezer Waffles Recipe apart. I usually lay waffles flat on a baking sheet to freeze for an hour before bagging, so they don’t stick together. It makes grabbing just one or two a breeze without the whole batch coming along for the ride.
Reheating
For reheating, my go-to is the toaster or toaster oven—it restores that crispy edge perfectly. Alternatively, I’ll use an air fryer at 350°F for 2-3 minutes if I want speed and crispiness. If I’m reheating a large batch, popping them directly on an oven rack for about 5 minutes at 350°F works like a charm.
FAQs
-
Can I use whole wheat flour instead of all-purpose flour?
Absolutely! You can substitute whole wheat flour for a nuttier flavor and added fiber. Keep in mind the texture might be a bit denser, so try mixing half whole wheat and half all-purpose if you prefer a lighter waffle.
-
Do I have to separate the eggs?
Separating the eggs and beating the whites adds lightness to the batter, making waffles fluffier. You can skip this step if you’re short on time, but your waffles might end up a little denser, still tasty, just with a different texture.
-
How long can I freeze the waffles?
These homemade waffles freeze well for up to 6 months. Just make sure they’re stored in an airtight container or bag with as much air removed as possible to prevent freezer burn.
-
What is the best way to reheat frozen waffles?
To maintain the crispiness, reheating in a toaster or toaster oven is ideal. An air fryer also works great for a quick warm-up with a nice crunch, but avoid microwaving if you want to keep them crisp.
Final Thoughts
This Homemade Freezer Waffles Recipe has been a real game-changer in my kitchen—saving time without sacrificing that homemade touch. It’s the kind of recipe I’m excited to share with friends because I know it makes mornings better and feeding your family simpler. Give it a try, and soon you’ll feel like a waffle pro, ready to tackle busy days with smiles and golden waffles on the table.
Print
Homemade Freezer Waffles Recipe
- Prep Time: 10 minutes
- Cook Time: 5 minutes
- Total Time: 15 minutes
- Yield: About 18 mini waffles 1x
- Category: Breakfast
- Method: Stovetop
- Cuisine: American
Description
This Homemade Freezer Waffles recipe creates light, fluffy, and crispy mini waffles that can be made in advance and frozen for quick breakfasts. Perfectly balanced with a mix of flour and cornstarch, these waffles use whipped egg whites for extra fluffiness and can easily be reheated in a toaster oven, air fryer, or oven, making busy mornings effortless and delicious.
Ingredients
Dry Ingredients
- 1 ½ cups all-purpose flour
- ¼ cup cornstarch
- 3 Tablespoons granulated sugar
- 2 ¼ teaspoons baking powder
- ¼ teaspoon salt
Wet Ingredients
- 1 cup + 2 Tablespoons milk (any kind)
- 6 Tablespoons vegetable oil (or avocado oil or melted coconut oil)
- 2 large eggs (separated)
- 1 teaspoon vanilla extract
Instructions
- Prepare Dry Ingredients: In a large bowl, whisk together the all-purpose flour, cornstarch, sugar, baking powder, and salt until well combined.
- Mix Wet Ingredients: In a separate bowl, combine the milk, vegetable oil, egg yolks, and vanilla extract, mixing thoroughly.
- Combine Mixtures: Gradually add the dry ingredients into the wet ingredients bowl and stir to form a smooth batter. Set aside.
- Preheat Waffle Iron: Heat your waffle iron according to the manufacturer’s instructions until hot and ready for cooking.
- Beat Egg Whites: In a clean bowl, use a hand mixer to beat the egg whites until soft peaks form, creating a light foam.
- Fold Egg Whites: Gently fold the beaten egg whites into the batter to retain the fluffiness without deflating the mixture.
- Cook Waffles: Lightly grease the hot waffle iron, pour a scant ¼ cup of batter per mini waffle, and cook until just lightly golden, slightly less than usual to prepare for freezing.
- Cool Waffles: Remove waffles and place them on a wire rack to cool completely, preventing sogginess on the bottoms.
- Freeze for Storage: Once cooled, transfer waffles into a freezer-safe bag or container. They can be stored in the freezer for up to 6 months.
- Reheat Suggestions: To serve, warm waffles in a toaster oven or air fryer at 350°F for 2-3 minutes; alternatively, reheat multiple waffles together in a 350°F oven for 5 minutes by placing them directly on the oven rack.
Notes
- Yield: This recipe makes about 18 mini waffles; one mini waffle is considered one serving.
- Gluten-Free Option: Substitute all-purpose flour with a 1:1 gluten-free flour blend. If the batter is too thick, add a small splash more milk to reach the right consistency.
- For best texture, cook the waffles slightly less than usual before freezing to avoid overcooking upon reheating.
- Store cooled waffles in an airtight container or freezer bag to prevent freezer burn and maintain freshness up to 6 months.
- Use vegetable oil, avocado oil, or melted coconut oil interchangeably for desired flavor variations.
Keywords: homemade waffles, freezer waffles, mini waffles, make ahead breakfast, easy waffle recipe, crispy waffles, fluffy waffles