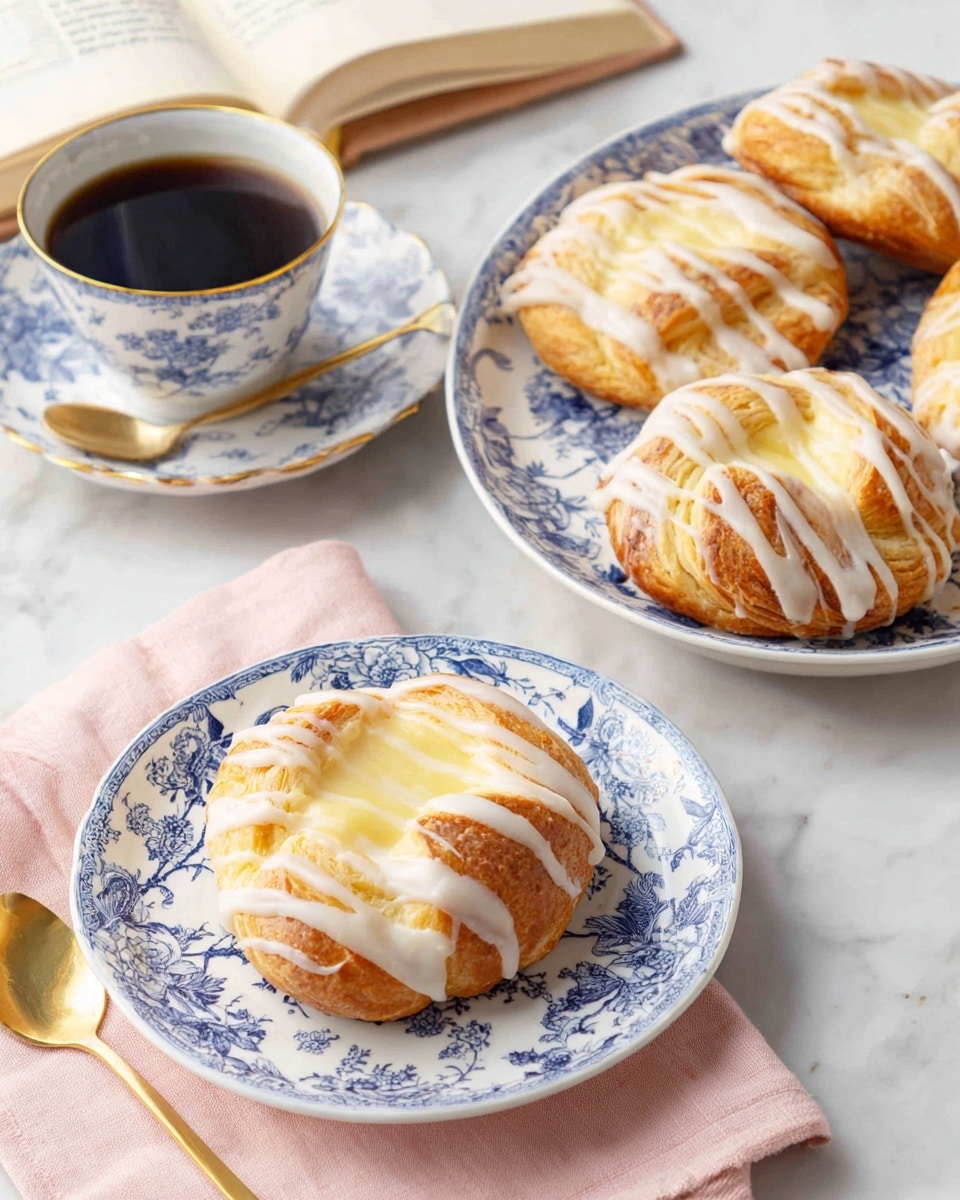
Deliciously Flaky Cheese Danish Recipe for Perfect Mornings Recipe
Hey there! If you’ve ever dreamed of waking up to the smell of fresh, buttery pastries, then this Deliciously Flaky Cheese Danish Recipe for Perfect Mornings Recipe is going to be your new best friend. I’ve made this recipe so many times that it feels like second nature now, and believe me, the flaky layers filled with creamy cheese make every morning feel like a special occasion. Whether you’re hosting a lazy weekend brunch or just wanting to treat yourself, these Danishes are worth the little extra effort.
What makes this recipe a standout for me is the flaky, layered dough paired with a luscious cream cheese filling that isn’t too sweet — just right to complement your morning coffee or tea. I’ve found that getting the butter’s temperature right and chilling the dough between folds is the true secret to that perfect flakiness. Stick with me and you’ll be surprised how approachable this feels once you get started.
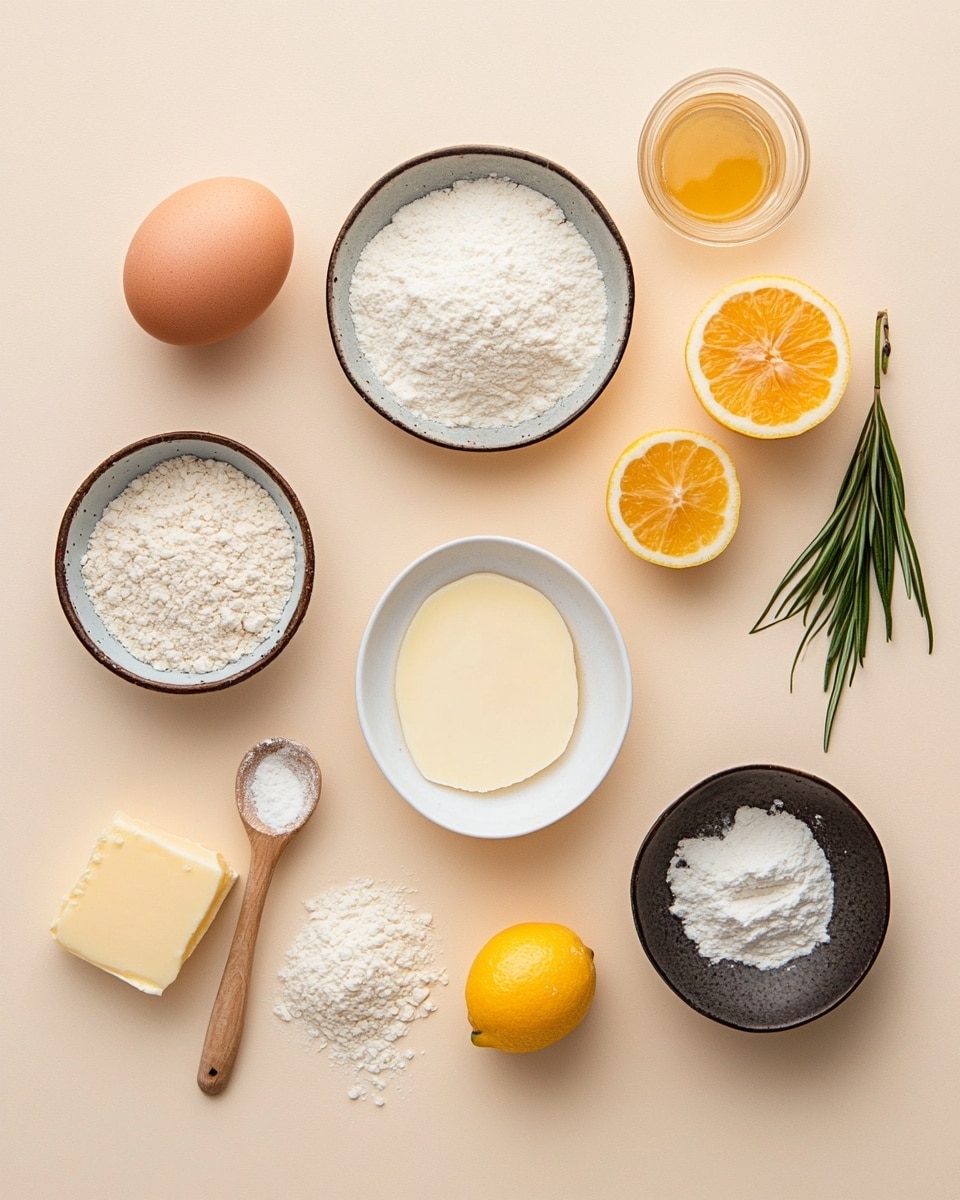
Ingredients You’ll Need
Every ingredient here plays a crucial role in creating that classic buttery, flaky texture and rich filling. I always recommend using fresh, high-quality butter and cream cheese because, honestly, they make a difference you can taste. Oh, and don’t skip warming the milk just enough — that little step wakes up the yeast and sets the dough rising beautifully.
- All-purpose flour: This forms the base of your dough, giving structure while still allowing that delicate flakiness.
- Granulated sugar: Adds gentle sweetness to the dough and filling without overpowering.
- Salt: Enhances all the other flavors and balances the sweetness perfectly.
- Active dry yeast: Your rising agent — make sure it’s fresh! It creates those light, airy layers.
- Whole milk (warm): Warming it just right activates the yeast without killing it.
- Large egg (room temperature): For richness and binding the dough together.
- Cold unsalted butter: Crucial for laminating the dough; keep it cold to get flaky layers.
- Cream cheese (softened): The star of the filling — rich and smooth.
- Vanilla extract: Brings warmth and depth to the cream cheese filling and glaze.
- Lemon zest (optional): Adds a refreshing brightness to the filling if you’re feeling fancy.
- Powdered sugar: For that delicate glaze that adds a sweet finish without heaviness.
- Milk or lemon juice (for glaze): To thin the powdered sugar to drizzle-able perfection.
- Optional toppings: Fruit preserves, fresh berries, or sliced almonds for an extra touch!
Variations
This recipe is really fun to personalize! I love swapping out ingredients depending on what’s in season or what flavors I’m craving. Honestly, once you get the hang of the dough and filling, these Danishes become your culinary playground, so don’t be shy to experiment.
- Ricotta or mascarpone filling: I tried this once for a lighter touch and it was a delightful change — creamier and a bit less tangy than cream cheese.
- Fruit preserves: My go-to is raspberry or apricot jam added on top of the cheese filling. It adds the perfect burst of sweetness and color.
- Almond topping: Sliced almonds toasted a bit before sprinkling on top add a lovely crunch and nutty note.
- Glaze alternatives: A simple drizzle of honey or a dusting of cinnamon sugar swaps out the powdered sugar glaze for something a little different.
- Dairy-free option: Use a non-dairy butter and cream cheese alternative to keep that flaky texture and cheesy filling for those with dietary restrictions.
How to Make Deliciously Flaky Cheese Danish Recipe for Perfect Mornings Recipe
Step 1: Wake up your yeast and mix the dough
Start by combining your flour, sugar, and salt in a large bowl. In a separate bowl, stir your warm milk with the yeast and let it sit for 5 to 10 minutes until it’s foamy and alive — that’s your green light! Add the egg and this yeast mixture to your dry ingredients, then knead everything together for about 6 to 8 minutes until the dough is smooth and elastic. Cover it up and pop it in the fridge to chill for 30 minutes, which helps relax the gluten and makes it easier to roll out later.
Step 2: Prepare your buttery block
While the dough chills, get your butter ready — it needs to be cold but workable. Place it between two sheets of parchment paper and pound it into a flat 8-inch square. The pounding might sound wild, but it’s the key to making the butter pliable without melting it, which leads to those beautiful flaky layers. Chill your butter block until it’s firm but still bendable.
Step 3: Laminate like a pro
Roll out your chilled dough into a 16-inch square. Place your butter block in the center, but rotated like a diamond, then fold the dough corners over the butter to completely encase it. Now for the rolling and folding magic — roll your dough into a long rectangle about 8 by 24 inches, then fold it into thirds like a letter. Chill it for 30 minutes, then repeat this rolling and folding two more times, always chilling between. Trust me, patience here brings that perfect flakiness you’re aiming for!
Step 4: Shape your Danishes
Once laminated, roll your dough out to about 1/4-inch thickness. Cut into generous 4-inch squares. Add a heaping tablespoon of your cream cheese filling to the center of each square. Feel free to shake things up by folding corners in or shaping them however you like — every shape turns out inviting. I often add a spoonful of fruit preserves or some fresh berries on top before folding for a bright pop of flavor.
Step 5: Proof and bake
Place your shaped Danishes on parchment-lined baking sheets and let them rise at room temperature until puffy — usually about an hour. Preheat your oven to 390°F (200°C) so it’s ready to go when your pastries are perfectly proofed. A quick brush of egg wash or milk just before baking will create a golden, glossy finish. Bake for 15–20 minutes, keeping an eye on that beautiful golden color — you’ll know when they’re done!
Step 6: Glaze and enjoy
Let your Danishes cool completely, then mix up a simple glaze with powdered sugar, milk or lemon juice, and a touch of vanilla. Drizzle it over the pastries for a lovely sweet sheen that’s just the right finishing touch. Serve warm or at room temperature — either way, you’re in for a treat.
How to Serve Deliciously Flaky Cheese Danish Recipe for Perfect Mornings Recipe
Garnishes
I’m a sucker for a simple sprinkle of sliced almonds right before baking—they toast up beautifully and add such a nice crunch against the creamy filling. Fresh berries on top add a burst of color and freshness, especially if you’re serving these for brunch. A light dusting of powdered sugar just before serving never fails to impress guests too.
Side Dishes
Pair these Danishes with a fruity smoothie or a cup of your favorite brew — I like a light roast coffee or a subtle green tea to balance the richness. For a bigger brunch, a fresh spinach salad or even scrambled eggs can round out the meal beautifully.
Creative Ways to Present
For a special occasion, I’ve laid these out on a pretty wooden board with clusters of fresh berries and edible flowers scattered around. You can even create a little DIY Danish bar where folks can add their own toppings like nuts, additional jams, or drizzle chocolate for a fun twist. It turns breakfast into a memorable event.
Make Ahead and Storage
Storing Leftovers
I store leftover Danishes in an airtight container in the fridge for up to five days. They still taste great, and I find that warming them slightly before serving brings back that fresh-baked feel. Just keep them covered to avoid drying out.
Freezing
One of my favorite tips is to freeze these before baking! After shaping your Danishes, place them on a baking tray lined with parchment and freeze until solid, then pop them into a freezer bag. When you want fresh Danishes, bake them straight from frozen—just add a few extra minutes to the bake time. It’s perfect for busy mornings when you don’t have time to start from scratch.
Reheating
To reheat, I pop my Danishes in a 325°F (160°C) oven for 5 to 7 minutes. It crisps the edges back up and warms the filling without drying out the pastry. Microwaving is quicker but can make the layers soggy – so when you can, go with the oven!
FAQs
-
Can I use puff pastry instead of making the dough from scratch?
Absolutely! Store-bought puff pastry can be a shortcut, though it won’t have quite the same homemade depth and richness as this recipe’s laminated dough. If you’re in a pinch, it’s a good alternative, but making the dough yourself is totally worth the effort for that extra flakiness and flavor.
-
How important is chilling between folds?
It’s super important! Chilling relaxes the gluten in the dough and keeps the butter firm, which prevents it from melting into the dough instead of creating layers. Skipping this step can lead to less flakiness, so try to stick with the timing for the best results.
-
What can I substitute for cream cheese in the filling?
Ricotta or mascarpone are great options if you want a lighter or slightly different flavor profile. Just keep in mind that the texture and tanginess will differ slightly from cream cheese, but it still tastes delicious!
-
Can I make this recipe dairy-free?
Yes! Use dairy-free butter and cream cheese alternatives available in most grocery stores. The key is to keep the butter cold for laminating and choose a filling that holds up well without dairy to keep that great texture.
-
How do I know when the Danishes are done baking?
Look for a deep golden brown color on top and edges that feel firm yet delicate. They should spring back lightly if you press with your finger. The baking time is typically 15 to 20 minutes, but ovens vary, so keep a close eye, especially the first time you make them!
Final Thoughts
This Deliciously Flaky Cheese Danish Recipe for Perfect Mornings Recipe holds a special place in my kitchen because it transforms an ordinary morning into a cozy, comforting experience. Once you taste those buttery layers with the creamy filling, you won’t want to go back to store-bought pastries. I really hope you give this recipe a try — it’s that kind of baking project that invites you to slow down a bit and enjoy the process, making your mornings feel truly perfect. Happy baking, friend!
Print
Deliciously Flaky Cheese Danish Recipe for Perfect Mornings Recipe
- Prep Time: 1 hour
- Cook Time: 20 minutes
- Total Time: 1 hour 20 minutes
- Yield: 8 Danishes 1x
- Category: Breakfast Pastries
- Method: Baking
- Cuisine: American
Description
This Deliciously Flaky Cheese Danish recipe yields perfect buttery pastries with a creamy cream cheese filling and optional fruit toppings, ideal for delightful mornings or special brunches. The dough is carefully laminated with cold butter to create delicate layers that bake into a golden, flaky texture, complemented by a sweet cream cheese center and a light glaze.
Ingredients
Dough
- 4 cups (500g) all-purpose flour
- 1/3 cup (75g) granulated sugar
- 1 tsp salt
- 1 tbsp (10g) active dry yeast
- 1 cup (240ml) whole milk, warm
- 1 large egg, room temperature
Butter Block
- 1 cup + 2 tbsp (250g) cold unsalted butter, for laminating
Filling
- 7 oz (200g) cream cheese, softened
- 1/4 cup (50g) granulated sugar
- 1 tsp vanilla extract
- Zest of 1 lemon (optional)
Glaze
- 1 cup (100g) powdered sugar
- 1–2 tbsp milk or lemon juice
- 1/2 tsp vanilla extract
Optional Toppings
- Fruit preserves (e.g., raspberry or apricot)
- Fresh berries
- Sliced almonds
Instructions
- Make the Dough: In a large bowl, combine flour, sugar, and salt. In another bowl, mix warm milk with active dry yeast and let it sit for 5–10 minutes until foamy to activate. Add the egg and yeast mixture to the dry ingredients, then mix and knead until a smooth dough forms, about 6–8 minutes. Cover the dough and chill it for 30 minutes to relax.
- Prepare Butter Block: Place the cold butter between two sheets of parchment paper. Use a mallet or rolling pin to pound and shape the butter into an 8-inch square block. Chill the butter block until it is firm but still pliable, ensuring it is cold for laminating.
- Laminate the Dough: Roll the chilled dough out into a 16-inch square. Place the chilled butter block in the center of the dough at a diamond angle. Fold the dough corners over the butter to fully encase it. Roll the dough into a long rectangle, approximately 8 by 24 inches. Fold this rectangle into thirds, like a letter. Chill the dough for 30 minutes. Repeat this rolling, folding, and chilling process two more times, for a total of three laminations, to create flaky layers.
- Shape the Danish: Roll the laminated dough out to about 1/4-inch thickness. Cut into 4-inch squares. Place about a tablespoon of the cream cheese filling in the center of each square. Fold corners towards the center or shape the Danish as desired. Optionally, add fresh berries or a spoonful of jam on top for added flavor and decoration.
- Proof and Bake: Place shaped Danishes on parchment-lined baking sheets. Let them rise at room temperature for 1 hour until puffed. Preheat the oven to 390°F (200°C). Optionally, brush each Danish with egg wash or milk for a shiny finish. Bake in the preheated oven for 15–20 minutes, or until golden brown and flaky.
- Glaze and Serve: Allow the Danishes to cool completely on a wire rack. Prepare the glaze by mixing powdered sugar with milk or lemon juice and vanilla extract until smooth. Drizzle the glaze over the cooled Danishes and serve.
Notes
- Ricotta or mascarpone can be used instead of cream cheese for a lighter, creamier filling.
- Chilling the dough between folds is crucial to developing distinct flaky layers.
- Fruit preserves such as raspberry or apricot add delightful flavor and visual appeal.
- Store baked Danishes in the refrigerator for up to 5 days; reheat at 325°F (160°C) for 5–7 minutes before serving.
- You can freeze unbaked, shaped Danishes for up to one month; bake them straight from frozen, adding a few extra minutes to the baking time.
Keywords: Cheese Danish, flaky pastry, laminated dough, breakfast pastries, cream cheese filling, homemade Danish