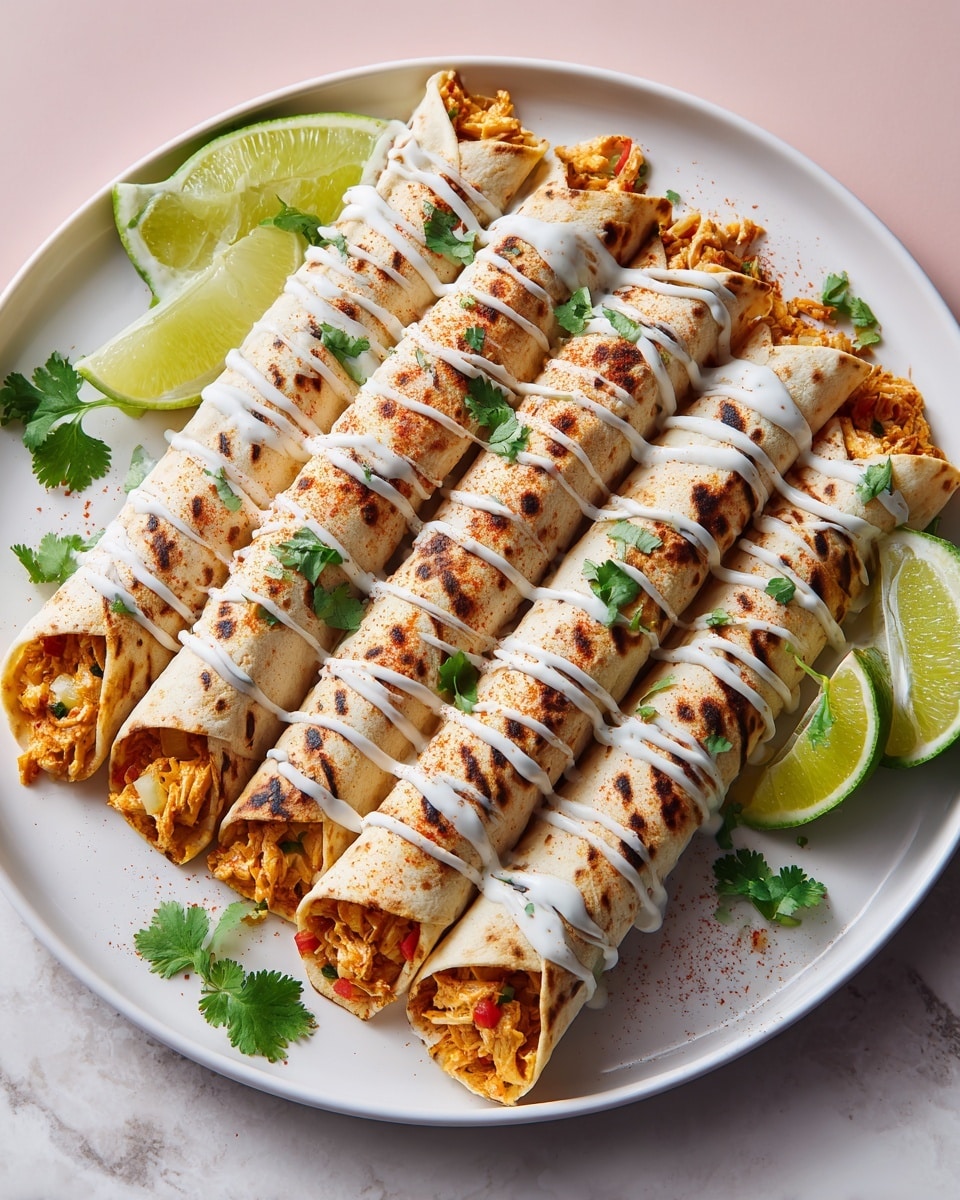
Crunchy Chicken Fajita Taquitos Recipe
I have to tell you, this Crunchy Chicken Fajita Taquitos Recipe is one of those dishes that feels like a little fiesta in your mouth. The combination of tender, spiced chicken with sautéed peppers and onions wrapped in a perfectly crispy tortilla just hits the spot every time. It’s got the right amount of crunch, cheesy goodness, and a vivid mix of flavors that makes it ideal for casual dinners or even when you want to impress your friends at a game day gathering.
What I love most about this recipe is how versatile and approachable it is. Whether you’re making a quick weeknight meal or prepping for a party, these taquitos come together fast and deliver on that crave-worthy crunch. Plus, they’re easy to customize, so you can tweak ingredients to your taste or what you have in the fridge. Trust me, once you try this Crunchy Chicken Fajita Taquitos Recipe, it’ll likely become one of your favorite go-to meals too.
Ingredients You’ll Need
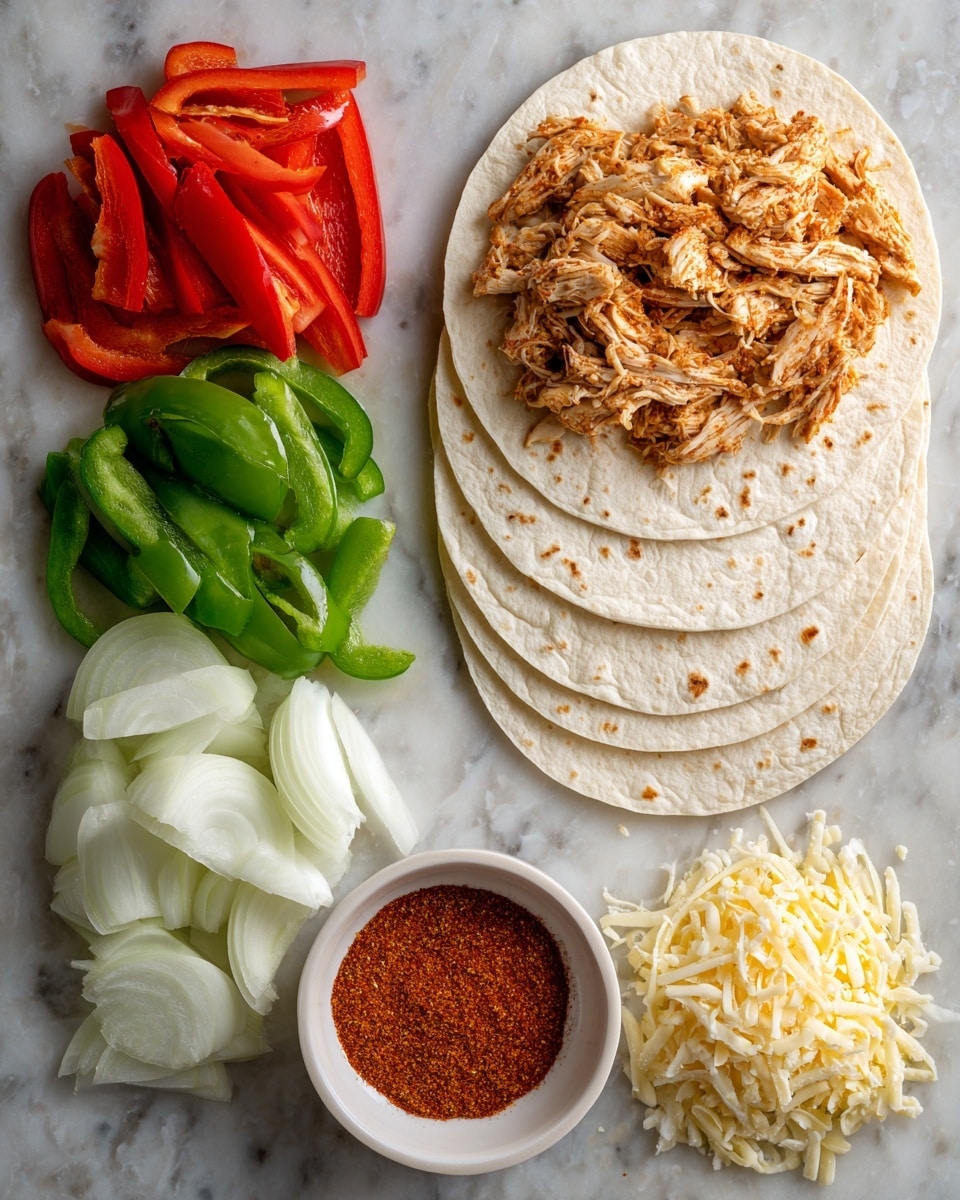
Gathering the right ingredients makes all the difference here. It’s a simple list, but each one works harmoniously to create that classic fajita flavor with a crispy twist. Remember, choosing fresh peppers and quality chicken will really up your taquito game.
- Butter: I use it both for cooking and brushing on the taquitos to get that golden crispiness.
- Onions: Sliced thin, they caramelize slightly and add sweetness that balances the spice.
- Boneless, skinless chicken breasts: Cut into thin strips for quick cooking and easy rolling.
- Bell peppers: Any color you like—red, green, yellow—they bring vibrant flavor and color.
- Fajita seasoning: Divided to season both chicken and veggies evenly. You can make your own or grab a good store-bought blend.
- Mexican cheese blend: Shredded for melting inside the taquitos for that creamy, savory touch.
- Small flour tortillas: Small size makes rolling the taquitos easier and perfect for single bites.
- Melted butter: For brushing on top of the rolled taquitos before baking—it’s a game changer!
Variations
I find that this Crunchy Chicken Fajita Taquitos Recipe adapts well to whatever mood or dietary needs you have. Don’t hesitate to make it your own—adding or swapping ingredients can bring a whole new life to this classic dish.
- Vegetarian Option: Swap chicken for sautéed mushrooms or black beans; I’ve tried this, and it’s just as satisfying with the same fajita spices.
- Spice Level: Toss in some diced jalapeños or a little cayenne to kick up the heat if you like it spicy.
- Cheese Alternatives: Try pepper jack for a bit of zing or queso fresco for a milder, crumbly texture.
- Gluten-Free: Use corn tortillas instead of flour ones; just be extra gentle rolling them to prevent cracking.
How to Make Crunchy Chicken Fajita Taquitos Recipe
Step 1: Cook the Chicken with Seasoning Love
Start by heating a tablespoon of butter over medium heat in a large skillet. Add the thin chicken strips and sprinkle half of your fajita seasoning on top. Cook the chicken for about 5 minutes, stirring occasionally, until it’s cooked through and just starting to get a little char. This slight sear adds so much flavor—don’t rush it! Once done, remove the chicken and wipe your skillet clean. This prevents flavors from mixing unevenly when you cook the veggies later.
Step 2: Sauté the Peppers and Onions
Add two tablespoons of butter back into your skillet and melt it over medium heat. Toss in your sliced onions and bell peppers, seasoning with the rest of your fajita seasoning. Sauté for 2 to 3 minutes until the onions are translucent and the peppers soften slightly but still hold a little crunch. This mix brings its own sweetness and earthiness that perfectly complements the chicken.
Step 3: Roll Them Up
Lay out a tortilla flat on a clean surface and spoon a good amount of the chicken and veggie filling onto the lower third. Don’t forget to sprinkle some shredded Mexican cheese over the filling—it melts inside and helps the taquito hold together. Roll the tortilla tightly and place it seam side down in your buttered baking dish. Repeat until all the filling’s used up. Make sure to brush the tops generously with melted butter—this is your shortcut to crispy, golden taquitos!
Step 4: Bake to Crunchy Perfection
Pop your baking dish into a 400°F (204°C) oven and bake the taquitos for about 15 minutes. You’re aiming for that perfect golden color and crispness on the outside. If they need more crunch, switch your oven to broil and broil for another 1-2 minutes, but keep a close eye so they don’t burn. The result is a crispy, cheesy, flavorful taquito that’s hard to resist.
How to Serve Crunchy Chicken Fajita Taquitos Recipe
Garnishes
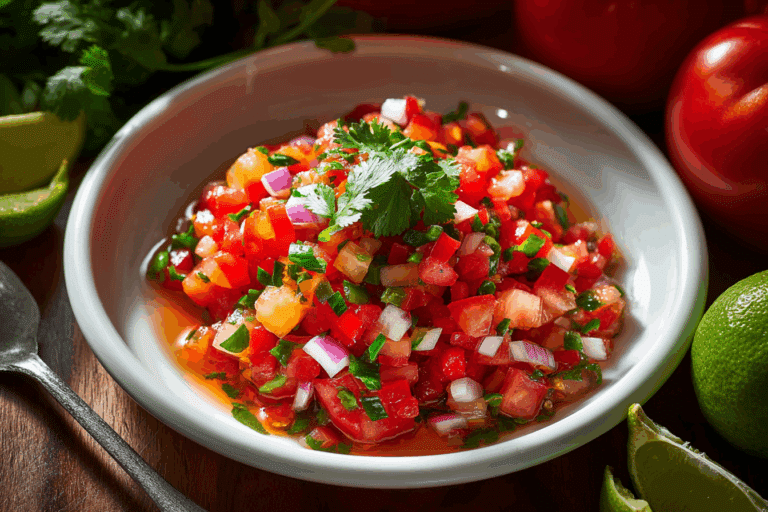
I usually serve my taquitos with a dollop of sour cream and some fresh salsa on the side. Sometimes, I add diced avocado or a sprinkle of chopped cilantro to brighten up the flavors. A squeeze of fresh lime juice over the top just before serving adds that perfect citrus zing that ties it all together beautifully.
Side Dishes
For a complete meal, I often pair these taquitos with a simple Mexican rice or a fresh, zesty salad—something light to balance the richness. Refried beans or a black bean salad also work great if you want to stick with traditional Mexican flavors.
Creative Ways to Present
Once, I arranged the taquitos standing upright in a tall glass, kind of like a crispy bouquet, and served with layered dips in small bowls around—everyone loved picking at that festive display! Also, stacking a few with a drizzle of chipotle mayo made for a fun appetizer at my last dinner party. Little touches like these can really make the dish stand out.
Make Ahead and Storage
Storing Leftovers
Leftover taquitos store wonderfully in an airtight container in the fridge for up to 3 days. I always let them cool completely before packing to keep that crust from getting soggy. The next day, they’re just as tasty after reheating, especially if you’re careful.
Freezing
If you want to prep ahead or save some for busy nights, freezing is a great option. I like to place the rolled taquitos on a baking sheet lined with parchment paper and freeze them individually until firm, then transfer to a freezer bag. They keep for about a month and taste fantastic when baked straight from frozen, just add a few extra minutes to the cooking time.
Reheating
To reheat, I pop the taquitos back in a 375°F oven for about 10 minutes until they’re warmed through and the outside regains that crunch. Skipping the microwave here really keeps the texture you want for those crunchy taquitos.
FAQs
-
Can I use corn tortillas instead of flour for this Crunchy Chicken Fajita Taquitos Recipe?
Yes, you can! Corn tortillas are a great gluten-free alternative, but they can be a bit more fragile when rolling. I recommend warming them slightly before filling to make them more pliable and rolling them gently to prevent cracking.
-
How do I make sure the taquitos get crispy and don’t get soggy?
Brushing the rolled taquitos generously with melted butter before baking helps create that beautiful golden crunch. Also, baking at a high temperature and finishing with a quick broil ensures the outside crisps up nice and tight without sogginess.
-
Can I prepare the filling ahead of time?
Absolutely! You can cook the chicken and sauté the veggies a day ahead, then assemble and bake the taquitos when you’re ready. This is especially handy for weeknight dinners or meal prepping.
-
What dipping sauces pair best with these taquitos?
Sour cream and salsa are classics, but guacamole, chipotle mayo, or a fresh cilantro lime crema also make delicious accompaniments to complement the flavors and add creamy or tangy elements.
Final Thoughts
This Crunchy Chicken Fajita Taquitos Recipe feels like one of those kitchen treasures you want to keep coming back to. It’s flavorful, fun to make, and reminds me of all those good times sharing food with friends and family. I hope you’ll give it a try, enjoy the process, and of course, savor every crispy, cheesy bite as much as I do. It’s comfort food with a bit of crunch—and in my book, that’s a winning combo.
Print
Crunchy Chicken Fajita Taquitos Recipe
- Prep Time: 15 minutes
- Cook Time: 30 minutes
- Total Time: 45 minutes
- Yield: 12 taquitos 1x
- Category: Appetizer
- Method: Baking
- Cuisine: Mexican
Description
These Crunchy Chicken Fajita Taquitos are a delicious and crispy Mexican-inspired appetizer or meal. Tender chicken strips and sautéed bell peppers and onions are seasoned with fajita spices, wrapped in flour tortillas with melted Mexican cheese, and baked to golden perfection. Serve them hot with salsa and sour cream for a perfect balance of crunchy, savory, and cheesy flavors.
Ingredients
Chicken and Vegetables
- 3 tablespoons butter
- 2 medium onions, sliced
- 1 pound boneless, skinless chicken breasts, cut into small thin strips
- 2 medium bell peppers (any color), thinly sliced
- 2 tablespoons fajita seasoning, divided
Filling and Assembly
- 1 cup Mexican cheese blend, shredded
- 12 small flour tortillas
- ¼ cup butter, melted (for brushing)
Instructions
- Preheat Oven and Prepare Baking Dish: Preheat your oven to 400°F (204°C). Lightly brush a 9×13-inch baking dish with the melted butter to prevent sticking and add flavor.
- Cook Chicken: In a large skillet, melt 1 tablespoon of butter over medium heat. Add the chicken strips and season with half of the fajita seasoning. Cook for about 5 minutes until the chicken is cooked through and has a slight char but is not burned. Remove the chicken from the skillet and wipe the skillet clean.
- Sauté Vegetables: Add the remaining 2 tablespoons of butter to the skillet and melt. Add the sliced onions and bell peppers, season with the remaining fajita seasoning, and sauté for 2-3 minutes until the onions become translucent and the peppers soften.
- Assemble Taquitos: Place a tortilla flat on a cutting board. Add a portion of the chicken and vegetable mixture, then sprinkle a couple tablespoons of shredded Mexican cheese on top. Roll the tortilla tightly and place it seam-side down in the prepared baking dish. Repeat with all tortillas. Brush the tops of the rolled taquitos generously with the melted butter.
- Bake Taquitos: Place the baking dish in the preheated oven and bake for about 15 minutes or until the tortillas are golden brown. For extra crispiness, switch to broil for 1-2 minutes, watching carefully to avoid burning, to achieve a crispy golden finish.
- Serve: Remove from the oven and serve hot with your choice of salsa and sour cream for dipping, enjoying the crunchy, cheesy, and flavorful taquitos.
Notes
- Use small flour tortillas for easy rolling.
- Feel free to use any color bell peppers for varied flavor and color.
- Watch carefully during broiling to prevent burning the taquitos.
- Serve with salsa, guacamole, or sour cream for extra flavor.
- Leftover taquitos can be reheated in the oven to maintain crispiness.
Keywords: Crunchy Chicken Taquitos, Chicken Fajita Taquitos, Baked Taquitos, Mexican Appetizer, Chicken Snacks, Fajita Recipe