Cherry Crumble Cheesecake Recipe
There’s something truly irresistible about a Cherry Crumble Cheesecake Recipe that perfectly blends creamy, tangy cheesecake with the sweet burst of fresh cherries and a buttery, crunchy crumble topping. If you love desserts that have a little bit of everything—soft, creamy, fruity, and crisp—this recipe is going to be your new best friend. I’ve made this several times for gatherings, and it never fails to impress both family and friends.
What I adore about this Cherry Crumble Cheesecake Recipe is how it balances textures and flavors effortlessly. It’s not just about indulging your sweet tooth; it’s a showstopper that looks stunning on the table and is surprisingly simple to pull off when you follow some straightforward steps. Whether you’re baking for a special occasion or just because you want to treat yourself, this cheesecake will become a favorite staple in your recipe book.
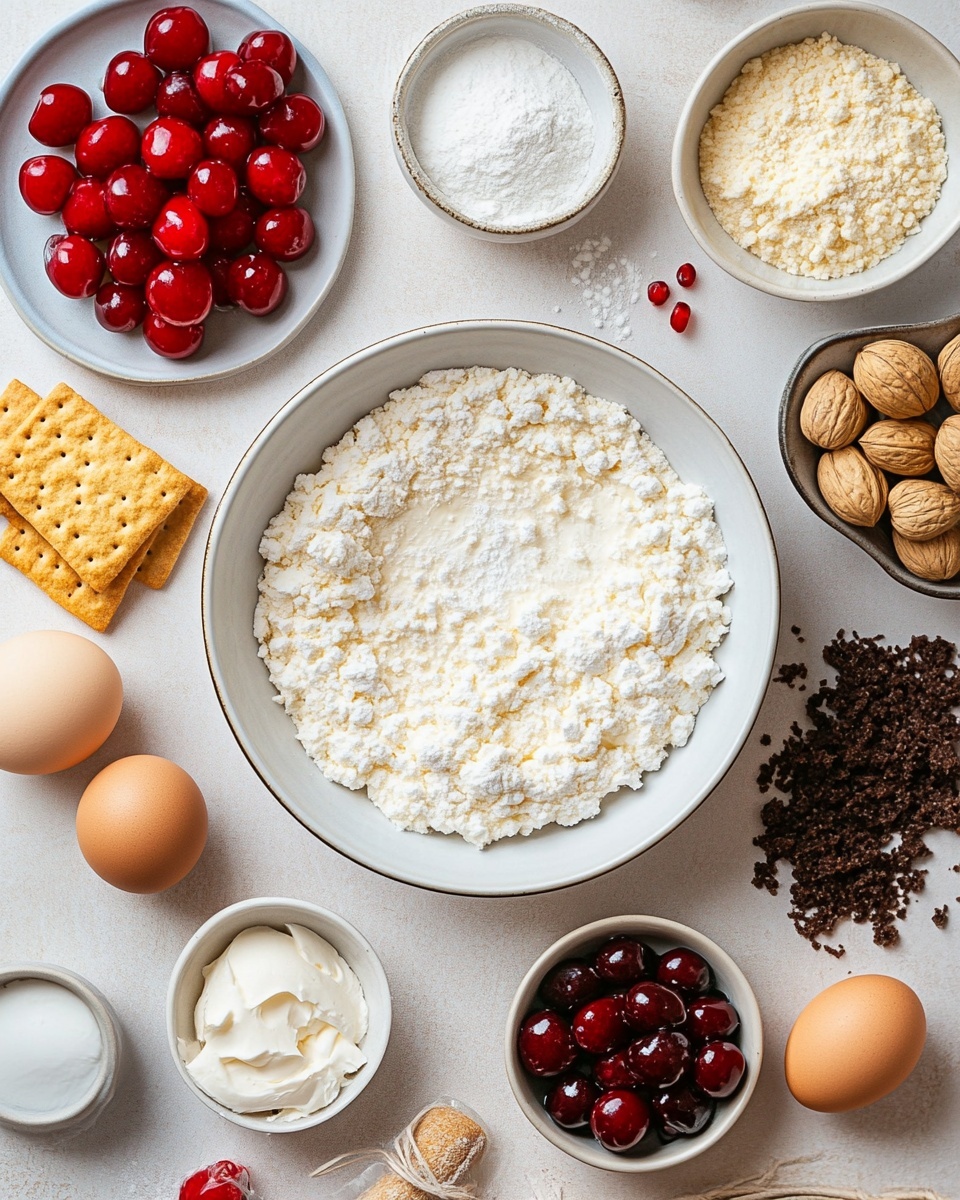
Ingredients You’ll Need
This recipe calls for ingredients that work beautifully together to create a layered masterpiece. When shopping, look for ripe, fresh cherries and good quality cream cheese for the best results.
- Digestive or graham crackers: These form the base crust—choose your favorite as it sets the flavor foundation.
- Granulated sugar: Used to sweeten both the crust and the filling evenly.
- Butter: Unsalted and melted for the crust, softened for the crumble topping—adds richness and binds everything.
- Fresh pitted cherries: Nothing beats fresh for that juicy, vibrant burst inside the cheesecake.
- All-purpose flour: Helps to thicken the cherry topping and bind the crumble.
- Lemon juice: Brightens and balances the sweetness in the cherry mixture.
- Dark brown sugar: Adds a deep, molasses flavor to the crumble topping that I love.
- Cream cheese, full fat: The cornerstone of creamy, luscious cheesecake texture.
- Sour cream: Contributes tanginess and a slight softness to the cheesecake.
- Cornstarch: Helps stabilize the cheesecake filling, keeping it smooth and firm.
- Vanilla extract: Provides warm, sweet notes that deepen the flavor.
- Almond extract: A subtle touch that pairs perfectly with cherry—don’t skip it!
- Large eggs: For structure and that lovely custard-like texture inside.
Variations
One of the things I love about this Cherry Crumble Cheesecake Recipe is how easy it is to personalize. Whether you want to swap ingredients for dietary needs or just switch up the flavors seasonally, I encourage you to make it your own.
- Berry Mix: I’ve swapped cherries for a mix of blueberries and raspberries before, and it’s fantastic for summer parties.
- Gluten-Free Crust: Using gluten-free cookies works well if you need to cater to gluten sensitivities—just watch the crumble topping ingredients.
- Vegan Adaptation: While I haven’t tried this myself, using vegan cream cheese and a flax egg might work for those avoiding dairy and eggs.
- More Crunch: Adding chopped nuts like pecans to the crumble topping adds an extra layer of texture I’ve had great feedback on.
- Liqueur Boost: For adults only, a splash of amaretto or kirsch in the cherry mixture enhances the almond notes beautifully.
How to Make Cherry Crumble Cheesecake Recipe
Step 1: Create the Perfect Cookie Crust
Start by preheating your oven to 160ºC (325ºF) and prepping a 9-inch springform pan with parchment paper on the base. I find that using a food processor to crush the digestive or graham crackers with sugar yields a fine texture that presses together beautifully. Once you add melted butter and mix it in, press the mixture firmly into the bottom and up the sides of the pan. Baking this crust for 10 minutes sets it nicely—don’t skip the cooling step to avoid a soggy crust beneath your creamy filling.
Step 2: Prepare the Cherry Filling and Crumble Topping
While the crust cools, halve and pit your cherries—this step can be time-consuming, but fresh cherries make a huge difference in flavor. Toss the cherries with sugar, flour, and lemon juice to get a juicy, thickened fruit layer. For the crumble topping, mix flour with dark brown sugar and soften butter until crumbly. I always make sure no dry flour is visible, so the crumble bakes evenly with a perfect crispness.
Step 3: Whip Up the Cheesecake Filling
Using a hand mixer or stand mixer, beat your softened cream cheese until smooth and creamy—this typically takes about a minute on low speed. Adding sugar gradually helps you avoid a gritty texture. Incorporate the sour cream mixed with cornstarch, then stir in vanilla and almond extracts for that signature cherry harmony. Add eggs two at a time on low speed to avoid overmixing, which can cause cracks later. Remember to scrape down the bowl sides so everything blends perfectly smooth.
Step 4: Layer, Bath, and Bake
Pour your luscious cheesecake filling over the cooled crust, then evenly layer the cherry mixture on top followed by the crumble. This layering creates that delightful contrast in every bite. To ensure a silky, crack-free cheesecake, bake it in a water bath: place your springform pan inside a larger pan filled two-thirds with hot water. I always double-check that the water won’t seep in by wrapping foil securely around the base if needed. Bake for about an hour and a half, then let it cool gently in the oven with the door ajar—this step helps prevent sudden temperature changes that can crack the cake.
Step 5: Chill and Set for the Best Flavor
Once the cheesecake is cool, remove it from the water bath and let it come to room temperature before refrigerating. I recommend letting it set in the fridge overnight, which makes slicing neat and enhances the flavors. Patience is key here, and the payoff is that smooth, creamy texture and a perfect slice every time.
How to Serve Cherry Crumble Cheesecake Recipe
Garnishes
I love topping my cherry crumble cheesecake with a few fresh cherries and a dusting of powdered sugar for a pretty, simple finish. Sometimes, a dollop of whipped cream or a light drizzle of melted dark chocolate can add a decadent touch that guests rave about.
Side Dishes
Pairing this dessert with a cup of rich coffee or a scoop of vanilla bean ice cream really elevates the experience. For brunch or afternoon tea, fresh fruit salads or lightly toasted nuts on the side complement the crumbly texture nicely.
Creative Ways to Present
For birthday parties, I’ve layered this cheesecake with edible flowers and served slices on pretty vintage plates. Another favorite is serving mini individual cheesecakes in jars, layering cherry crumble and cheesecake for an impressive and portable dessert. It’s a great way to add some pizzazz without extra fuss.
Make Ahead and Storage
Storing Leftovers
Leftover cheesecake keeps wonderfully in the fridge for up to 4-5 days when wrapped tightly in plastic wrap or stored in an airtight container. I always slice it into portions first so I can grab a slice without disturbing the whole cake.
Freezing
I’ve frozen this Cherry Crumble Cheesecake Recipe successfully by wrapping it well in plastic and foil to prevent freezer burn. Defrost it overnight in the fridge and expect a slight softening of the crumble, but the cheesecake texture remains intact and delicious.
Reheating
Cheesecake is best served cold, but if you prefer it slightly warmed, I gently reheat slices for about 10-15 seconds in the microwave. Keep a close eye to avoid melting the crumble topping—warm just enough to take the chill off without losing texture.
FAQs
-
Can I use frozen cherries for this Cherry Crumble Cheesecake Recipe?
Absolutely! Frozen cherries work fine, but be sure to thaw and drain them well to reduce excess liquid, which can make the filling too wet. Toss them with the flour and sugar mixture just like fresh cherries to help keep the topping thick.
-
How do I avoid cracks in my cheesecake?
The water bath is the secret here—it ensures even baking and gentle heat around the cheesecake. Also, avoid overmixing the batter and cool the cheesecake gradually with the oven door slightly open. These little tricks dramatically reduce cracking.
-
Can I make this cheesecake ahead of time?
Yes! This cheesecake actually tastes better after resting overnight in the fridge. It allows the flavors to meld and the texture to firm up perfectly. Just cover it tightly and keep refrigerated until serving.
-
What if I don’t have a springform pan?
A springform pan makes releasing the cheesecake easier, but you can use a regular cake pan lined well with parchment paper on the sides and bottom. Just be gentle when removing the cheesecake to keep it intact.
-
Can I substitute almond extract?
If you don’t have almond extract, you can leave it out or use another complementary flavor like a bit more vanilla extract or a teaspoon of cherry liqueur. It’s a subtle note that complements the cherries, but the cheesecake still shines without it.
Final Thoughts
This Cherry Crumble Cheesecake Recipe holds a special place in my heart because it combines comfort and celebration all in one dessert. It’s my go-to when I want to impress guests without stressing in the kitchen—and it never disappoints. I hope you enjoy making (and eating!) this as much as I do. Trust me, once you try it, you’ll find yourself wanting to bake it again and again.
Print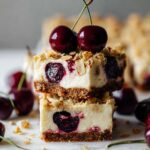
Cherry Crumble Cheesecake Recipe
- Prep Time: 45 minutes
- Cook Time: 1 hour 30 minutes
- Total Time: 8 hours 15 minutes
- Yield: 12 servings 1x
- Category: Dessert
- Method: Baking
- Cuisine: American
- Diet: Vegetarian
Description
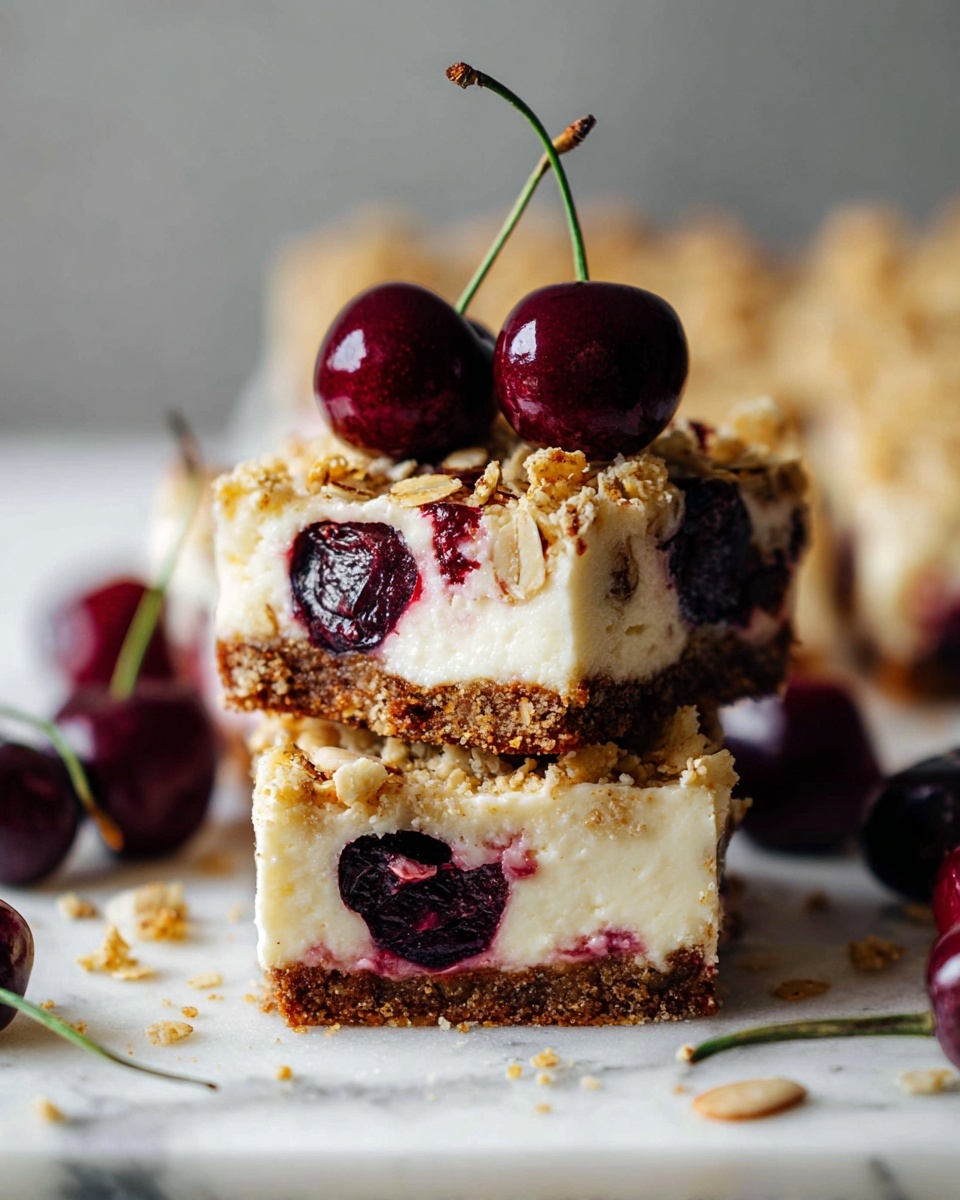
This Cherry Crumble Cheesecake is a decadent dessert featuring a buttery cookie crust, a smooth and creamy cheesecake filling, topped with fresh cherries and a crunchy crumble. Baked in a water bath for perfect texture and a moist finish, it’s an irresistible treat perfect for special occasions or whenever a rich, fruity dessert is desired.
Ingredients
Cookie Crust
- 250 g digestive or graham crackers
- 2 tablespoons granulated sugar
- 75 g butter
Cherries
- 300 g fresh pitted cherries (about 350 g with pits)
- 1 tablespoon granulated sugar
- 1 tablespoon all-purpose flour
- 2 teaspoons lemon juice
Crumble
- 110 g all-purpose flour
- 80 g dark brown sugar
- 70 g butter (room temperature)
Cheesecake
- 800 g full-fat cream cheese (room temperature)
- 250 g granulated sugar
- 200 g sour cream (14-18%, room temperature)
- 1 ½ tablespoons cornstarch
- 1 ½ teaspoons vanilla extract
- ½ teaspoon almond extract
- 4 large eggs
Instructions
- Preheat Oven and Prepare Pan: Preheat your oven to 160ºC (325ºF) using the conventional setting. Line the bottom of a 23 cm (9-inch) springform pan with parchment paper.
- Make Cookie Crust: In a food processor, pulse the digestive or graham crackers with granulated sugar until a fine, sand-like texture forms. Melt the butter and add it to the processor, blending until combined.
- Form Crust: Press the cookie crumb mixture firmly into the bottom and up the sides of the springform pan using the bottom of a glass to pack it tightly and even it out.
- Bake Crust: Bake the crust for 10 minutes, then allow it to cool until it is cool to the touch. Keep the oven on.
- Prepare Cherries: While the crust bakes, halve and pit the cherries if not done. In a bowl, mix cherries with sugar, flour, and lemon juice until there is no dry flour left. Set aside.
- Prepare Crumble Topping: In another bowl, combine flour and dark brown sugar. Add softened butter and mix with a fork until crumbly with no dry flour; set aside.
- Cream Cheese Mixture: Using a hand or stand mixer fitted with paddle attachment, beat cream cheese on low speed for 1 minute. Add granulated sugar and mix on low until incorporated. Scrape sides of the bowl and continue mixing for 1 more minute on low speed.
- Add Sour Cream Mixture: In a small bowl, blend sour cream and cornstarch until smooth. Add this mixture along with vanilla and almond extracts to the cream cheese and mix on low speed until combined.
- Incorporate Eggs: Add eggs two at a time, mixing on low speed after each addition until combined. Scrape down bowl sides and mix once more to ensure everything is fully incorporated.
- Assemble Cheesecake: Pour the batter evenly into the prepared crust. Gently spread the cherry mixture over the top, followed by the crumble topping evenly.
- Prepare Water Bath: Boil water in a kettle. Place the springform pan inside a larger 25 cm (10 inch) cake pan, then place this on a baking tray or roasting pan. Carefully pour hot water into the outer pan until it reaches two-thirds up the side of the cake pan. Alternatively, wrap the cake pan in a triple layer of aluminum foil tightly to protect against water leaks before placing in the water bath.
- Bake Cheesecake: Bake in the preheated oven for 1 hour and 25-35 minutes. The cheesecake should still have a slight wobble in the center when done.
- Cool in Oven: Turn off the oven and slightly open the door. Let the cheesecake cool inside the oven for 1 hour.
- Remove and Cool: Remove the cheesecake from the water bath and take off any foil wrapping. Place it on a cooling rack and let it cool to room temperature for about 1 hour.
- Chill Before Serving: Refrigerate the cheesecake for at least 6 hours, preferably overnight, to set fully before slicing and serving.
Notes
- Using a water bath ensures gentle, even baking and prevents cracking on the cheesecake surface.
- If wrapping with aluminum foil, ensure it is sealed tightly to prevent water from leaking in and damaging the crust.
- The slight wobble in the cheesecake center indicates perfect doneness; it will firm up during cooling.
- Room temperature ingredients (cream cheese, sour cream, eggs) help in achieving a smooth batter without lumps.
- Allow the cheesecake to chill fully in the fridge; cutting it too soon can cause it to crumble.
- This cheesecake is best enjoyed chilled and can be refrigerated for up to 3 days.
Keywords: cherry crumble cheesecake, cherry cheesecake, crumble topping, baked cheesecake, water bath cheesecake, dessert recipe