Thai Broth Recipe
There’s something truly comforting about a well-made broth, and this Thai Broth Recipe is no exception. It’s the kind of base that transforms a simple bowl of soup into something vibrant and soulful, packed with layers of gentle garlic, fresh cilantro, and that subtle kick of white pepper. Whenever I whip this up, I love how it brings warmth and depth to any Thai-inspired dish, whether it’s a quick lunch or a slow-cooked dinner with friends.
What makes this Thai Broth Recipe so special is its balance and simplicity. The clear, fragrant broth works perfectly as a starting point for noodles, stews, or even just sipped on its own when you need something nourishing. Plus, it’s surprisingly easy to make at home, and with a little patience, you’re rewarded with a broth that tastes far richer than most store-bought versions.
Ingredients You’ll Need
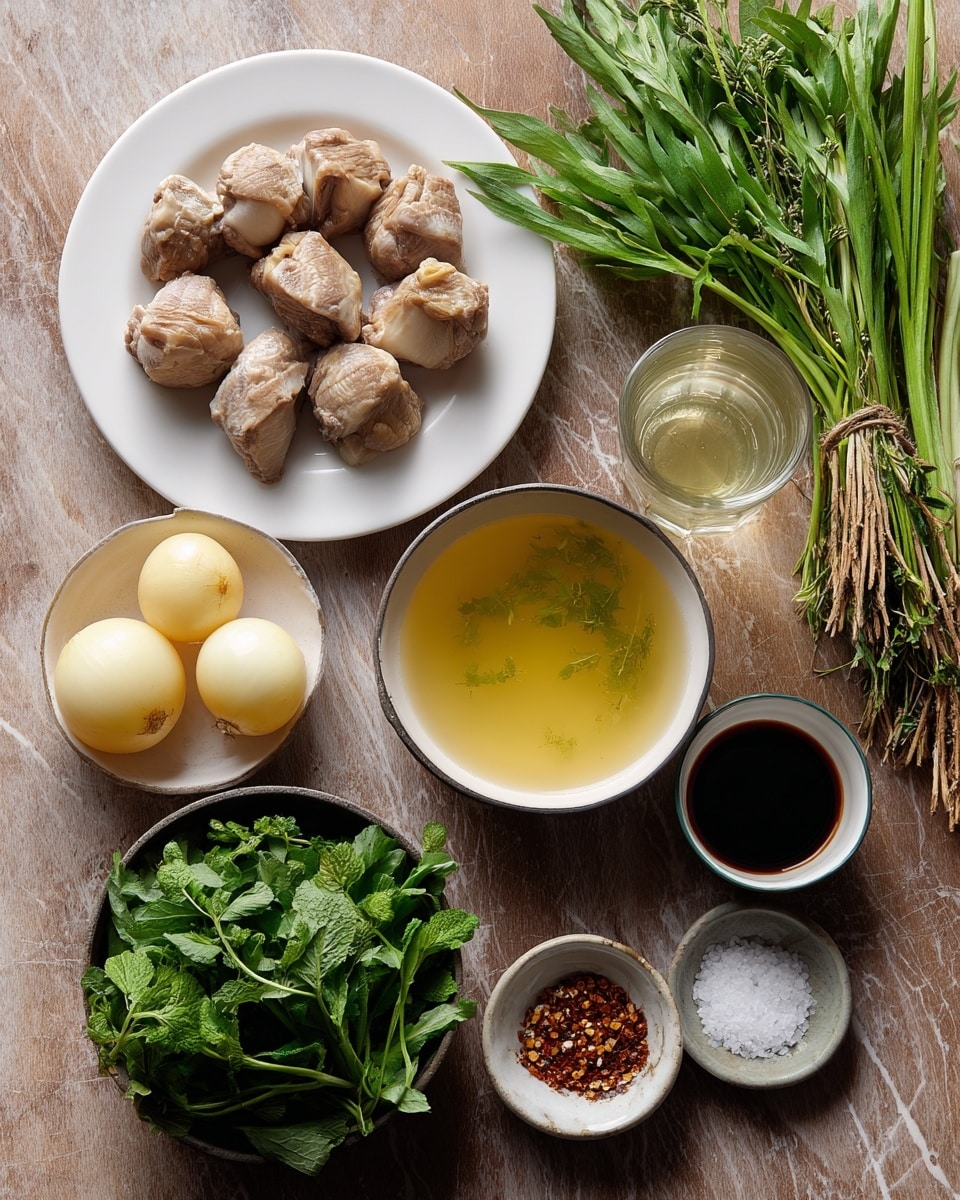
This recipe uses simple, natural ingredients that are staples in many kitchens, yet they come together to create such a fragrant and complex broth. Here’s what you’ll want to gather before you start, and a few tips to help you shop smart for the best flavor.
- Chicken bones or pork bones: Fresh bones from the market add amazing depth; I prefer chicken bones for a lighter broth and pork for a heartier version.
- Water: Use filtered water if you can — clean water means a clearer, purer broth.
- Garlic: Lightly crushed to unlock those sweet, mellow flavors without overpowering the broth.
- Cilantro roots or stems: These offer the authentic fresh herbal taste—if you only find leaves, stems work almost as well.
- White pepper powder: Adds a gentle warmth; fresh ground white pepper is best if you can get it.
- Thin soy sauce: Provides umami and subtle saltiness; avoid thick soy sauce to keep the broth clear.
- Fish sauce: The secret ingredient for that quintessential Thai flavor punch — use a good brand for the best taste.
Variations
I love how flexible this Thai Broth Recipe is—you can easily tailor it to your tastes or dietary needs. Sometimes, I tweak it to match what ingredients I have on hand or the mood I’m in.
- Vegetarian variation: Swap bones for roasted mushrooms and kombu seaweed for a rich, meat-free broth. It’s a surprisingly tasty alternative I turn to when I’m avoiding meat.
- Roasting the bones: For deeper flavor, I like roasting chicken bones until golden brown before simmering; it adds a toasty note that makes noodle soups extra special.
- Using different herbs: Try adding lemongrass or kaffir lime leaves for a citrusy twist that brightens the broth beautifully.
- Milder or spicier: Adjust white pepper amount or add fresh chili slices to make the broth suit your preferred heat level.
How to Make Thai Broth Recipe
Step 1: Start with Clean Bones and Water
First things first—I like to blanch my chicken or pork bones briefly in boiling water for 5 minutes and then discard that water. This step really helps produce a clearer broth by removing impurities. After that, place your cleaned bones in a large pot and add 12 cups of fresh cool water. Bring it to a gentle boil over medium heat, and keep an eye out for foam that rises to the surface. I skim this off using a ladle to keep the broth from tasting bitter or cloudy.
Step 2: Add the Aromatics and Simmer Slowly
Once the foam is skimmed, toss in your lightly crushed garlic cloves and cilantro roots or stems. Add the white pepper powder next to invite a subtle heat. Lower the heat so the broth barely simmers—it’s important to avoid boiling hard or boiling vigorously. Let it cook low and slow for about 2 hours. During this time, check every 30 minutes or so to skim off any scum and keep your broth crystal clear.
Step 3: Season and Strain for Clarity
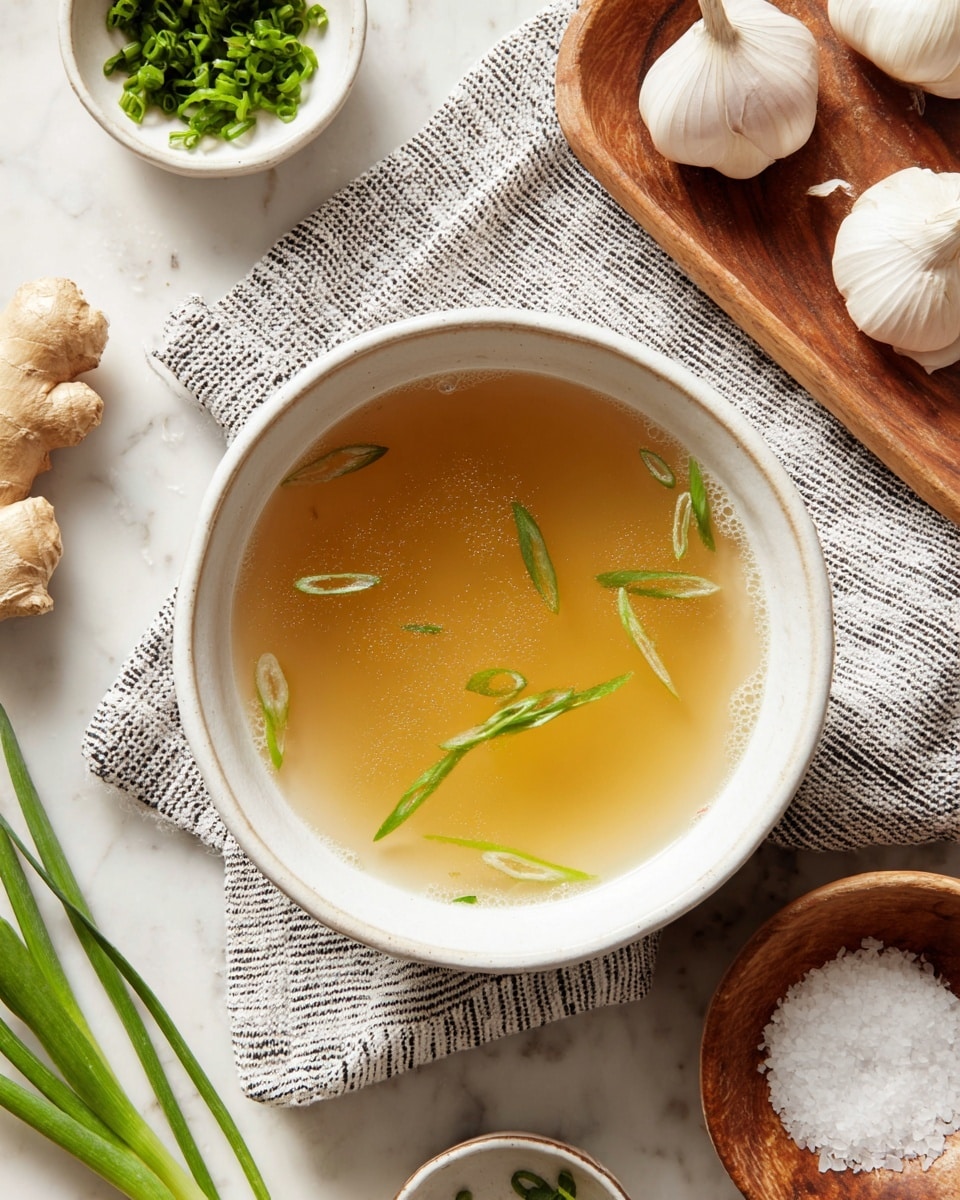
After simmering, it’s time to add the umami magic — thin soy sauce and fish sauce. Go slowly here: add a little, taste, and adjust until it’s perfectly balanced between salty and savory. Then strain the broth through a fine mesh strainer to remove all bones and aromatics. This step is where you see the beautiful clear golden liquid that’s ready to become the star of your next meal.
How to Serve Thai Broth Recipe
Garnishes
I love topping this broth with fresh, crunchy garnishes like sliced green onions, chopped cilantro leaves, and a squeeze of lime. It instantly wakes up the flavors and adds a pop of freshness. Sometimes, a few thin slices of fresh chili or a sprinkle of fried garlic elevate it even more, especially if you enjoy a little heat.
Side Dishes
Pairing your Thai broth with steamed jasmine rice or rice noodles turns it into a comforting meal. I often serve it alongside spicy Thai salads like som tam (green papaya salad) or appetizer favorites like spring rolls. The broth also plays nicely with grilled or roasted meats for a heartier dinner.
Creative Ways to Present
For dinner parties, I like to serve this Thai broth in small bowls garnished with edible flowers and microgreens to impress guests. Another fun idea I tried was making individual hot pots by ladling the broth over noodles, meats, and fresh herbs right at the table—it’s interactive and cozy, especially in cooler months!
Make Ahead and Storage
Storing Leftovers
After making the broth, I let it cool completely before transferring it to airtight containers. Stored in the fridge, it keeps wonderfully for up to 4 days. I always find that letting it sit overnight helps the flavors deepen even more.
Freezing
I freeze any extra broth in portion-sized containers or silicone ice cube trays. This way, I can pop out exactly what I need for future meals without thawing a whole batch. Freezing keeps it fresh for about 3 months, which is a game-changer for busy weeks.
Reheating
When reheating, I do it gently over low heat to avoid over-reducing or making the broth too salty. If it tastes intense after reheating, just stir in a little water to lighten it up. Reheating this way keeps the flavors bright and comforting.
FAQs
-
Can I make this Thai Broth Recipe without bones?
Yes! While bones add richness and body, you can create a flavorful broth with vegetables and herbs like mushrooms, onions, and kombu seaweed. This is a good vegetarian alternative but may lack some depth compared to the traditional method.
-
How do I keep the Thai broth clear?
Blanching your bones before simmering helps remove impurities that cloud the broth. Also, simmer gently and skim foam regularly. Avoiding rapid boiling is key to maintaining clarity.
-
Can I prepare the broth ahead of time?
Absolutely! The broth tastes even better the next day. Just store it in the refrigerator for up to 4 days or freeze portions for longer storage.
-
What dishes pair well with this Thai Broth Recipe?
This broth is fantastic as a base for noodle soups, like thai chicken noodle soup or tom yum, but also shines in hot pots or simply served as a light consommé with fresh herbs and lime.
-
Is it necessary to add fish sauce?
While fish sauce adds authentic umami, you can adjust or omit it if you’re vegan or allergic. Just be mindful that it changes the flavor profile and you might want to add extra soy sauce or seasoning to compensate.
Final Thoughts
I honestly can’t recommend this Thai Broth Recipe enough—it’s one of those humble kitchen treasures that once you make, you’ll find yourself coming back to it again and again. It’s nourishing, easy to customize, and fills your home with the most warming aromas. Give it a try, and I promise it’ll become your new go-to base for countless Thai dishes, offering comfort and flavor in every sip.
Print
Thai Broth Recipe
- Prep Time: 15 minutes
- Cook Time: 2 hours
- Total Time: 2 hours 15 minutes
- Yield: 8 servings 1x
- Category: Soup Broth
- Method: Stovetop
- Cuisine: Thai
Description
This authentic Thai broth recipe delivers a rich, flavorful base perfect for a variety of Thai soups and dishes. Slow-simmered with chicken or pork bones, garlic, cilantro, and aromatic seasonings, the broth is light yet deeply savory, with a subtle hint of spice from white pepper and the umami kick of soy and fish sauce. Ideal for enhancing noodle soups, stews, or enjoyed on its own, this homemade broth is both comforting and nourishing.
Ingredients
Broth Base
- 2 pounds chicken bones or pork bones
- 12 cups water
- 10 cloves garlic, lightly crushed
- 4 cilantro roots or 10 cilantro stems
- 1/4 teaspoon white pepper powder
Seasoning
- 2 tablespoons thin soy sauce
- 1 tablespoon fish sauce
Instructions
- Prepare Bones and Water: Place the chicken or pork bones in a large pot and pour in 12 cups of water. Bring the water to a gentle boil, carefully skimming off any foam or impurities that rise to the surface to ensure a clear broth.
- Add Aromatics and Spices: Add the lightly crushed garlic cloves, cilantro roots or stems, and white pepper powder to the pot. These ingredients provide the foundational flavors and fragrant aroma for the broth.
- Simmer the Broth: Reduce the heat to low and let the broth simmer slowly for approximately 2 hours. Occasionally skim the surface to remove any scum and keep the broth clear and clean.
- Season the Broth: Once simmered, stir in the thin soy sauce and fish sauce. Taste and adjust these seasonings as needed to balance the saltiness and depth of flavor.
- Strain the Broth: Use a fine mesh strainer to carefully strain the broth, removing all bones, garlic, cilantro, and other solids, leaving a smooth liquid.
- Serve or Store: Serve the broth hot as a base for your favorite soups or noodles. Alternatively, allow it to cool completely before refrigerating for up to 4 days or freezing for up to 3 months. For a lighter broth, skim off any excess fat after chilling.
Notes
- Roasting the bones before simmering enhances the broth with a deeper, richer flavor.
- Blanching the bones briefly in boiling water prior to simmering helps produce a clearer broth by removing impurities.
- Season the broth at the end to accurately adjust saltiness and flavor balance.
- Refrigerate broth for up to 4 days or freeze for up to 3 months to extend shelf life.
- Remove excess fat after chilling the broth if a lighter consistency is preferred.
Keywords: Thai broth, chicken broth, pork broth, homemade broth, Thai cooking, soup base, simmered broth