Oreo Cookie Christmas Ornaments Recipe
If you’re looking for the perfect festive treat that’s not just delicious but doubles as adorable holiday decor, you’ve got to try this Oreo Cookie Christmas Ornaments Recipe. It’s one of those joyful kitchen projects that turns simple ingredients into delightful goodies you can hang on your tree or share with friends. Plus, making them with family or friends feels like creating little edible memories together.
What I love most about this Oreo Cookie Christmas Ornaments Recipe is how easy it is to pull off, even if you don’t consider yourself a baker or decorator. The combination of Oreo cookies with peanut butter cups and candy melts just works beautifully, and bonus—it lets you get creative with sprinkles and colors. These are perfect for holiday parties, last-minute gifts, or simply adding a bit of charm to your Christmas celebrations.
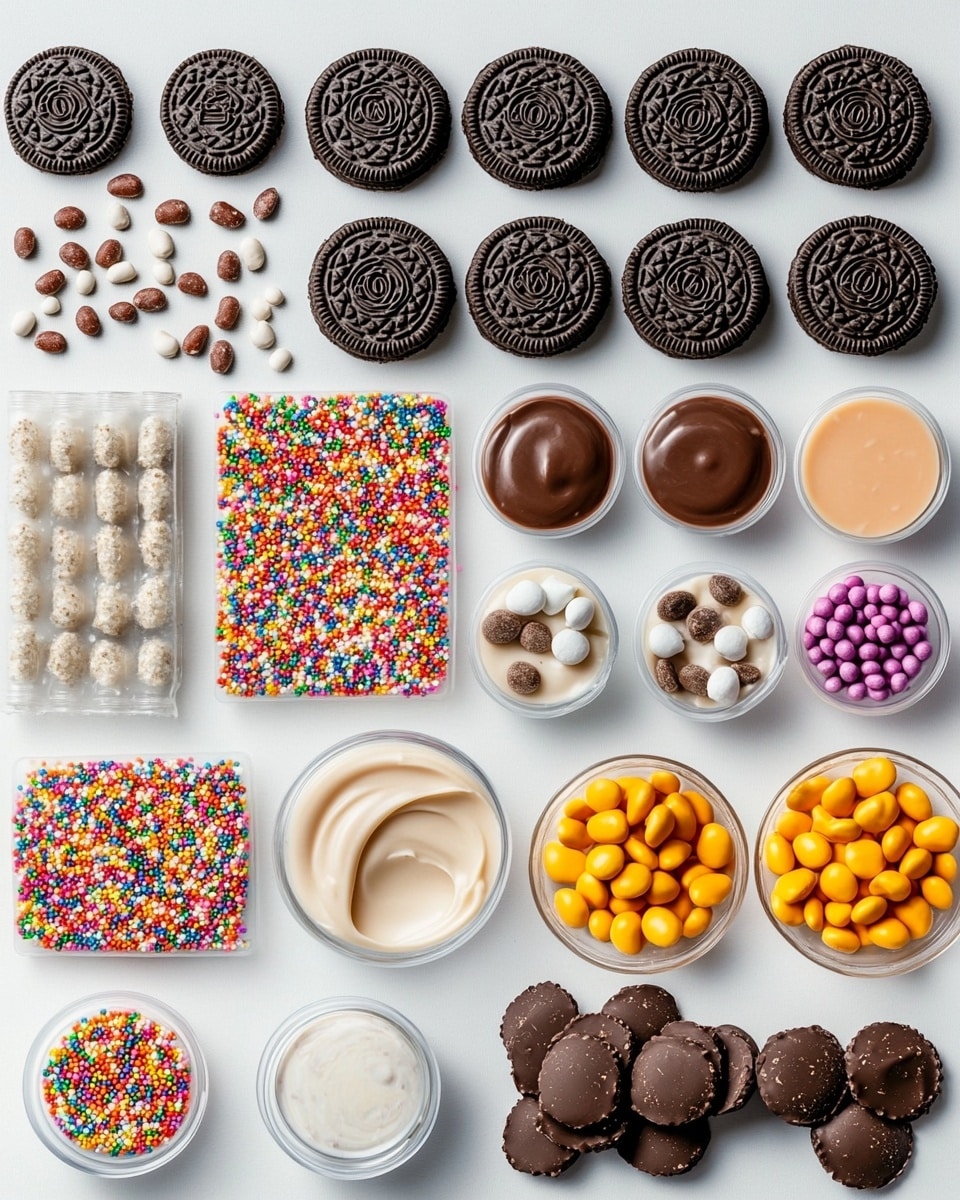
Ingredients You’ll Need
These ingredients come together effortlessly, each playing a role in both flavor and the festive appeal of the ornaments. Keep an eye out for quality candy melts and fun sprinkles to really make your ornaments pop!
- Oreos: Classic and dependable, their chocolate cookie base is perfect for this craft-and-treat combo.
- Mini peanut butter cups: These add a lovely soft center and peanut butter twist that pairs beautifully with the Oreos.
- Candy melts: These are easy to melt and come in all sorts of bright holiday colors to coat and decorate your ornaments.
- Sprinkles and candy for decorating: Pick a mix of festive shapes and colors — they add personality and a fun crunch.
Variations
One of my favorite parts of the Oreo Cookie Christmas Ornaments Recipe is how you can tweak it to fit your vibe or dietary needs. Whether it’s switching up candies or adding a personal flair with decorations, there’s plenty of room to make this recipe your own.
- Nut-free version: Swap mini peanut butter cups for mini chocolate chips or other nut-free candies. I’ve done this for school events and everyone loved it just as much.
- Color themes: Use candy melts and sprinkles that match your holiday colors—red and green, silver and blue, or even gold and white for a classy look.
- Gluten-free adjustment: There are gluten-free sandwich cookies out there that make great substitutes if you or someone you’re gifting to needs it.
How to Make Oreo Cookie Christmas Ornaments Recipe
Step 1: Prep your Workspace and Ingredients
Start by laying out all your ingredients on the counter. I like to have wax paper or parchment ready to place the ornaments on once coated. Also, melt your candy melts gently—either in the microwave in short bursts or over a double boiler—to get a smooth, glossy coating without lumps. This sets you up for easy dipping and decorating.
Step 2: Assemble the Ornaments
Take one Oreo cookie and gently press a mini peanut butter cup onto one side—in my experience, resting the peanut butter cup with the flat side down helps it stick better. Once you’ve got your “front” and “back” ready, you’re set to dunk them in your melted candy. Tip: Insert a small hole with a toothpick or a straw before coating if you want to thread ribbon or string later for hanging.
Step 3: Dip and Decorate
Dip each Oreo assembly into the melted candy, using a fork or dipping tool to ensure it’s fully coated. Shake off excess candy gently and place it on your wax paper. While the coating is still wet, quickly add sprinkles or other candies to decorate—once the candy hardens, you won’t be able to add toppings. I always find that working quickly but carefully makes the ornaments look neat and festive.
Step 4: Let Them Set
Allow the coated Oreos to set at room temperature or speed things along by popping them in the fridge for about 15 minutes. Once fully hardened, if you made holes earlier, thread festive ribbon or string through for hanging. Otherwise, these make adorable edible gifts piled on a festive plate!
How to Serve Oreo Cookie Christmas Ornaments Recipe
Garnishes
I love sprinkling edible glitter or metallic sugar on my Oreo Cookie Christmas Ornaments Recipe to give them a little shimmer under the holiday lights. Sometimes I also add crushed candy canes for a minty crunch that surprises your taste buds.
Side Dishes
These ornaments are quite sweet and rich on their own, so I usually pair them with a savory cheese platter or some lightly salted nuts at parties. They also go great with a warm cup of cocoa or coffee, perfect for cozy winter afternoons.
Creative Ways to Present
I once arranged these Oreo Cookie Christmas Ornaments Recipe on a platter shaped like a Christmas tree, stacking them in a pyramid and threading gold ribbon around as “garland.” Another time, I tied each one individually with curling ribbon and placed them in clear treat bags for a charming take-home gift. Presentation really elevates these beyond just cookies!
Make Ahead and Storage
Storing Leftovers
I store leftover Oreo Cookie Christmas Ornaments Recipe in an airtight container at room temperature. They keep their crunch and coating well for up to a week—just be sure to layer wax paper between to avoid sticking.
Freezing
Freezing works surprisingly well! I wrap each ornament in plastic wrap and freeze them in a sealed container. When you’re ready to enjoy, thaw at room temperature to preserve that fresh, crunchy texture.
Reheating
No reheating needed here since these are no-bake and best enjoyed cold or at room temp. Just unwrap and savor the festive flavors—easy and hassle-free!
FAQs
-
Can I use other types of cookies instead of Oreos for this Christmas ornaments recipe?
Absolutely! While Oreos work great because of their sturdy sandwich structure and classic flavor, you can experiment with other sandwich cookies or even plain chocolate cookies. Just make sure the cookies are firm enough to hold the peanut butter cups and candy coating without falling apart.
-
How do I prevent the candy coating from cracking?
Melting the candy gently and applying a smooth, even coat helps prevent cracking. Make sure the candy melts aren’t overheated—they should be warm and runny, not hot. Also, letting the ornaments set at room temperature rather than very cold environments reduces cracking risks.
-
Can I make these ornaments ahead of time?
Yes! These Oreo Cookie Christmas Ornaments Recipe can be made several days ahead and stored in an airtight container. They’re perfect for prepping before big holiday gatherings.
-
Is it possible to make these without peanut butter?
Definitely. If you’re allergic or just not a fan of peanut butter, substitute the mini peanut butter cups with mini chocolate chips, fudge pieces, or other small candies you enjoy. The recipe is forgiving and fun to customize.
-
What’s the best way to hang these ornaments on the tree?
If you want to hang them, create a small hole before dipping by gently poking through the Oreo with a toothpick or small straw. Once decorated and set, thread a festive ribbon or string through and tie a loop. These little details make the ornaments both charming and functional.
Final Thoughts
This Oreo Cookie Christmas Ornaments Recipe is truly one of those sweet, simple holiday traditions you’ll find yourself making year after year. It’s charming, delicious, and invites you to get hands-on with the festivities. I hope you enjoy making—and eating!—these as much as I do. Imagine your tree sprinkled with edible adornments that bring smiles and a touch of magic to your season.
Print
Oreo Cookie Christmas Ornaments Recipe
- Prep Time: 15 minutes
- Cook Time: 10 minutes
- Total Time: 25 minutes
- Yield: 12 Oreo Cookie Christmas Ornaments 1x
- Category: Dessert
- Method: No-Cook
- Cuisine: American
Description
Create festive Oreo Cookie Christmas Ornaments with this simple no-bake recipe. These delightful treats combine classic Oreo cookies with mini peanut butter cups, coated in colorful candy melts and decorated with fun sprinkles and candies, making them perfect for holiday celebrations or edible ornaments.
Ingredients
Cookies
- 12 Oreo cookies
- 12 mini peanut butter cups
Coating and Decorations
- 10 oz candy melts (assorted colors)
- Sprinkles and candy pieces for decorating
Instructions
- Prepare your workspace: Line a baking sheet with parchment paper to place the finished ornaments on and avoid sticking.
- Unwrap and assemble: Unwrap the 12 mini peanut butter cups. Gently twist apart each Oreo cookie and place one mini peanut butter cup on the cream center of one cookie half, then sandwich it back with the other half.
- Melt the candy melts: In a microwave-safe bowl, melt the 10 oz of candy melts according to package instructions, typically heating in 30-second intervals and stirring until smooth.
- Coat the Oreos: Using a fork or a dipping tool, dip each assembled Oreo sandwich into the melted candy, ensuring it is fully coated. Let excess drip off.
- Decorate: Quickly before the coating sets, sprinkle the coated Oreos with colorful sprinkles and candy pieces to give them a festive look.
- Set the ornaments: Place the decorated Oreos onto the parchment-lined baking sheet and allow them to cool at room temperature or in the refrigerator until the candy coating hardens completely.
- Display or serve: Once set, these Oreo Cookie Christmas Ornaments can be used as edible decorations or served as holiday treats.
Notes
- Use different colors of candy melts to make the ornaments more vibrant and festive.
- If candy melts are too thick, add a small amount of vegetable oil to thin them out for easier dipping.
- You can insert a small piece of string or ribbon in the candy coating before it sets to hang the ornaments on your tree.
- Store leftovers in an airtight container at room temperature for up to 5 days.
- Be careful when handling melted candy as it can be hot.
Keywords: Oreo Christmas ornaments, holiday cookies, no-bake Christmas treats, peanut butter cup desserts, candy melts decorations