Magic of Candy Cane Cookies Recipe
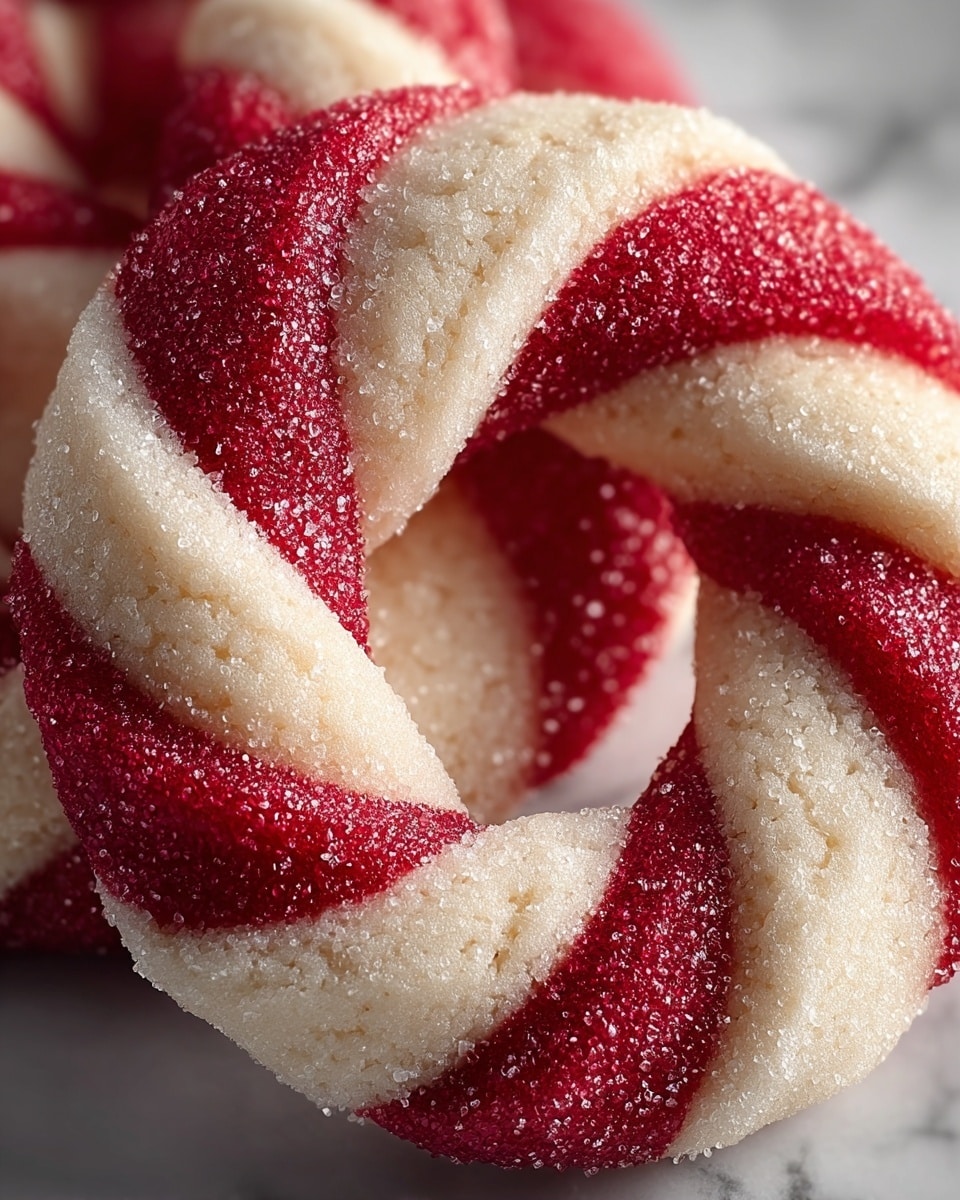
There’s something undeniably festive and magical about baking Candy Cane Cookies during the holiday season. This Magic of Candy Cane Cookies Recipe captures that magic perfectly, blending creamy vanilla, refreshing peppermint, and a hint of sweetness that instantly reminds me of cozy winter afternoons spent with family and friends. What makes this recipe truly special is the way it combines the classic buttery cookie base with that festive peppermint twist, and of course, the swirling red and white candy cane pattern that makes each cookie feel like a little handmade gift.
Whenever I pull out this Magic of Candy Cane Cookies Recipe, it’s like unwrapping a tradition that warms the entire kitchen. Whether you’re baking for a holiday party, a thoughtful gift, or simply want to brighten a winter day, these cookies never fail to impress. Plus, the recipe is straightforward, so even if you’re new to festive baking, you’ll find it fun and rewarding to make!
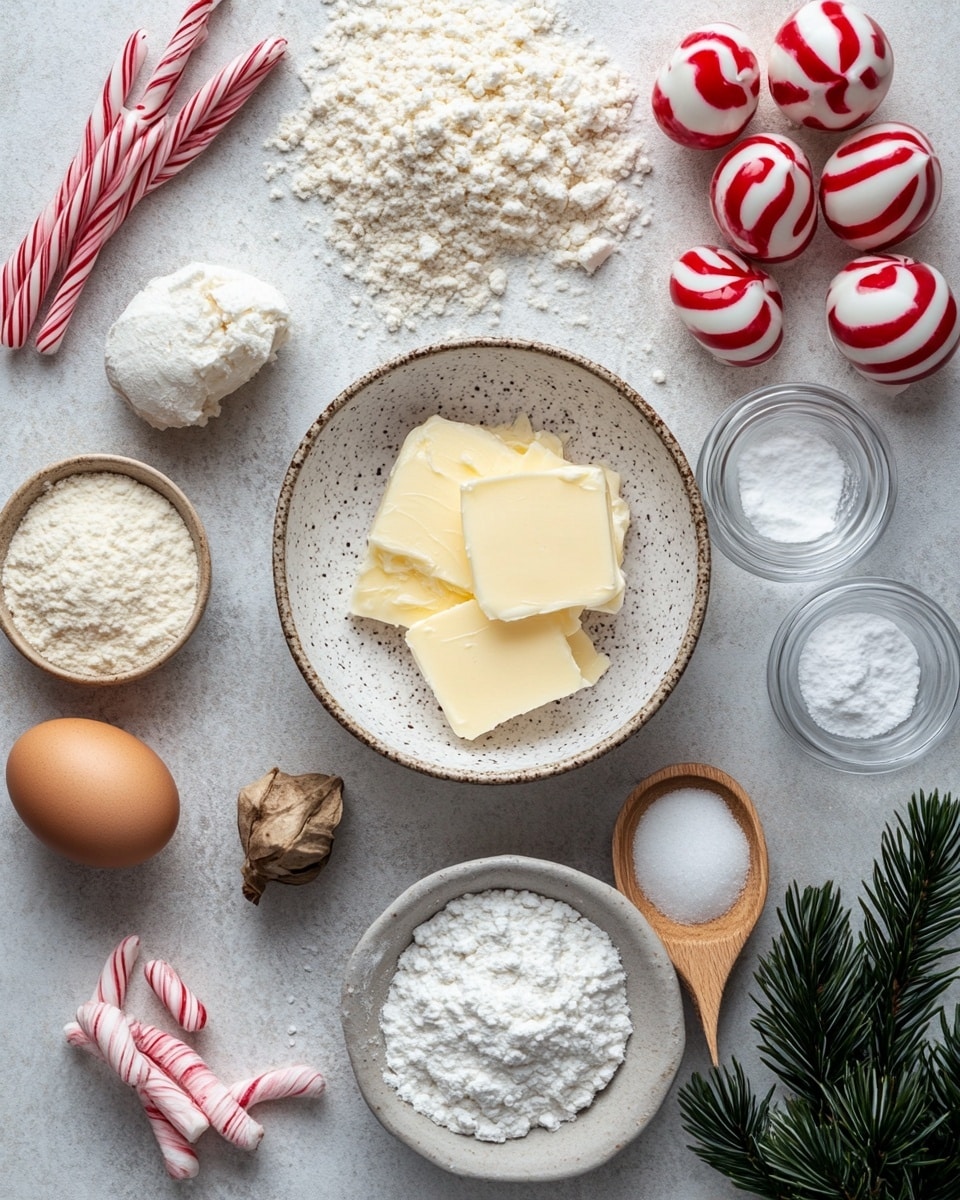
Ingredients You’ll Need
Each ingredient in this recipe plays a crucial role in creating the perfect candy cane cookie texture and flavor. Plus, they’re common pantry staples, making your shopping trip a breeze!
- Unsalted Butter: Softened butter provides that rich, melt-in-your-mouth texture without overpowering the peppermint flavor.
- Powdered Sugar: This gives the cookie a smooth, tender crumb compared to granulated sugar.
- Large Egg: Room temperature helps the dough bind evenly and adds moisture.
- Vanilla Extract: Adds warmth and depth, perfectly balancing the minty notes.
- Peppermint Extract: This is the star of the show for that unmistakable candy cane flavor. Be careful not to add too much—it can be strong!
- All-Purpose Flour: Provides structure and helps achieve that classic cookie firmness.
- Salt: Enhances all the flavors and balances the sweetness.
- Red Gel Food Coloring: Use gel for vibrant color without altering the dough’s consistency.
Variations
The fun of baking this Magic of Candy Cane Cookies Recipe is how you can play around with flavors and presentation. I love tweaking it depending on the occasion or who I’m baking for, and you should definitely feel free to make it your own.
- Chocolate Peppermint: I once added a swirl of cocoa powder into half the dough for a chocolatey twist, which was a huge crowd-pleaser.
- Gluten-Free Version: Swap all-purpose flour with a trusted gluten-free baking blend, and you’ll still get fantastic texture.
- Spiced Peppermint: Add a pinch of cinnamon or nutmeg to warm the flavor profile, which is lovely during colder months.
- Miniature Candies: Press crushed candy canes or mini chocolate chips on top before baking for added texture and festive flair.
How to Make Magic of Candy Cane Cookies Recipe
Step 1: Cream the Butter and Sugar
Start by beating the softened unsalted butter with powdered sugar in a large bowl until the mixture is light, fluffy, and smooth—this usually takes about 3 to 5 minutes with an electric mixer. This step is key because it incorporates air, giving your cookies that perfect tender texture. If you try to rush this, your cookies might turn out dense, so be patient!
Step 2: Add the Egg and Extracts
Next, beat in your room temperature egg, vanilla extract, and peppermint extract until fully combined. The egg helps bind the dough, while the extracts build that holiday flavor you’re after—just remember to measure the peppermint carefully, or it can overpower the rest.
Step 3: Mix in Dry Ingredients
In a separate bowl, whisk together the all-purpose flour and salt. Gradually add this to the wet ingredients, mixing on low speed until just combined. Overmixing here can lead to tougher cookies, so stop as soon as you don’t see any flour streaks.
Step 4: Divide, Color, and Roll Out the Dough
Divide the dough into two equal portions. Leave one plain and mix the other with a few drops of red gel food coloring until the color is uniform. Then, roll out each portion into long ropes on a lightly floured surface. I find that chilling the dough slightly before rolling helps manage stickiness, especially if your kitchen is warm!
Step 5: Twist and Shape Your Candy Canes
Carefully twist the red and white ropes together to create that classic candy cane swirl. Then, slice the twisted ropes into about ¼-inch thick rounds and shape each slice gently into a candy cane curve. This part is so satisfying—the dough is soft yet pliable, which makes shaping a breeze.
Step 6: Bake Until Just Set
Place the shaped candy cane cookies on a parchment-lined baking sheet and bake in a preheated 350°F (175°C) oven for about 10-12 minutes. Keep an eye on them—the edges should be just starting to turn golden while the centers look set. Overbaking will dry them out, and we want tender yet sturdy cookies.
How to Serve Magic of Candy Cane Cookies Recipe
Garnishes
I usually leave these cookies as is since their candy cane shape and red-white pattern are decoration enough. But for a special holiday touch, I sometimes sprinkle a little edible glitter or add a light drizzle of white chocolate after baking—this adds an extra sparkle that’s fun for parties.
Side Dishes
These cookies pair wonderfully with a warm cup of hot chocolate or peppermint tea. I love serving them alongside a holiday cheese board for a sweet contrast or with frosted sugar cookies for a festive cookie platter.
Creative Ways to Present
A favorite of mine is arranging the cookies standing up in clear glass jars layered with red and white candies like M&Ms or peppermints for a striking effect. For gifting, I wrap bundles with a festive ribbon and tuck in a sprig of fresh rosemary or pine for that extra holiday charm.
Make Ahead and Storage
Storing Leftovers
Once cooled completely, I store the leftover Magic of Candy Cane Cookies in an airtight container at room temperature. They usually stay fresh and soft for up to a week, but if your kitchen is humid, a paper towel inside the container can help absorb moisture.
Freezing
If you want to make these cookies ahead in larger batches, I highly recommend freezing the shaped dough ropes before slicing. Wrap tightly in plastic wrap and freeze for up to 3 months. When you’re ready to bake, just thaw in the fridge overnight, then slice and bake as usual.
Reheating
To warm leftovers, I pop a cookie or two in a preheated 300°F oven for 5 minutes—this freshens them up nicely without drying them out. Avoid microwaving for too long, or they can become chewy in an unpleasant way.
FAQs
-
Can I use peppermint oil instead of peppermint extract?
You can, but peppermint oil is much stronger than extract, so start with a drop and taste your dough before adding more. Too much can easily overpower the cookie and make it bitter.
-
Why should I use gel food coloring, not liquid?
Gel food coloring is concentrated and doesn’t add extra liquid to the dough, which helps keep the texture of your cookies perfect. Liquid coloring can thin the dough and make it harder to handle.
-
How can I prevent my candy cane cookies from spreading too much in the oven?
Make sure your butter is softened but not melted, and chill your dough ropes slightly before shaping and baking. Also, use parchment paper or silicone mats to prevent sticking and spreading.
-
Can I make this recipe dairy-free?
Yes! Swap the unsalted butter for a dairy-free alternative like coconut oil or vegan butter sticks, but note that the flavor and texture might be slightly different.
-
What is the best way to store these cookies if I want them crisp instead of soft?
Store cookies in an airtight container without any added moisture, and place a piece of bread inside the container to keep them crunchy longer. The bread absorbs excess moisture that might soften the cookies.
Final Thoughts
This Magic of Candy Cane Cookies Recipe has become a staple in my holiday baking repertoire. I love how it brings a little extra sparkle to seasonal gatherings and shows up as a thoughtful gift that always delights. I hope when you try it, you’ll find the same joy and warmth that I do every time I twist those red and white ropes together. Trust me—once you make these cookies, they become more than just a treat; they become a little magic you create and share.
Print
Magic of Candy Cane Cookies Recipe
- Prep Time: 20 minutes
- Cook Time: 12 minutes
- Total Time: 32 minutes
- Yield: 24 medium-sized cookies 1x
- Category: Dessert
- Method: Baking
- Cuisine: American
- Diet: Vegetarian
Description
Candy Cane Cookies are festive peppermint-flavored treats that combine a tender buttery base with a vibrant swirl of red and white, perfect for holiday celebrations. These colorful cookies deliver a sweet and minty flavor with a delightful buttery texture, making them a magical addition to your Christmas cookie platter.
Ingredients
Wet Ingredients
- 1 cup unsalted butter, softened
- 1 cup powdered sugar
- 1 large egg, room temperature
- 1 tsp vanilla extract
- ½ tsp peppermint extract
Dry Ingredients
- 2½ cups all-purpose flour
- ½ tsp salt
Other
- Red gel food coloring
Instructions
- Prepare the dough base: In a large mixing bowl, cream the softened unsalted butter and powdered sugar together until light and fluffy. Add the egg, vanilla extract, and peppermint extract; mix until fully combined.
- Incorporate dry ingredients: Gradually add the all-purpose flour and salt to the wet mixture, stirring until a smooth, firm dough forms. Divide the dough into two equal portions.
- Color the dough: Leave one portion plain white. Add red gel food coloring to the other portion and knead gently until the color is uniform.
- Form the candy cane shapes: Roll out each dough portion into long ropes of similar length. Place the white and red ropes side by side and gently twist them together. Shape the twisted ropes into candy cane shapes or lay straight ropes on a baking sheet lined with parchment paper.
- Chill the dough: Refrigerate the shaped dough for at least 30 minutes to firm it up and help maintain the shape during baking.
- Bake the cookies: Preheat the oven to 350°F (175°C). Arrange the shaped dough on a baking sheet with parchment and bake for 10-12 minutes or until the edges are slightly golden but the cookies remain soft.
- Cool and serve: Remove from the oven and allow the cookies to cool on the baking sheet for 5 minutes before transferring them to a wire rack to cool completely. Serve and enjoy your festive candy cane cookies!
Notes
- For extra peppermint flavor, you can sprinkle crushed candy canes on top before baking.
- If dough is too soft, chill it longer to make it easier to handle.
- Use red gel coloring to avoid adding extra liquid that can alter dough consistency.
- Store cookies in an airtight container at room temperature for up to one week.
Keywords: candy cane cookies, peppermint cookies, holiday cookies, Christmas cookies, festive treats