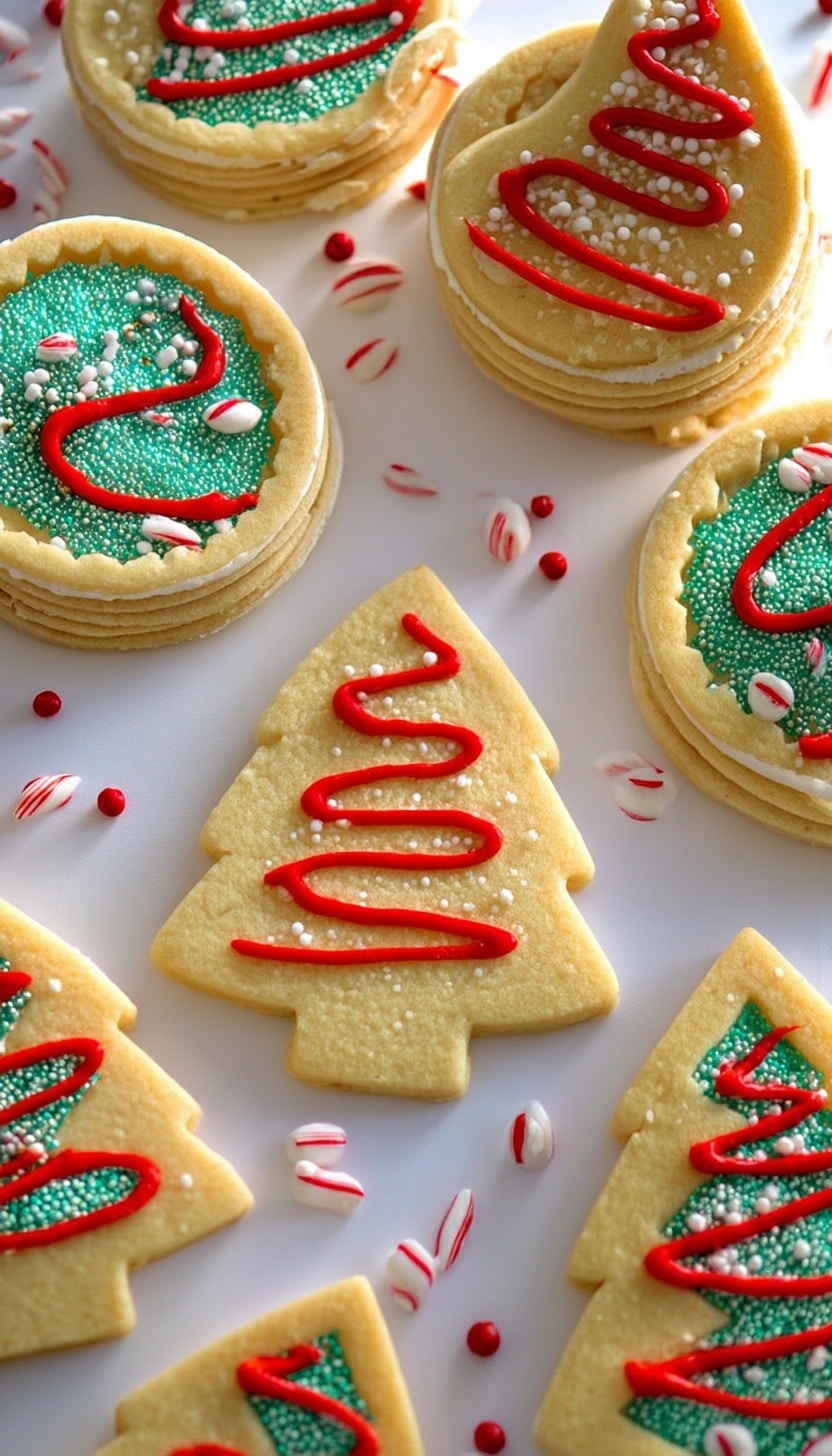
Little Debbie Christmas Tree Cake Cookies Recipe
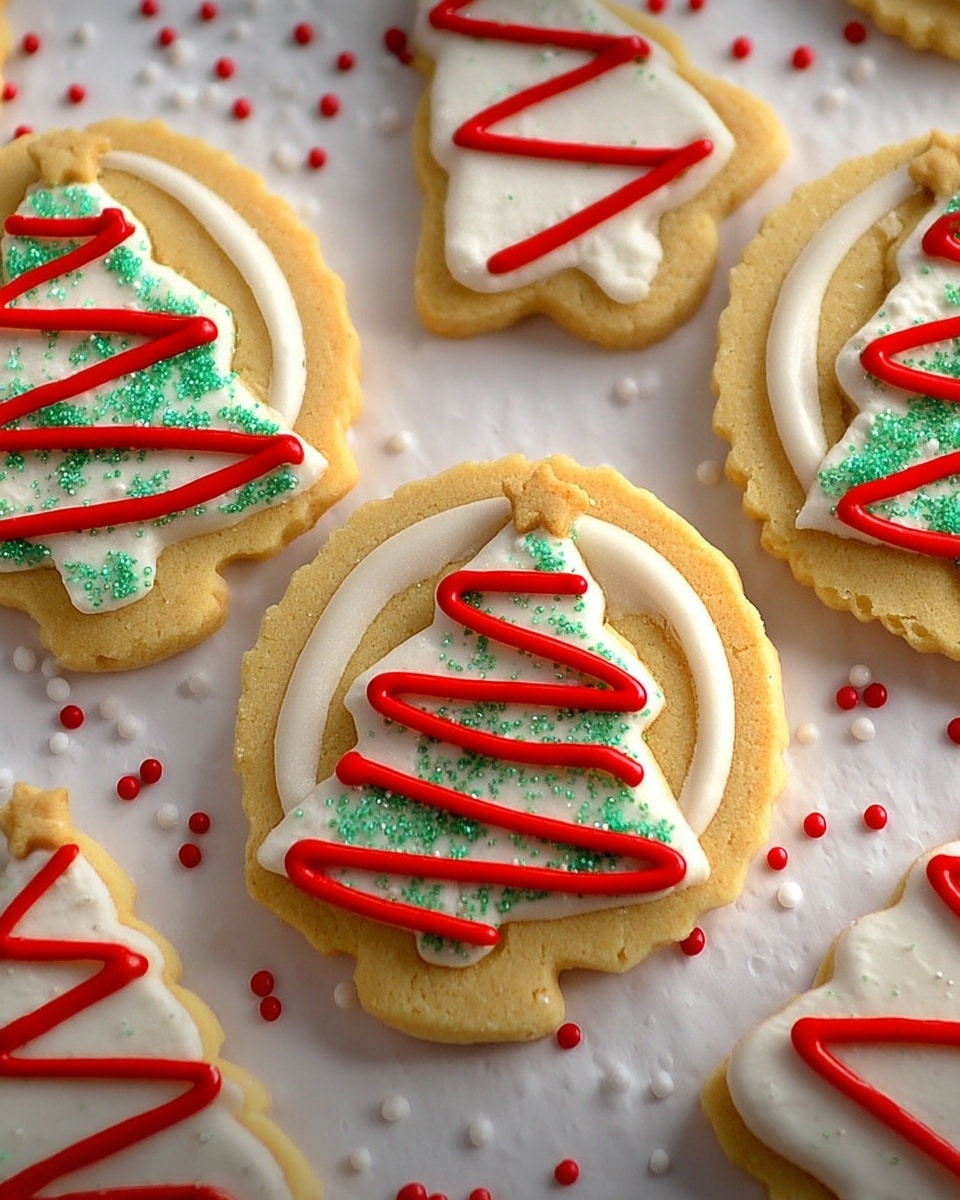
If you’ve ever enjoyed those charming Little Debbie Christmas Tree Cakes, then you’re in for a treat! This Little Debbie Christmas Tree Cake Cookies Recipe lets you recreate the festive magic in cookie form. Crispy on the edges, soft in the center, and sandwiched with creamy vanilla buttercream filling—these cookies bring all the nostalgic holiday vibes to your kitchen.
What I love most is how perfect these cookies are for holiday parties or cozy family gatherings. They’re festive, fun to make, and the red and green accents really bring that Christmas spirit to the table. Plus, making them yourself means you can adjust sweetness and even add your personal flair, which I’m excited to share with you!
Ingredients You’ll Need
This recipe combines simple pantry staples with a few festive toppings to make the magic happen. Choosing good-quality butter and fresh vanilla extract really makes a difference in flavor, so don’t skip those details!
- All-purpose flour: The sturdy base that gives the cookies a perfect structure without being too dense.
- Salt: Just a pinch to enhance all those sweet flavors.
- Baking powder: Helps give the cookies a slight lift for a tender crumb.
- Butter: I recommend unsalted and softened to room temperature for smooth mixing and the creamiest texture.
- Sugar: Regular granulated sugar adds that classic sweetness and a slight crunch once baked.
- Egg: Room temperature eggs work best to keep the dough uniform and well blended.
- Vanilla extract: This makes a big difference in flavor—use pure vanilla extract for that rich aroma.
- Red food gel: For that iconic festive tint in the filling that screams Christmas!
- Green sugar sprinkles: Adds a fun and colorful crunch on the edges, mimicking those classic Little Debbie Christmas trees.
Variations
One of the best parts about recipes like this is how easy it is to make them your own. I often play around with a few tweaks to match different occasions or dietary needs—you should too!
- Gluten-Free Version: I swapped the flour for a gluten-free blend once, and the cookies held up beautifully without losing any of that delightful texture.
- Chocolate Buttercream Filling: Adding cocoa powder to the buttercream makes for a delightful twist if you’re a chocolate lover like me.
- Sprinkle Colors: Not just for Christmas—you can switch to pastel sprinkles for Easter or orange and black for Halloween to make this recipe year-round fun!
- Egg Substitute: For an egg-free option, I’ve had success with flaxseed meal mixed with water; it’s a neat trick that keeps the dough from getting crumbly.
How to Make Little Debbie Christmas Tree Cake Cookies Recipe
Step 1: Prepare the Dry Ingredients
Start by whisking together the all-purpose flour, salt, and baking powder in a bowl. This step might seem simple, but it’s important to make sure those leavening agents are evenly distributed, so you get a consistent rise in every cookie.
Step 2: Cream Butter and Sugar
In a separate large bowl, beat the softened butter with the sugar until you get a fluffy, light texture—this usually takes about 3-4 minutes with an electric mixer. The fluffiness here is the secret to tender cookies that melt in your mouth.
Step 3: Add Egg and Vanilla
Next, mix in the egg followed by the vanilla extract. Make sure your egg is at room temperature to avoid lumps, and mix just until combined. This helps keep the dough silky smooth.
Step 4: Combine Wet and Dry Ingredients
Gradually add the dry ingredients to the wet mixture and mix on low speed. Don’t overmix at this point; you want to combine them until just smooth to keep the cookies tender instead of tough.
Step 5: Shape and Decorate
Roll out the dough gently and use a cookie cutter or a knife to shape little triangles that look like Christmas trees. Dip the edges in green sugar sprinkles for that festive touch. I find chilling the dough for 15 minutes before cutting helps keep the shapes crisp and easier to handle.
Step 6: Bake to Perfection
Bake the cookies at 350°F (175°C) for about 10-12 minutes or until the edges are lightly golden. Keep an eye on them—overbaking dries them out, and you want that soft center that’s so satisfying.
Step 7: Make the Vanilla Buttercream Filling
While the cookies cool, whip up the buttercream by beating the unsalted softened butter until creamy. Gradually add confectioner’s sugar, salt, and vanilla extract, then slowly add heavy cream until you reach a smooth spreading consistency. Add a drop or two of red food gel to get that festive color—it’s not only pretty but adds charm to the cookie sandwiches.
Step 8: Assemble Your Cookies
Once the cookies are completely cooled, spread a generous amount of the vanilla buttercream on one cookie and sandwich it with another. Press lightly to spread the filling evenly. These little sandwiches are delicate, so be gentle when stacking!
How to Serve Little Debbie Christmas Tree Cake Cookies Recipe
Garnishes
I love to finish these cookies with a light dusting of powdered sugar for an extra snowy effect. Sometimes, I add tiny edible silver balls or star-shaped sprinkles to add more sparkle during holiday parties—it definitely catches everyone’s eye!
Side Dishes
These little tree cookie sandwiches pair wonderfully with a warm cup of hot cocoa or your favorite holiday tea. For gatherings, I serve them alongside a cheese platter and fresh fruit to balance the sweet richness.
Creative Ways to Present
For special occasions, I like to arrange the cookies standing up in a circular pattern to mimic a Christmas tree centerpiece. You can tie little ribbons around each cookie bag if gifting, or layer them on a tiered dessert tray with fairy lights for an enchanting display.
Make Ahead and Storage
Storing Leftovers
Store leftover cookies in an airtight container at room temperature for up to 3 days. If you want them softer, you can place a slice of bread in the container—the cookies absorb moisture and stay tender.
Freezing
I’ve had great success freezing both the cookie dough and the fully assembled cookies. For dough, wrap it tightly in plastic and freeze for up to a month. Assemble after baking and cooling. Assembled cookies freeze well too—just thaw them in the refrigerator overnight.
Reheating
To refresh leftover cookies, pop them in the microwave for 10 seconds to soften the buttercream slightly. Avoid longer microwaving or reheating in an oven as the buttercream can melt or the cookies can become too hard.
FAQs
-
Can I use different sprinkles instead of green sugar sprinkles?
Absolutely! While green sugar sprinkles give that classic Christmas tree look, you can use any colored sprinkles or sanding sugar you like to match your theme. Just press them gently onto the edges right after shaping the dough for best adhesion.
-
Do I have to use red food gel for the filling?
Red food gel is key for the traditional look but is optional. If you prefer, you can leave the buttercream white or add other colors depending on your holiday theme. The gel also adds a vibrant pop, so I recommend at least trying it!
-
How can I make these cookies more kid-friendly?
Kids love getting involved with decorating! You can set up a decorating station with various sprinkles and colored buttercream. Let them press their favorite decorations on the edges before baking and spread the filling together—it’s a fun holiday activity.
-
Can I prepare the dough ahead of time?
Yes! In fact, chilling the dough in the fridge for up to 24 hours actually improves the flavor and makes it easier to handle when cutting shapes. Just bring it back to a slightly softened state before rolling out.
Final Thoughts
This Little Debbie Christmas Tree Cake Cookies Recipe holds a special place in my heart every holiday season. It’s such a joy to make and share with loved ones, and the combination of buttery cookies and creamy filling is downright irresistible. I hope you give this recipe a try and create your own festive memories—just like I did right here in my kitchen, laughing and decorating alongside family and friends!
Print
Little Debbie Christmas Tree Cake Cookies Recipe
- Prep Time: 20 minutes
- Cook Time: 10 minutes
- Total Time: 40 minutes
- Yield: 24 cookies (12 sandwich cookies) 1x
- Category: Dessert
- Method: Baking
- Cuisine: American
Description
These festive Little Debbie Christmas Tree Cake Cookies combine tender buttery sugar cookies with a smooth vanilla buttercream filling, decorated to look like charming Christmas trees with red food gel and green sugar sprinkles. Perfect for holiday celebrations or as a sweet seasonal treat.
Ingredients
Cookies
- 2 cups all-purpose flour
- 1/4 tsp salt
- 1/4 tsp baking powder
- 1/2 cup butter, softened
- 1 cup sugar
- 1 egg, room temperature
- 2 tsp vanilla extract
- Red food gel, for decorating
- Green sugar sprinkles, for decorating
Vanilla Buttercream Filling
- 3/4 cup unsalted butter, room temperature
- 3 1/2 cups confectioner’s sugar
- 1/4 tsp salt
- 1 tsp vanilla extract
- 3–5 tbsp heavy whipping cream
- 1–2 drops red food gel
Instructions
- Prepare the Cookie Dough: In a bowl, whisk together the all-purpose flour, salt, and baking powder until combined. In a separate larger bowl, cream the 1/2 cup softened butter with 1 cup sugar until light and fluffy. Add the egg and 2 teaspoons vanilla extract to the creamed mixture and beat well.
- Combine Dry and Wet Ingredients: Gradually mix the dry flour mixture into the wet ingredients until a smooth dough forms. Be careful not to overmix to keep the cookies tender.
- Shape and Bake Cookies: Preheat your oven to 350°F (175°C). Roll out the dough on a lightly floured surface to about 1/4-inch thickness. Cut into Christmas tree shapes using a cookie cutter. Place the cookies on a parchment-lined baking sheet about 1 inch apart. Bake for 8-10 minutes or until edges are lightly golden. Allow cookies to cool completely on wire racks.
- Make Vanilla Buttercream Filling: In a mixing bowl, beat 3/4 cup unsalted butter until creamy. Gradually add 3 1/2 cups confectioner’s sugar, 1/4 teaspoon salt, 1 teaspoon vanilla extract, and 3 to 5 tablespoons heavy whipping cream, adjusting the cream to reach a spreadable consistency. Add 1-2 drops of red food gel for a subtle pink tint and mix until evenly incorporated.
- Assemble Cookies: Spread a generous amount of the vanilla buttercream filling onto the underside of one cookie. Sandwich with another cookie to form a filled sandwich cookie.
- Decorate: Using red food gel, add small decorations or dots resembling Christmas tree ornaments on the top of each cookie. Sprinkle green sugar sprinkles over the top to mimic pine needles or garlands for that festive look.
- Serve and Store: Let the assembled and decorated cookies set for about 30 minutes to ensure the filling firms up slightly. Store in an airtight container at room temperature for up to 5 days, or refrigerate for longer freshness.
Notes
- For best results, ensure the butter for both the dough and frosting is at room temperature for easier mixing.
- You can adjust the amount of red food gel in the buttercream to achieve your preferred color intensity.
- If you don’t have a Christmas tree cookie cutter, a triangle shape can also work well.
- These cookies can be frozen before assembly; freeze the baked cookies and filling separately, then assemble once thawed.
- Make sure the cookies are completely cooled before adding the buttercream to avoid melting.
Keywords: Christmas cookies, sugar cookies, holiday treats, sandwich cookies, buttercream filling, festive desserts