Little Debbie Cake Balls Recipe
If you’ve ever craved a bite-sized dessert that’s both nostalgic and irresistibly delicious, this Little Debbie Cake Balls Recipe is exactly what you need. I love how these little treats take your favorite Christmas tree cakes and transform them into festive, bite-sized treasures perfect for holiday parties, potlucks, or an anytime sweet craving. They’re so easy to make that even a beginner baker can whip them up without breaking a sweat.
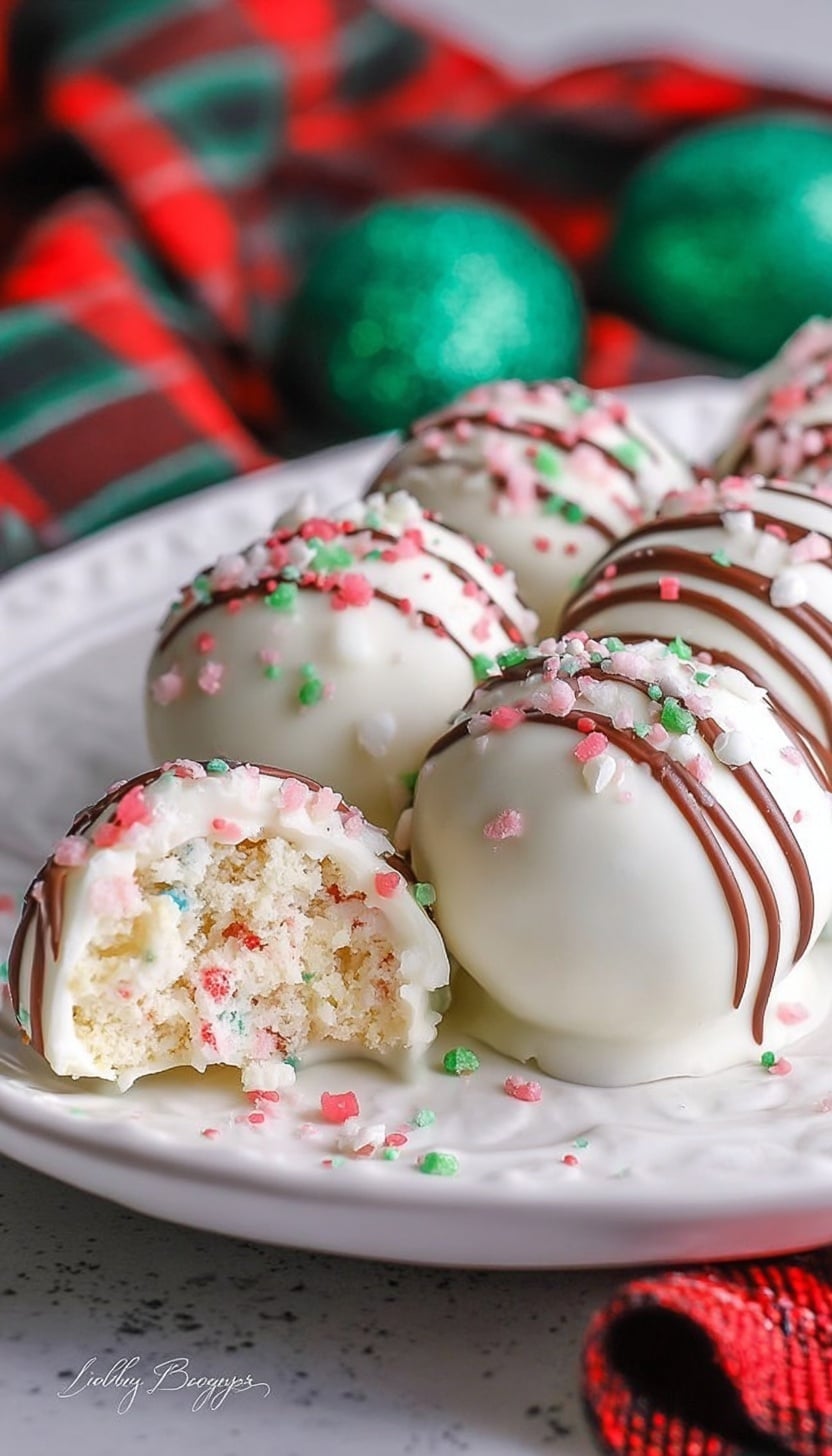
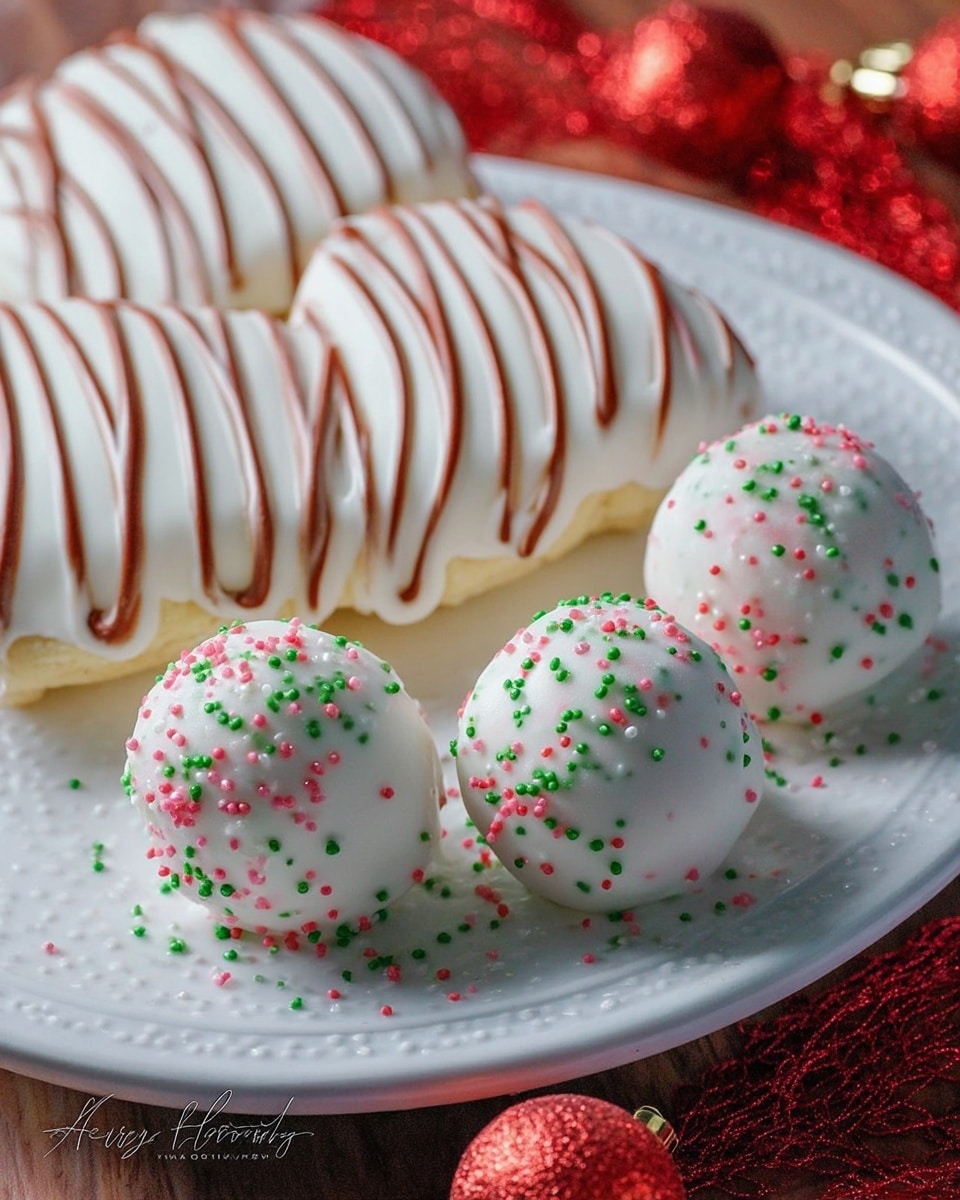
What makes this Little Debbie Cake Balls Recipe really stand out for me is the creamy texture that comes from mixing cream cheese with the crumbled Little Debbie cakes — it’s like a dreamy dance between soft cake and tangy smoothness. Plus, coating everything in white candy melts and decorating with red and green sanding sugar makes these cake balls pop with holiday cheer. Whether you’re gifting them or enjoying at home, they’re always a crowd-pleaser.
Ingredients You’ll Need
These ingredients work hand in hand to create that perfect balance of flavor and texture. When shopping, try to pick quality cream cheese and candy melts for the best results — they make the assembly and coating process so much smoother.
- Vanilla Little Debbie Christmas Tree Cakes: The star of the show, these provide a moist, fruity base that’s already festive.
- Cream cheese: Softened to room temperature, it blends beautifully with the crumbled cakes to hold everything together.
- White candy melts: These create that smooth, glossy coating that hardens perfectly for a clean, finished look.
- Red candy melts (optional): For adding fun swirls or accents, these make the cake balls extra festive.
- Red and green colored sanding sugar: Adds sparkle and holiday spirit with a bit of crunchy texture.
Variations
I love making this Little Debbie Cake Balls Recipe my own by tweaking flavors or decorations depending on the occasion. You can really let your creativity shine here, and trust me, your friends will appreciate the personal touch.
- Chocolate cake balls: Swap vanilla Christmas Tree Cakes for chocolate-flavored ones for a rich twist—I did this once for a birthday party and everyone went crazy for the chocolate version!
- Gluten-free adaptation: Use gluten-free cake options if you or your guests have dietary restrictions, and the cream cheese combo will still bind everything beautifully.
- Seasonal flavors: Try adding a pinch of cinnamon or peppermint extract to the cream cheese mixture for an extra holiday kick.
- Nutty crunch: Roll the dipped cake balls in finely chopped nuts instead of sanding sugar for extra texture.
How to Make Little Debbie Cake Balls Recipe
Step 1: Crumble the Christmas Tree Cakes
Start by unwrapping those vanilla Little Debbie Christmas Tree Cakes and crumbling them into a large bowl. I like to use my hands for this—there’s something satisfying about the feel and it helps break the cakes down evenly. You want about fine crumbs but not powdery; think bigger than sand, smaller than cookie chunks.
Step 2: Mix in the cream cheese
Add your room temperature cream cheese to the crumbled cakes. Using a spatula or your hands, mix gently until everything is combined and forms a dough-like consistency. If it feels too wet, add a little more crumbed cake, but usually, the cream cheese blends just right to hold it all together without being sticky.
Step 3: Shape into balls
Roll the mixture into 1-inch balls using your hands and place them on a parchment-lined baking sheet. Be gentle but firm when rolling to avoid cracking. I find this step really fun because it feels like rolling cookie dough—but in the end, you get these perfect round cake balls that hold their shape beautifully.
Step 4: Chill before dipping
Pop the tray in the fridge for about 30 minutes to let the balls firm up. This makes the dipping process smoother since chilled cake balls don’t fall apart in the warm melted candy. This little pause step is a game changer for neat, slick coating!
Step 5: Dip in melted candy
Melt the white candy melts in a microwave-safe bowl, stirring every 30 seconds until silky smooth. Using a fork or dipping tool, coat each cake ball evenly in the white melts, then gently tap off excess. If you want, add some red candy melts for drizzling swirls once the white coating is set—this adds such a festive flair!
Step 6: Decorate and let set
Immediately sprinkle the dipped balls with red and green sanding sugar before the candy coating hardens. The sugar adds both sparkle and a little crunch, making these little bites more fun to eat. Then, set them on parchment to let the coating fully harden, about 15-20 minutes at room temperature.
How to Serve Little Debbie Cake Balls Recipe
Garnishes
I love to top these cake balls with extra sprinkles or tiny holiday-themed edible decorations, especially for parties. Sometimes, a dusting of powdered sugar gives them a snowy touch that looks just adorable on a festive platter.
Side Dishes
Pairing these cake balls with a hot cup of cocoa or coffee instantly elevates the experience—perfect for afternoon snacks or dessert tables. I also like to serve them alongside fresh fruit or a scoop of vanilla ice cream for a balanced treat.
Creative Ways to Present
For holiday gatherings, try stacking Little Debbie Cake Balls Recipe on a tiered dessert stand or arranging them in festive cupcake liners to add pops of color. A decorative platter lined with evergreen sprigs or candy canes can turn these cake balls into a centerpiece everyone will talk about!
Make Ahead and Storage
Storing Leftovers
I store leftover cake balls in an airtight container in the fridge to keep them fresh and firm. They usually last up to 5 days well, but honestly, mine never last that long because they’re so tempting!
Freezing
If you want to make these ahead of time, freezing works like a charm. Just freeze the dipped and decorated cake balls on a tray first, then transfer to a freezer-safe container. When I’ve done this, I find they keep for up to 3 months without losing flavor or texture.
Reheating
Since these are cold treats, I usually let frozen cake balls thaw in the fridge for a few hours before serving. But if you’re in a hurry, just leave them out at room temperature for about 20 minutes. They taste just as great slightly chilled or closer to room temp!
FAQs
-
Can I use other flavors of Little Debbie cakes for this recipe?
Absolutely! Though the recipe is crafted with vanilla Christmas Tree Cakes for their texture and subtle fruit flavor, you can experiment with chocolate or snack cake varieties. Just keep in mind that flavors and texture might vary slightly, so adjust cream cheese quantities if needed.
-
What if the candy melts are too thick for dipping?
Thin out candy melts by adding a small amount of shortening or coconut oil while melting. Stir gently to keep the consistency smooth and perfect for coating the cake balls evenly.
-
Can I make these cake balls ahead of time?
Yes! These cake balls freeze beautifully and can be made weeks ahead. Just store in an airtight container in the freezer and thaw in the fridge before serving.
-
How do I prevent the cake balls from cracking when dipping?
Make sure your cake balls are well chilled before dipping. Warm cake balls are more likely to fall apart. Also, handle them gently during dipping and tap off excess coating to avoid cracking.
-
Can I use regular chocolate instead of candy melts?
You can, but I recommend candy melts because they harden smoothly and hold up better at room temperature. If you use chocolate, temper it properly for best results and be mindful that it may not coat as thickly.
Final Thoughts
Honestly, the Little Debbie Cake Balls Recipe has become a favorite in my kitchen for good reason — it combines ease, flavor, and festive fun all in one. If you love quick, nostalgic treats that impress with minimal effort, this recipe is definitely worth trying. I’d recommend making a batch this weekend and sharing them with your closest friends or family; trust me, once they try these, they’ll be asking for the recipe too!
Print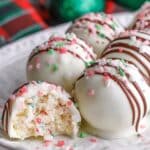
Little Debbie Cake Balls Recipe
- Prep Time: 20 minutes
- Cook Time: 0 minutes
- Total Time: 1 hour 20 minutes
- Yield: About 36 cake balls 1x
- Category: Dessert
- Method: No-Cook
- Cuisine: American
- Diet: Vegetarian
Description
These delightful Little Debbie Cake Balls are an easy and festive treat perfect for the holiday season. Made by combining crumbled vanilla Christmas Tree Cakes with creamy cream cheese, then coated in white candy melts and decorated with red and green sanding sugar, these bite-sized sweets are sure to impress at any holiday gathering.
Ingredients
Ingredients
- Two 5 count boxes vanilla Little Debbie Christmas Tree Cakes, crumbled
- 1 8 ounce package cream cheese, room temperature
- 1 16 ounce package white candy melts
- ¼ cup red candy melts, melted (optional)
- Red and green colored sanding sugar
Instructions
- Prepare the Cake Mixture: Crumble the vanilla Little Debbie Christmas Tree Cakes into a large mixing bowl. Add the room temperature cream cheese to the bowl and mix thoroughly until the mixture is smooth and evenly combined.
- Shape the Cake Balls: Using your hands or a small cookie scoop, form the cake mixture into 1-inch balls. Place the balls onto a baking sheet lined with parchment paper and refrigerate for at least 1 hour, or until firm.
- Melt the Candy Coating: While the cake balls chill, melt the white candy melts according to the package instructions in a microwave-safe bowl, stirring every 30 seconds until smooth.
- Dip the Cake Balls: Remove the cake balls from the refrigerator. Using a fork or toothpick, dip each ball into the melted white candy melts, ensuring they are fully coated. Allow excess coating to drip off, then place the coated balls back onto the parchment paper.
- Decorate: Immediately sprinkle the coated cake balls with red and green colored sanding sugar. If desired, drizzle the melted red candy melts over some of the cake balls for an extra festive touch.
- Set and Serve: Let the coated and decorated cake balls set at room temperature or refrigerate briefly to harden the candy coating. Serve chilled or at room temperature.
Notes
- Ensure the cream cheese is at room temperature for easy mixing.
- Chilling the cake balls before dipping helps them hold their shape better.
- Use a toothpick or dipping tool for easier candy coating application.
- You can substitute candy melts colors as per your holiday theme or preference.
- Store cake balls in an airtight container in the refrigerator for up to 5 days.
Keywords: Little Debbie Cake Balls, Christmas Tree Cake Balls, Holiday Treats, No-Bake Cake Balls, Festive Desserts