Hot Cocoa Melting Mugs Recipe
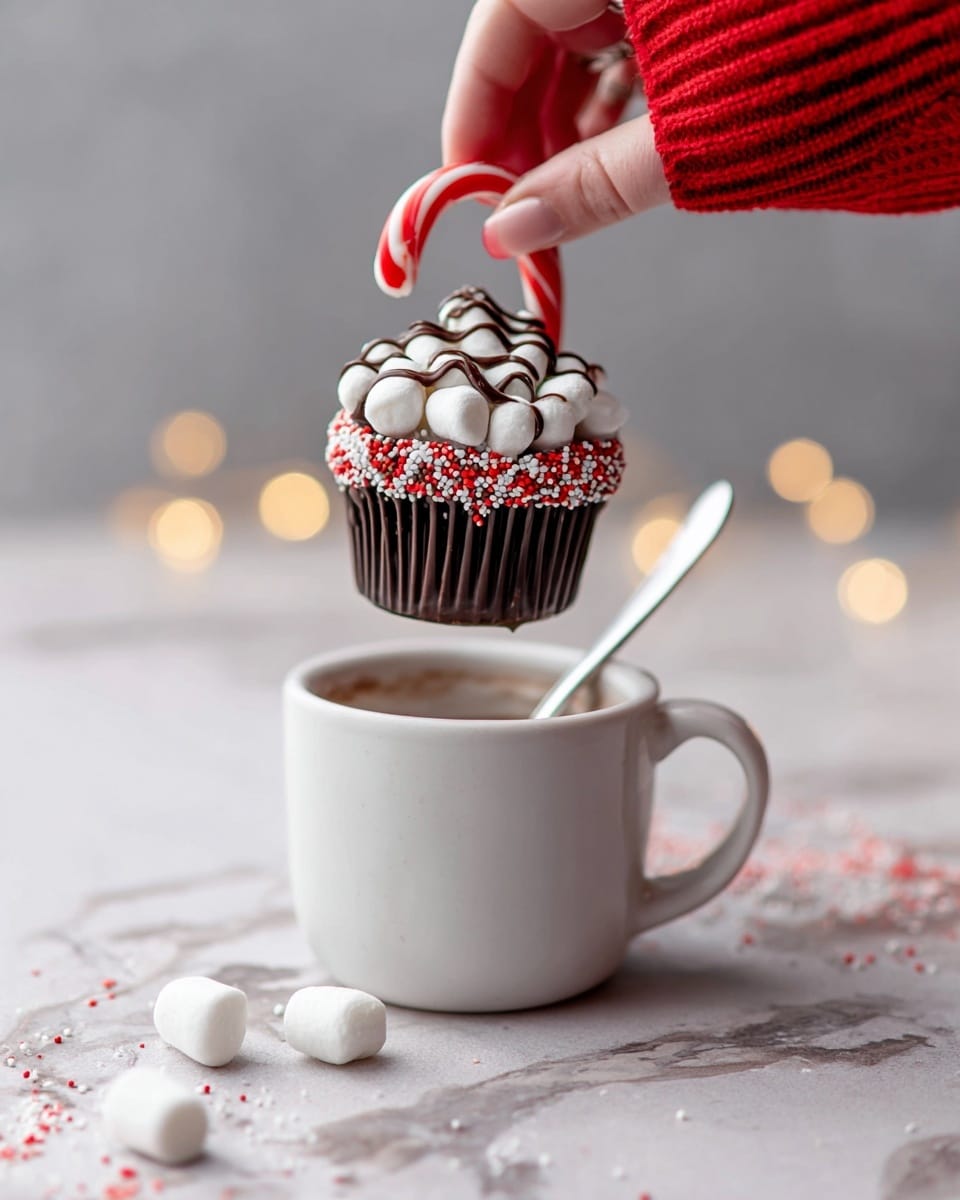
If you’re anything like me, there’s nothing cozier than a steaming cup of hot cocoa when the weather turns chilly. That’s exactly why I’m so excited to share this Hot Cocoa Melting Mugs Recipe with you—it’s like bringing a little magic to your kitchen. Instead of just stirring cocoa into milk, these charming melting mugs are edible chocolate shells filled with all your favorite hot cocoa goodness. They melt delightfully as you pour in warm milk, turning an ordinary cup into a fun experience that feels extra special.
What really makes this recipe a winner for me is how perfect it is for those simple, comfy moments—like a quiet evening in or when you have guests stopping by for an impromptu treat. Plus, it’s surprisingly easy to make and uses basic ingredients you might already have on hand. The Hot Cocoa Melting Mugs Recipe is a total crowd-pleaser and always sparks a bit of joy, especially when you see the chocolate melting away in front of your eyes.
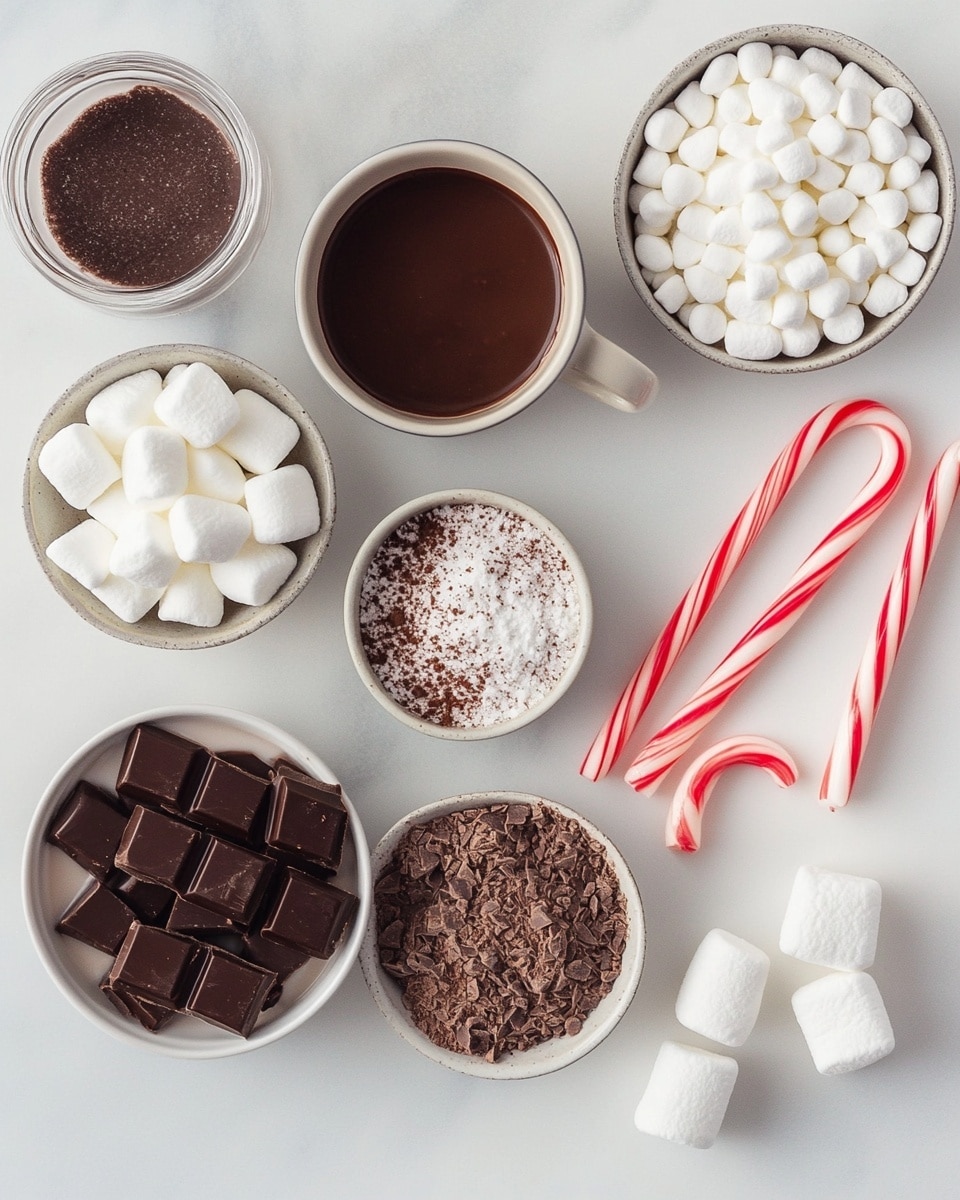
Ingredients You’ll Need
Every ingredient in this Hot Cocoa Melting Mugs Recipe plays an important role, from building the rich cocoa flavor to creating those beautiful edible mugs. Choosing quality chocolate really makes a difference, so I always go for a good semi-sweet variety. The combination of instant milk powder, cocoa, and powdered sugar gives you that creamy, sweet hot chocolate flavor you crave.
- Instant milk powder: This helps make your hot cocoa creamy without needing as much fresh milk. It’s also great if you want a richer texture.
- Powdered sugar: I prefer powdered sugar here because it dissolves smoothly and sweetens evenly without grit.
- Unsweetened cocoa powder: Cocoa is the star of the show—choose a good-quality one for deep chocolate flavor.
- Pinch of salt: Just a tiny pinch helps balance and enhance the chocolate’s richness.
- Semi-sweet chocolate: For the melting mugs, semi-sweet chocolate works perfectly because it has that balance of sweetness and intensity.
- Festive sprinkles or crushed candy canes (optional): Great for adding a little flair and a pop of color around the mug rims, especially during holidays.
- Mini marshmallows: A classic hot cocoa topper—you can never have too many.
- Candy canes: Beyond decoration, these add a lovely hint of peppermint to your drink.
- Whole milk: The warm liquid you’ll pour into your mugs to melt the chocolate—whole milk gives it that creamy, satisfying finish.
- Water: This slightly lightens the texture when mixed with milk, balancing richness without diluting flavor.
Variations
I love making this Hot Cocoa Melting Mugs Recipe my own depending on who I’m serving or the time of year. Don’t be afraid to get creative—your guests will appreciate the thoughtful tweaks just as much as the base recipe.
- Dairy-Free Variation: Swap the milk powder and whole milk for coconut or almond milk powder and your favorite dairy-free milk. I’ve done this with great success and it still melts beautifully.
- Spiced Hot Cocoa: Add a pinch of cinnamon or cayenne to the cocoa powder for a warming twist. This is my go-to when I want an extra cozy vibe!
- Mint Chocolate: Mix crushed peppermint candies right into the chocolate shell before it sets, and serve with a mini candy cane stirrer. It’s refreshingly festive.
- Extra Indulgent: Use dark chocolate instead of semi-sweet for a richer experience, and add a splash of flavored liqueur in your serving milk if you’re feeling fancy.
How to Make Hot Cocoa Melting Mugs Recipe
Step 1: Prepare the Chocolate Mugs
Start by finely chopping your semi-sweet chocolate—this makes it melt more evenly and quickly. Then, gently melt the chocolate in a double boiler or microwave in short bursts, stirring often so it doesn’t burn. Once smooth and glossy, spoon the chocolate into silicone or metal mug-shaped molds, making sure to coat the sides evenly but not too thickly. Pop the molds into the fridge for about 20 minutes until the chocolate hardens. If you want to add festive sprinkles or crushed candy canes, gently press them onto the rims while the chocolate is still soft.
Step 2: Make the Hot Cocoa Mix
While the chocolate mugs are chilling, mix together your instant milk powder, powdered sugar, unsweetened cocoa powder, and a pinch of salt in a bowl. This dry mix is what gives your hot cocoa that classic rich flavor, and having it ready will speed things up when it’s time to serve.
Step 3: Assemble and Serve
When you’re ready to enjoy, place your hardened chocolate mugs on a heat-proof surface or on top of regular mugs for stability. Pour ½ cup water and ½ cup whole milk into a small saucepan and warm until very hot but not boiling. Pour the hot milk mixture right into your chocolate mugs, stirring gently as the chocolate shell melts into a creamy hot cocoa. Add a handful of mini marshmallows on top to finish—watch them toast if you want to get fancy!
How to Serve Hot Cocoa Melting Mugs Recipe
Garnishes
I keep it simple with a generous handful of mini marshmallows—there’s just something so perfect about watching them slowly melt into the cocoa. During the holidays, I also love adding a candy cane on the side or even a sprinkle of cinnamon on top. If you prefer, dust a little cocoa powder or grated chocolate for an elegant finish. Garnishes really bring the experience home and make it feel like a true treat.
Side Dishes
Pair these melting mugs with buttery sugar cookies, cinnamon rolls, or even some flaky croissants for a delicious coffee-break combo. For something savory, light sandwiches or toasted nuts complement the sweetness beautifully. I’ve found that simple, warm snacks keep the vibe casual and cozy.
Creative Ways to Present
I once surprised my family by serving these in clear glass mugs so you could watch the chocolate melt and swirl—it’s like mini chocolate art! For holiday parties, setting each mug on a bed of festive napkins and adding a cinnamon stick as a stirrer really steps up the presentation. You could even customize each mug’s chocolate shell with colored sprinkles or edible glitter for a party vibe.
Make Ahead and Storage
Storing Leftovers
If you happen to have leftover chocolate mugs, store them in an airtight container in a cool, dry place—no fridge needed unless your kitchen is warm. They keep beautifully for up to two weeks, ready to melt into a quick hot cocoa anytime. Just handle them gently so they don’t crack.
Freezing
I’ve frozen the chocolate mugs before when I made large batches for friends, and it works great! Wrap each mug in plastic wrap and place in a freezer-safe bag to protect from freezer burn. When you’re ready, just thaw them at room temperature for about 20 minutes before using.
Reheating
Since the mugs are meant to melt with warm milk, you don’t really reheat them on their own. For leftover hot cocoa though, gently warm in a saucepan over low heat or microwave in short bursts, stirring in between to keep it smooth and creamy. Avoid boiling to preserve that luscious texture.
FAQs
-
Can I make the chocolate mugs in advance?
Absolutely! The chocolate mugs hold up well when made ahead of time. Just store them in an airtight container in a cool place, and they’ll be ready to melt into your hot cocoa whenever you want.
-
What’s the best chocolate to use for melting mugs?
Semi-sweet chocolate is my favorite because it strikes the perfect balance of sweet and rich. Just be sure to chop it finely so it melts evenly. You can also use dark chocolate for more intensity or milk chocolate if you prefer a sweeter cup.
-
Can I make these mugs dairy-free?
Yes! Replace the whole milk with a plant-based milk like almond or oat, and use dairy-free chocolate. For the powdered milk, you can find non-dairy powdered alternatives or skip it and add a bit more cocoa and sweetener.
-
How do I prevent the chocolate from breaking when assembling?
Handle your chocolate mugs gently, especially when unmolding. Using silicone molds really helps since they’re flexible and less prone to cracks. Also, don’t make the chocolate layer too thin—aim for even, moderate thickness.
-
Can I add flavored extracts to the cocoa mix?
Definitely! A drop or two of vanilla, peppermint, or even orange extract can elevate your hot cocoa flavor. Just add these to the warm milk before pouring it into the chocolate mugs.
Final Thoughts
This Hot Cocoa Melting Mugs Recipe has quickly become a favorite in my home because it marries simplicity with a dash of whimsy. Sharing it with friends always brings a smile, and there’s something so satisfying about watching the chocolate dissolve into rich, velvety cocoa right before your eyes. I genuinely hope you give it a try—it’s such a fun twist on traditional hot chocolate that’s perfect for making cozy memories. You’ll love how easy it is to impress and how comforting the results feel, sip after blissful sip.
Print
Hot Cocoa Melting Mugs Recipe
- Prep Time: 20 minutes
- Cook Time: 10 minutes
- Total Time: 30 minutes
- Yield: 4 melting mugs 1x
- Category: Beverage
- Method: No-Cook
- Cuisine: American
Description
Enjoy a cozy and festive treat with these Hot Cocoa Melting Mugs featuring rich semi-sweet chocolate cups that melt perfectly when hot milk and water are poured in. Topped with mini marshmallows and candy canes, this comforting drink is perfect for holiday gatherings or a warm winter indulgence.
Ingredients
Hot Cocoa Mix
- ¼ cup (20g) instant milk powder
- ¼ cup (30g) powdered sugar
- 2 tablespoons unsweetened cocoa powder
- Pinch of salt
Mug Shaped Melting Cups
- 6 ounces (170g) semi-sweet chocolate (about 1 cup finely chopped)
- Festive sprinkles and/or crushed candy canes (optional for decorating the rims)
- Mini marshmallows
- Candy canes
For Serving
- ½ cup (120mL) whole milk per melting mug (2 cups total for 4 mugs)
- ½ cup (120mL) water per melting mug (2 cups total for 4 mugs)
Instructions
- Prepare the hot cocoa mix: In a bowl, combine instant milk powder, powdered sugar, unsweetened cocoa powder, and a pinch of salt, mixing thoroughly to create a smooth cocoa blend.
- Make the melting cups: Finely chop semi-sweet chocolate, then melt it gently using a double boiler or microwave in short bursts, stirring until smooth and shiny.
- Form the chocolate mugs: Using silicone molds shaped like mugs, pour melted chocolate inside, coating the walls evenly. Add festive sprinkles or crushed candy canes on the rims if desired. Place in the refrigerator to set until fully hardened.
- Assemble: Once the chocolate mugs have hardened, fill each with 1 tablespoon of the prepared hot cocoa mix.
- Serve and enjoy: Place the chocolate mug on a heat-safe surface or glass. Slowly pour in ½ cup whole milk and ½ cup water heated until just warm but not boiling. The chocolate mug will start to melt, blending with the hot liquid to create rich hot cocoa. Top with mini marshmallows and garnish with a candy cane for stirring.
Notes
- Use high-quality semi-sweet chocolate for the best flavor and smooth melting experience.
- Be careful not to overheat the chocolate during melting to avoid burning or seizing.
- To decorate rims, briefly dip them in melted chocolate and then into sprinkles or crushed candy canes before setting.
- Adjust sweetness by varying the amount of powdered sugar in the hot cocoa mix.
- Serve immediately after pouring hot milk and water for the best melting effect.
Keywords: hot cocoa, melting mugs, chocolate cups, festive drink, holiday hot chocolate, warm beverage, winter drink, semi-sweet chocolate