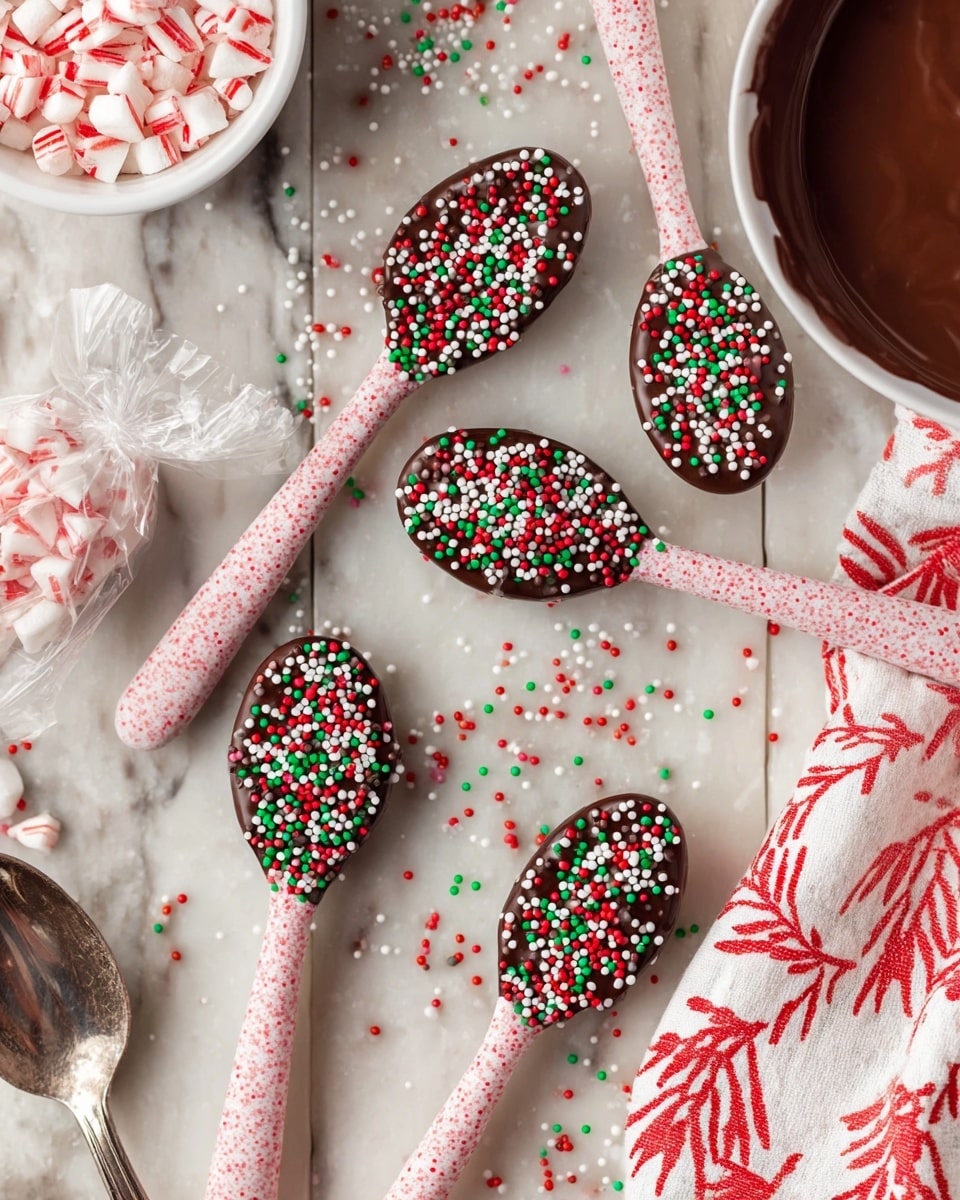
DIY Peppermint Candy Spoons Recipe
There’s something utterly charming about a sweet treat that doubles as a stirring utensil—enter this DIY Peppermint Candy Spoons Recipe! These colorful, festive spoons are not only fun to make but bring a delightful peppermint punch to your hot chocolates, coffees, or even milk. I love having them around during the holidays; they instantly lift the mood and add that homemade touch that’s just so satisfying.
If you’re like me and enjoy little projects that make your gatherings extra special, these peppermint candy spoons fit the bill perfectly. Plus, they’re incredibly simple and require just a handful of ingredients with a minimal time commitment. Whether you’re prepping for a party or just want to jazz up your winter drinks at home, this DIY Peppermint Candy Spoons Recipe is definitely worth trying.
Ingredients You’ll Need
All the magic happens with just three simple ingredients, which blend together to create that crisp peppermint flavor and gorgeous, glossy finish. I find that quality candy melts paired with classic peppermint candy really bring out the best in these spoons — plus, they look stunning!
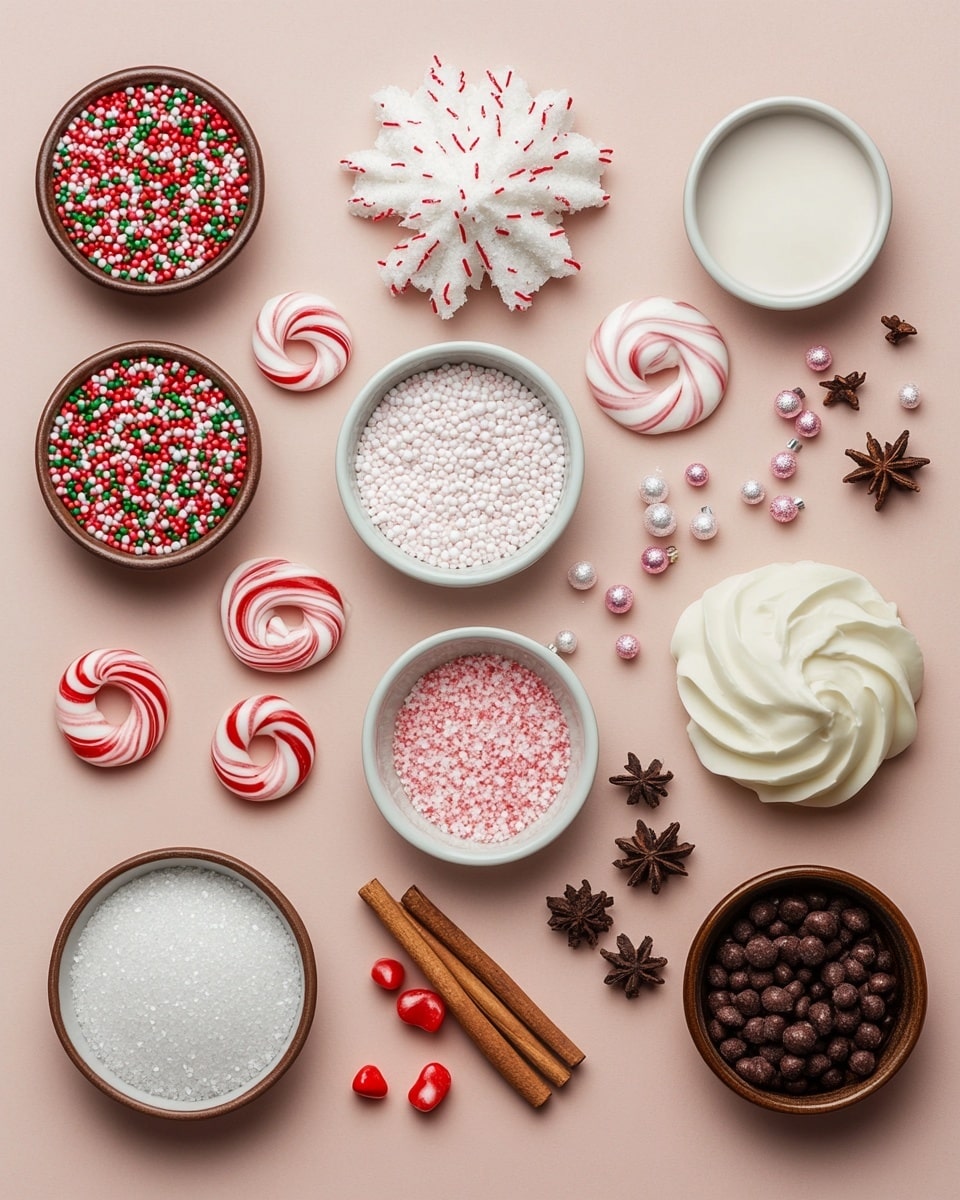
- Starlight Peppermint Candy: These iconic candies crush beautifully and give that authentic peppermint flavor; you want real peppermint, not artificial mint.
- Wilton Candy Melts: Choose colors that match your holiday vibe—white, red, or even pastel shades work well. They melt smoothly, making the spoons glossy and sturdy.
- Holiday Sprinkles: A fun finishing touch! I pick sprinkles with festive shapes and colors to add that extra pop and personality.
Variations
One of the things I love about this DIY Peppermint Candy Spoons Recipe is how easy it is to play around with it. Feel free to match your mood or occasion by swapping out colors or adding a twist to the candy bits—personalization makes it even more fun.
- Chocolate Peppermint: I once dipped the spoons in dark chocolate candy melts before adding crushed peppermint for a richer flavor. It instantly turned a simple spoon into a fancy treat.
- Natural Sweeteners: For a cleaner label, you could try using organic candy melts or even homemade peppermint bark if you’re feeling ambitious.
- Seasonal Shapes: During Easter, I swapped out peppermint for pastel-colored candy and added bunny-shaped sprinkles—super adorable and kid-approved.
How to Make DIY Peppermint Candy Spoons Recipe
Step 1: Prepare Your Workspace and Ingredients
First things first, line a baking sheet with parchment paper to prevent sticking. Crush the Starlight Peppermint Candy by popping them in a zip-top bag and gently pounding with a rolling pin. You want coarse shards—not dust—to get that satisfying peppermint texture and sparkle on the spoons.
Step 2: Melt Your Candy Melts
Use a microwave-safe bowl to melt the Wilton Candy Melts. Heat in 30-second intervals, stirring in between, until smooth and silky. Avoid overheating as candy melts can seize up quickly. I usually like to stop when there are just a few lumps left because stirring helps them melt fully without burning.
Step 3: Dip and Decorate the Spoons
Dip each plastic or wooden spoon into the melted candy, coating the bowl part generously. Sprinkle the crushed peppermint and holiday sprinkles on top immediately while the candy is still wet. This step is crucial—if you wait too long, the candy hardens, and the toppings won’t stick well.
Step 4: Let Them Set
Place your decorated spoons back on the parchment-lined sheet and let them harden. I pop mine in the fridge for about 15-20 minutes to speed up the process. You want the candy to be fully set before handling or packaging.
How to Serve DIY Peppermint Candy Spoons Recipe
Garnishes
I like adding a little extra on top to complement the peppermint vibe—mini marshmallows or a dusting of cocoa powder make a cozy combo. Sometimes, I even add a tiny cinnamon stick alongside for a spicy kick when serving hot beverages.
Side Dishes
These spoons shine when paired with rich desserts or warm drinks. Think gingerbread cookies, snickerdoodles, or a slice of your favorite chocolate cake. They also elevate your latte game during a chilly afternoon break.
Creative Ways to Present
For holiday parties, I’ve wrapped each peppermint candy spoon in clear cellophane tied with a festive ribbon—makes a fantastic little favor guests can take home. Another idea is to stick them in mugs filled with candy cane marshmallows for an inviting hot cocoa station display.
Make Ahead and Storage
Storing Leftovers
I store leftover peppermint candy spoons in an airtight container at room temperature, away from heat or direct sunlight. They hold up well for about two weeks, so you can make a batch ahead of time without worry.
Freezing
Freezing isn’t necessary for these spoons, and I tend not to do it since the texture can change slightly after thawing. But if you do freeze them, wrap them individually and thaw gently at room temperature before use.
Reheating
Reheating isn’t really an option here since the candy hardens—it’s best to enjoy these spoons as is. If the candy gets soft, just allow it to firm back up at room temp or chill briefly, rather than try to remelt.
FAQs
-
Can I use another type of candy instead of Starlight Peppermint Candy?
Absolutely! While Starlight Peppermint Candy offers that classic minty crunch, you can experiment with other peppermint candies or even crushed candy canes. Just keep in mind that larger, coarser pieces give a better texture and visual appeal on the spoons.
-
Are Wooden Spoons okay to use, or should I stick with plastic?
Both work well, but I prefer plastic for this DIY Peppermint Candy Spoons Recipe because they’re easier to clean and have a smooth surface for candy to stick better. If using wooden spoons, make sure they are clean and unused to avoid any off flavors.
-
Can I make these candy spoons vegan or allergen-free?
Yes! Look for vegan candy melts and vegan-friendly peppermint candies, which are increasingly available. Be sure to check ingredient labels for allergens like dairy or nuts, depending on your needs.
-
How long do these peppermint candy spoons last?
Stored properly in an airtight container at room temperature, they’ll last around two weeks, making them a good make-ahead treat for holiday celebrations.
-
What’s the best way to prevent candy melts from seizing?
Heat candy melts slowly in short bursts and stir frequently. Avoid any water contact, as moisture causes candy melts to seize and turn grainy. If you notice thickening, adding a tiny bit of vegetable oil can sometimes help smooth things out.
Final Thoughts
I’ve always found that small touches like these DIY Peppermint Candy Spoons can turn an ordinary cup of cocoa into a cozy moment of joy. Making them yourself brings a sense of accomplishment and, honestly, it’s fun watching little faces light up when they see these colorful, festive spoons swirling in their drinks. I wholeheartedly recommend giving this recipe a shot—you’ll love the look, the taste, and the easy way it spruces up any winter gathering. Plus, once you get the hang of it, you might find yourself playing with new flavors and designs all season long!
Print
DIY Peppermint Candy Spoons Recipe
- Prep Time: 10 minutes
- Cook Time: 5 minutes
- Total Time: 15 minutes
- Yield: Approximately 12 peppermint candy spoons 1x
- Category: Dessert
- Method: No-Cook
- Cuisine: American
- Diet: Vegetarian
Description
Create festive DIY Peppermint Candy Spoons perfect for holiday hot chocolate or as charming edible garnishes. This simple recipe combines crushed Starlight Peppermint Candy with creamy Wilton Candy Melts, finished with colorful holiday sprinkles to add a sweet, minty crunch to your winter drinks and desserts.
Ingredients
Ingredients
- 1 bag Starlight Peppermint Candy (about 12 ounces)
- 1 bag Wilton Candy Melts (approximately 12 ounces), white or colored as preferred
- Holiday Sprinkles, for decoration (about 2 tablespoons)
Instructions
- Prepare the Peppermint Candy: Place the Starlight Peppermint Candy in a strong zip-top bag and crush them into small pieces using a rolling pin or a heavy pan, leaving a mixture of small bits and fine crumbs.
- Melt the Candy Melts: In a microwave-safe bowl, melt the Wilton Candy Melts in 30-second intervals, stirring in between, until smooth and fully melted. Be careful not to overheat to prevent burning.
- Form the Candy Spoons: Spoon the melted candy into spoon-shaped molds or onto a parchment-lined baking sheet creating spoon shapes. Spread evenly using the back of the spoon or a small spatula.
- Add Peppermint and Sprinkles: Immediately sprinkle the crushed peppermint candy and holiday sprinkles over the melted candy before it sets, pressing gently to adhere the pieces.
- Set the Spoons: Allow the candy spoons to cool and harden at room temperature or place them in the refrigerator for about 15-20 minutes until firm.
- Remove and Store: Gently remove the spoons from the molds or peel from the parchment paper. Store the finished peppermint candy spoons in an airtight container at room temperature until ready to use.
Notes
- You can substitute Wilton Candy Melts with any melting chocolate or chocolate wafers if preferred.
- Using spoon-shaped molds will create uniform spoons, but freeform shapes on parchment paper also work well.
- Store in a cool, dry place to prevent melting or sweating, especially if your climate is warm.
- These candy spoons make great gifts when wrapped in clear bags tied with ribbon.
- For a stronger peppermint flavor, add a drop of peppermint extract to the melted candy before forming spoon shapes.
Keywords: peppermint candy spoons, holiday candy, candy melts recipe, DIY edible spoons, festive candy garnish, peppermint candy craft