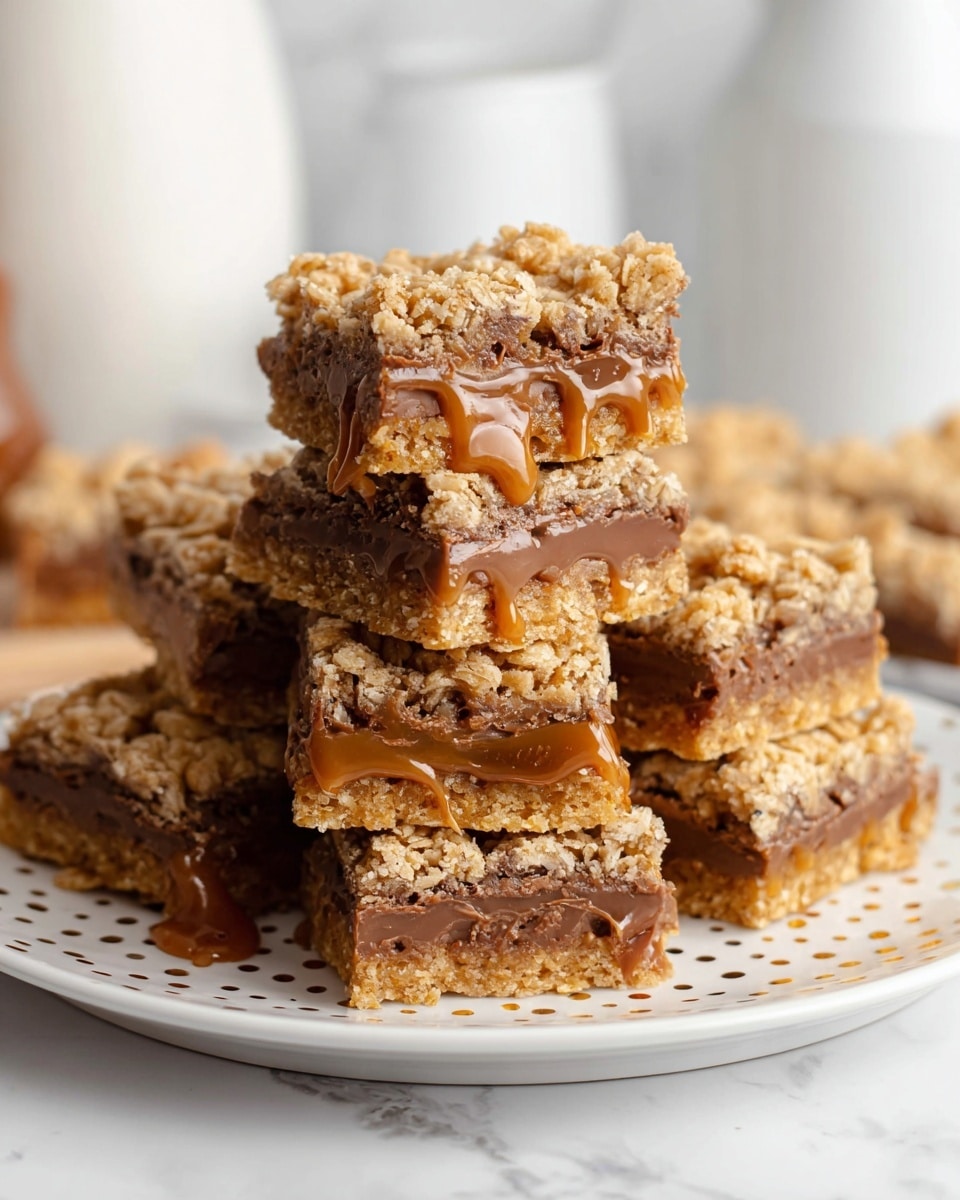
Delicious Caramelitas with Rich Chocolate and Caramel Layers Recipe
If you’ve ever wanted a treat that hits every craving spot—sweet, chewy, buttery, and packed with gooey caramel and melty chocolate—you’re going to adore this Delicious Caramelitas with Rich Chocolate and Caramel Layers Recipe. Honestly, making these caramelitas always feels like a little celebration in my kitchen because the layers of chocolate and caramel are so indulgent and satisfying. They’re perfect for sharing at a party or just enjoying with a cup of coffee on a quiet afternoon.
What I love most about this recipe is how it balances the chewy oat base with the luscious caramel and smooth chocolate topping, creating textures and flavors that keep you coming back for more. Whether you’re a seasoned baker or just looking for a fail-proof dessert to impress friends, this Delicious Caramelitas with Rich Chocolate and Caramel Layers Recipe is a total crowd-pleaser you’ll want in your repertoire.
Ingredients You’ll Need
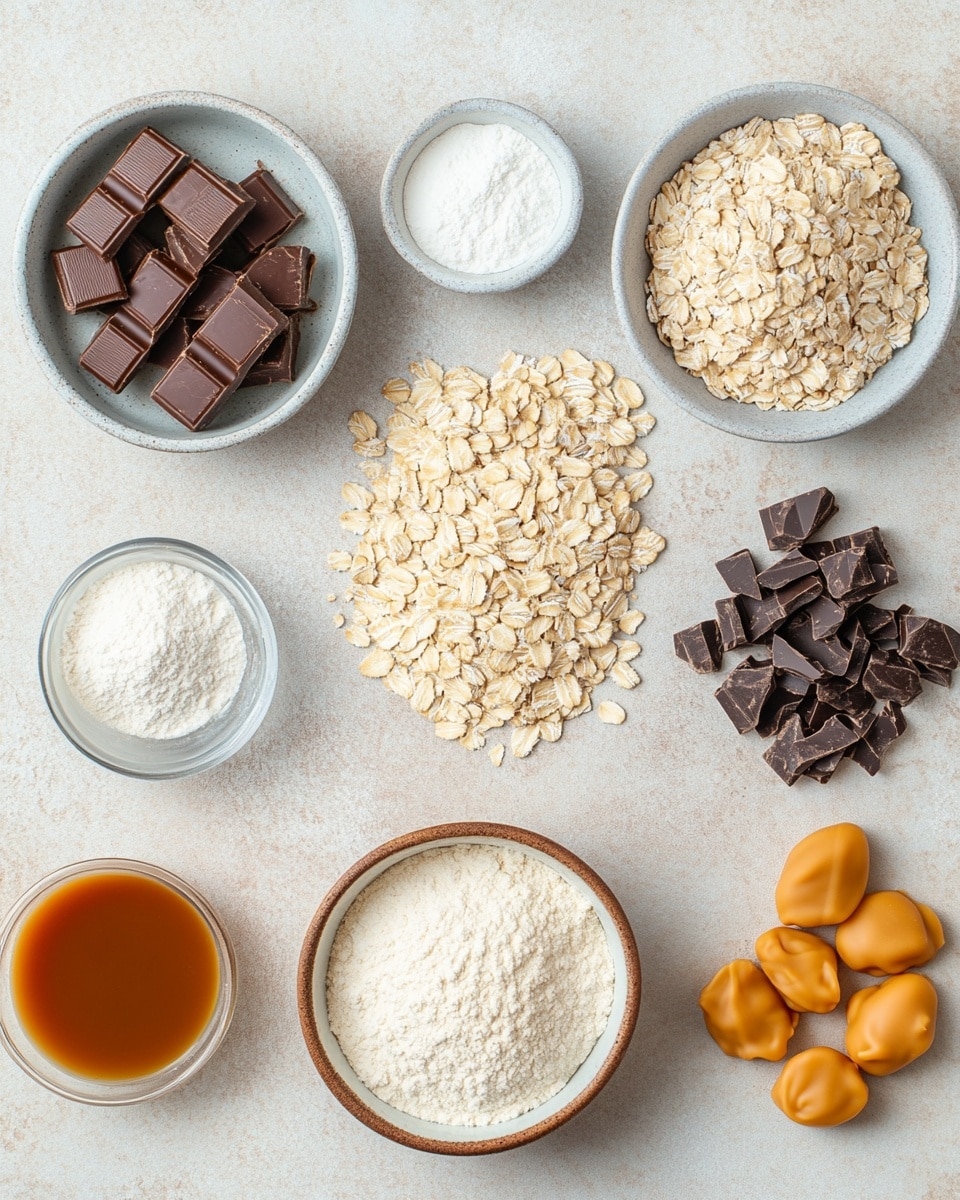
Every ingredient in this recipe plays a key role in building that perfect chewy, sweet base layered with rich caramel and chocolate. Shopping for quality ingredients makes a big difference—especially when it comes to the chocolate chips and caramels, which are the stars on top.
- All-purpose flour: Provides structure to hold the chewy oat crust together without being too dense.
- Old fashioned oats: Adds hearty texture and chewiness that contrasts so nicely with the gooey toppings.
- Salted butter: Use melted for easy mixing and to infuse rich flavor and moistness throughout.
- Light brown sugar: Packed tightly for that deep, caramel-like sweetness in the crust.
- Pure vanilla extract: Just a touch brightens the entire batter with warm, inviting notes.
- Baking soda: A small boost of lift helps keep your caramelitas from turning too tough.
- Kosher salt: A pinch balances the sweetness and enhances all the flavors.
- Milk chocolate chips: These melt beautifully to form a creamy, dreamy chocolate layer.
- Individually wrapped caramels: Using wrapped caramels gives you that irresistible gooey caramel topping without fuss.
- Heavy cream: Helps melt the caramels evenly into a smooth, luscious layer.
Variations
I love encouraging a little recipe freedom here—caramelitas are so adaptable for different tastes and dietary needs. Feel free to swap out or add ingredients to make these your own.
- Vegan variation: I’ve tried replacing butter with coconut oil and using dairy-free chocolate chips for a surprisingly delicious twist that still warms the heart.
- Nutty addition: Adding chopped pecans or walnuts to the oat base adds a lovely crunch—I always find it makes the bars even more addictive!
- Salted caramel twist: Sprinkle flaky sea salt on top after baking for that perfect sweet-salty balance; it’s a game changer.
- Dark chocolate swap: Sometimes I use dark chocolate chips instead of milk chocolate for a richer, less sweet finish that pairs beautifully with the caramel.
How to Make Delicious Caramelitas with Rich Chocolate and Caramel Layers Recipe
Step 1: Mix the oat base to chewy perfection
Start by preheating your oven to 350°F (175°C) and greasing or lining a 9×13-inch baking pan with parchment paper—trust me, parchment makes clean-up and removal a breeze. In a big bowl, combine the all-purpose flour, old fashioned oats, light brown sugar, baking soda, and kosher salt. Pour in the melted salted butter and vanilla extract, stirring everything until the mixture looks evenly moistened and crumbly yet comes together when pressed. This part’s important for that classic chewy texture, so don’t overmix.
Step 2: Press and bake the oat crust
Firmly press about two-thirds of the oat mixture into the bottom of your prepared pan. The pressure here helps create that dense, chewy layer that’s impossible to resist. Bake this crust for around 15 minutes or until it starts to get golden on the edges. Meanwhile, get your caramel and chocolate ready—this timing prevents everything from overheating or burning later on.
Step 3: Melt the caramel and chocolate layers
In a small saucepan over low heat, gently melt the individually wrapped caramels with heavy cream, stirring constantly. You want a smooth, pourable caramel sauce that’s rich but not too runny. Once melted, pour it evenly over the baked oat crust. Immediately sprinkle the milk chocolate chips on top and gently press them into the warm caramel layer to create a smooth chocolate topping. The heat will melt the chips slightly, giving that luscious gooey layer everyone loves.
Step 4: Top baking and cooling magic
Sprinkle the remaining oat mixture gently over the chocolate and caramel layers—this will bake into a beautiful top crust that holds the gooey layers in place but still stays soft and chewy. Return the pan to the oven and bake for another 15-20 minutes. When you pull it out, let the caramelitas cool completely in the pan before slicing—this step is key because it allows the layers to set for perfect squares that don’t fall apart. If you try cutting too soon, trust me, it’ll be a sticky mess.
How to Serve Delicious Caramelitas with Rich Chocolate and Caramel Layers Recipe
Garnishes
When I serve caramelitas, I usually keep it simple because the bars are rich enough, but a light dusting of powdered sugar or a sprinkle of flaky sea salt adds a nice touch and an elegant look. Sometimes, I’ve drizzled a bit of melted chocolate or caramel sauce on top for extra flair during special occasions—it’s always a hit!
Side Dishes
I personally love pairing these with a scoop of vanilla ice cream or a cup of freshly brewed coffee—I find the creaminess and the bittersweet coffee highlight the richness perfectly. For gatherings, a refreshing glass of cold milk is also a classic that can’t be beat alongside these indulgent layers.
Creative Ways to Present
For birthdays or potlucks, I like to cut these into bite-sized squares and arrange them on a tiered dessert stand—adding small fresh berries or mint leaves in between makes the presentation feel festive and inviting. Wrapping individual squares in parchment paper tied with a ribbon also makes lovely homemade gifts if you’re bringing treats to friends or neighbors.
Make Ahead and Storage
Storing Leftovers
I find that keeping the caramelitas in an airtight container at room temperature works best for up to 3-4 days—this keeps the topping soft and the base chewy just like day one. If you live somewhere warm, you might want to store them in the fridge, though I recommend letting them come to room temp before serving for the best texture.
Freezing
Freezing caramelitas is a smart move if you want to make ahead or save leftovers. Wrap individual bars tightly in plastic wrap and then foil before freezing. From my experience, they thaw beautifully overnight in the fridge and maintain their moisture without losing that amazing caramel and chocolate layer texture.
Reheating
If you want to enjoy these warm, gently reheat a bar in the microwave for about 10-15 seconds—enough to soften the caramel and chocolate but not so much it melts completely into a mess. Alternatively, a quick 5-minute warm-up in a low oven wrapped in foil works wonders too, especially when serving multiple pieces.
FAQs
-
Can I use different types of chocolate for this caramelitas recipe?
Absolutely! While milk chocolate chips are classic for this recipe because of their creamy sweetness, you can swap in dark chocolate chips for a richer flavor or white chocolate for a sweeter, creamier contrast. Just be mindful of melting times as white chocolate requires gentle heat to avoid seizing.
-
What’s the best way to prevent caramel from hardening too much?
Melting the individually wrapped caramels with heavy cream, as the recipe suggests, creates a smooth caramel sauce that stays soft and gooey once baked. Be sure to stir constantly and melt over low heat to avoid scorching, which can cause the caramel to harden when cooled.
-
Can I make this recipe gluten-free?
You can definitely try replacing the all-purpose flour with a gluten-free flour blend that measures cup-for-cup. Also, make sure your oats are certified gluten-free to keep the recipe safe for those with gluten sensitivities. The texture may be slightly different but still delicious!
-
How long do caramelitas keep fresh?
Stored properly in an airtight container at room temperature, these bars keep fresh for 3 to 4 days. Beyond that, they start to dry out. For longer storage, freezing is your best bet and they’ll keep well in the freezer for up to 2 months.
Final Thoughts
Every time I bake this Delicious Caramelitas with Rich Chocolate and Caramel Layers Recipe, it reminds me why I love sharing homemade desserts with friends and family—the joy that comes from biting into that perfect mix of chewy oats, melted chocolate, and gooey caramel is truly special. It’s one of those recipes that feels fancy yet is straightforward enough to make anytime you want a comforting treat. So go ahead, whip up a batch, and see just how addictive these bars can be—you’ll be glad you did!
Print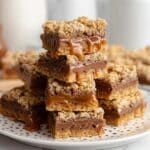
Delicious Caramelitas with Rich Chocolate and Caramel Layers Recipe
- Prep Time: 15 minutes
- Cook Time: 30 minutes
- Total Time: 45 minutes
- Yield: 24 bars 1x
- Category: Dessert
- Method: Baking
- Cuisine: American
Description
A delicious Carmelitas recipe featuring a buttery oat and flour base layered with rich milk chocolate chips and gooey caramel, all topped with a luscious caramel cream mixture. These bars are perfect for a sweet treat or dessert for any occasion.
Ingredients
Base Layer
- 1½ cups all purpose flour
- 1½ cups old fashioned oats
- 1 cup salted butter, melted
- ¾ cup light brown sugar, tightly packed
- 2 teaspoons pure vanilla extract
- 1 teaspoon baking soda
- ½ teaspoon kosher salt
Chocolate and Caramel Layer
- 1½ cups milk chocolate chips
- 11 ounces individually wrapped caramels
- ½ cup heavy cream
Instructions
- Prepare the Base Layer: In a large mixing bowl, combine the all-purpose flour, old fashioned oats, baking soda, and kosher salt. Stir in the melted salted butter, light brown sugar, and pure vanilla extract until the mixture is evenly combined and forms a crumbly dough.
- Form the Base in Pan: Press about two-thirds of the oat and flour mixture evenly into the bottom of a greased 9×13-inch baking pan to create a sturdy base layer.
- Add Chocolate Chips: Sprinkle the milk chocolate chips evenly over the base layer, ensuring complete coverage to create the chocolate layer.
- Prepare Caramel Sauce: Unwrap the caramels and place them in a small saucepan with the heavy cream over low heat. Stir continuously until the caramels are fully melted and the mixture is smooth and creamy.
- Pour Caramel Layer: Carefully pour the melted caramel and cream mixture evenly over the chocolate chip layer in the baking pan.
- Add Remaining Crumble: Sprinkle the remaining one-third of the oat and flour mixture evenly over the caramel layer to create a crumb topping.
- Bake: Bake the assembled Carmelitas bars in a preheated oven at 350°F (175°C) for approximately 25-30 minutes or until the topping is golden brown and bubbly.
- Cool and Serve: Allow the Carmelitas to cool completely in the pan on a wire rack before cutting into bars. This cooling step helps the layers set properly for easier slicing and serving.
Notes
- Ensure the caramels are melted slowly over low heat to prevent burning or separation.
- Use a greased or parchment-lined pan to prevent sticking and allow easy removal.
- For a firmer set, refrigerate the bars for an hour after cooling.
- You can swap milk chocolate chips with dark chocolate chips if preferred for a richer flavor.
- Store leftovers in an airtight container at room temperature for up to 3 days or refrigerate for up to a week.
Keywords: Carmelitas, caramel bars, oat bars, chocolate caramel dessert, homemade dessert bars, caramel chocolate bars