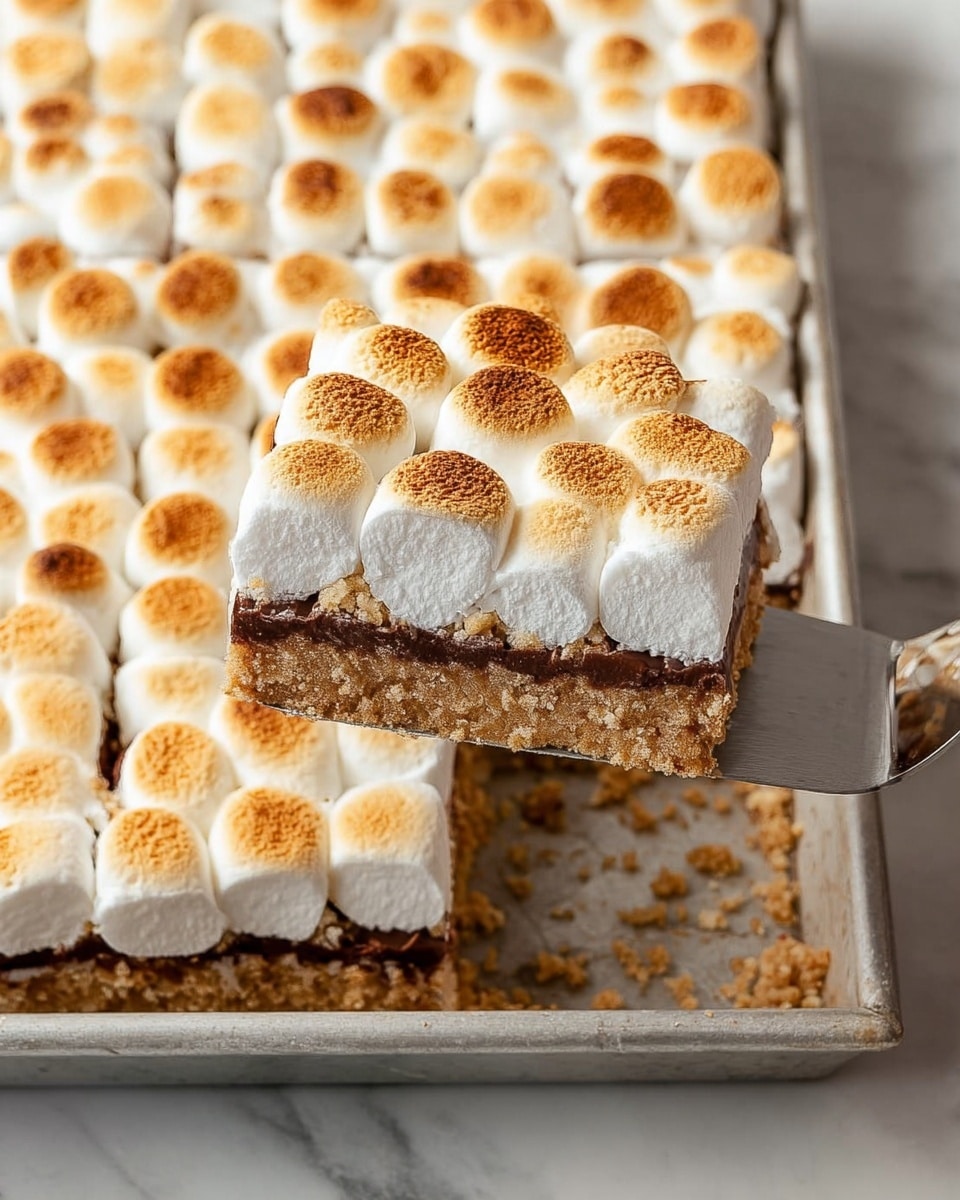
Decadent S’mores Bars Recipe
If you’re a fan of s’mores but want to enjoy them anytime without the fuss of a campfire, this Decadent S’mores Bars Recipe will become your new best friend. It captures all the gooey chocolatey, marshmallowy goodness that makes classic s’mores irresistible but in a neat, portable bar form. I’ve made these bars more times than I can count, especially when friends drop by unexpectedly or for cozy movie nights – they always disappear fast!
What I love most about this Decadent S’mores Bars Recipe is how easy and flexible it is. You only need a handful of ingredients that you probably already have on hand, and it comes together quickly. Whether you’re making it for a picnic, a kid’s birthday party, or a sweet treat after dinner, it hits the spot every time. Plus, the balance of crunchy graham cracker crust with melty chocolate and pillowy marshmallows makes it a universal crowd-pleaser.
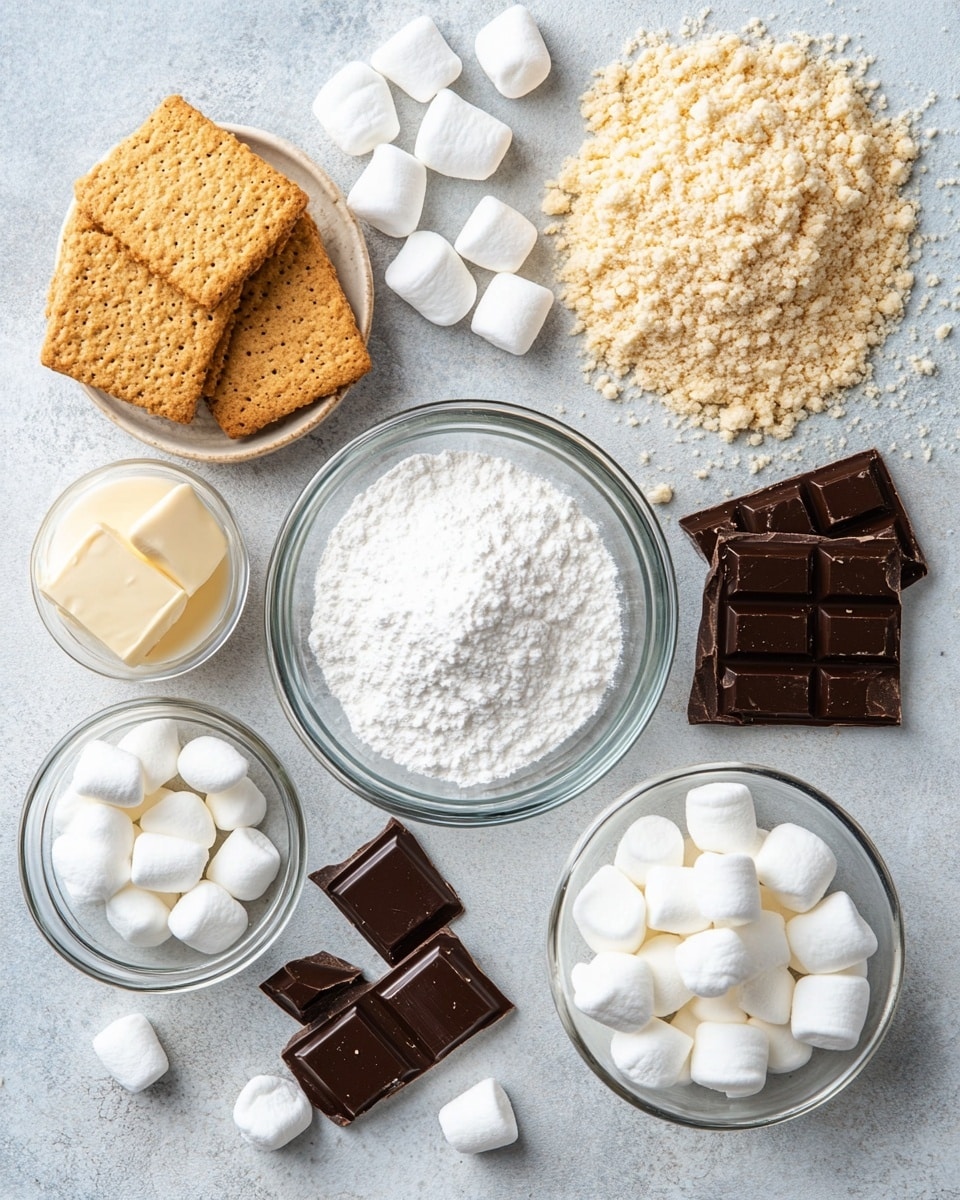
Ingredients You’ll Need
To make these bars, each ingredient has a special role that brings together the nostalgic flavor we all crave. I always recommend using the best quality chocolate you can find—it really makes a difference here. The graham cracker crumbs provide a sturdy yet crumbly base that holds all that gooey goodness perfectly.
- Graham cracker crumbs: I prefer the finely crushed kind; it helps create a smooth, crumbly crust that holds together well.
- Butter: Melted butter binds the crust ingredients; don’t skip this or your bars won’t hold their shape.
- Powdered sugar: Just a touch adds sweetness and helps the crust texture stay just right.
- Hershey chocolate bars: Classic milk chocolate bars give you that authentic s’mores flavor — choose the 4.4-ounce size.
- Mini marshmallows: These melt beautifully and distribute evenly, creating that signature gooey layer everyone loves.
Variations
I like to switch things up sometimes and tailor this Decadent S’mores Bars Recipe to whatever mood I’m in or who I’m baking for. It’s such a forgiving recipe, so feel free to experiment with flavors and textures—you might just find a new favorite version!
- Dark chocolate: When I’m craving something a bit richer, I swap milk chocolate for dark chocolate bars — I love how the slight bitterness complements the sweetness.
- Peanut butter swirl: One time, I swirled some peanut butter into the crust before baking, and let me tell you, it added a wonderful nutty depth to these bars.
- Gluten-free crust: I’ve used gluten-free graham cracker crumbs for friends with sensitivities, and the bars still turn out just as decadent.
- Adding nuts: Chopped toasted pecans or almonds sprinkled on top add a great crunch and extra flavor dimension.
How to Make Decadent S’mores Bars Recipe
Step 1: Mix and press the crust
Start by combining the graham cracker crumbs, melted butter, and powdered sugar in a mixing bowl. Stir until the mixture looks evenly moistened and holds together when pressed. I like to press it firmly into a greased 9×9-inch pan to get that perfect, compact base. Use a flat-bottomed measuring cup or your hands to really press it down evenly—this helps avoid crumbly bars later.
Step 2: Layer the chocolate bars
Next, break up the Hershey chocolate bars into smaller pieces and spread them evenly over the crust layer. No need to melt the chocolate beforehand; it’ll soften beautifully during baking to create that luscious middle layer you want. Make sure to cover the crumbs completely for a consistent chocolate experience in every bite.
Step 3: Top with mini marshmallows
Generously sprinkle the mini marshmallows over the chocolate layer. I like to pile them on thick because they puff up and melt into a golden, gooey blanket. Don’t be shy here—more marshmallows equal bigger smiles!
Step 4: Bake until golden and gooey
Bake your s’mores bars at 350°F for about 12-15 minutes, or until the marshmallows turn a light golden brown and are puffed up. Keep an eye on them—marshmallows can go from perfectly toasted to burnt pretty quickly. This short bake time helps maintain that tender chewiness you’re looking for.
Step 5: Cool, slice, and enjoy
Once out of the oven, let the bars cool in the pan for at least 30 minutes so they set up nicely. Then slice them into squares and prepare for your tastebuds to do a happy dance. If you try to cut them too soon, the gooey marshmallow can get messy, so patience here is key.
How to Serve Decadent S’mores Bars Recipe
Garnishes
I usually keep garnishes simple—maybe a dusting of powdered sugar or a drizzle of melted chocolate over the top. Once, I even sprinkled crushed graham crackers to amp up the texture and it was a hit. You can also add a tiny pinch of sea salt to give a lovely contrast to the sweetness.
Side Dishes
These bars are sweet enough to shine on their own, but if you want to turn your treat time into an indulgent session, a scoop of vanilla ice cream pairs beautifully. For something warm, a mug of hot chocolate or coffee works wonders, especially on a chilly evening.
Creative Ways to Present
For gatherings, I love arranging these bars on a rustic wooden board with little bowls of extra marshmallows, chocolate chips, and graham crackers so guests can customize their bites. They also look stunning served in colorful mini cupcake liners, which is perfect for kids’ parties or outdoor picnics.
Make Ahead and Storage
Storing Leftovers
I store leftover bars in an airtight container at room temperature for up to 3 days. If your kitchen is particularly warm, I recommend refrigerating them to avoid melting. When stored well, they keep their texture surprisingly well without getting too sticky.
Freezing
I’ve frozen these bars wrapped tightly in plastic wrap and then placed in a freezer-safe container with great results. Just thaw them overnight in the fridge and bring them to room temperature before serving. The marshmallows might be a bit less gooey but still delicious!
Reheating
If you want that freshly toasted feel, pop individual bars in the microwave for 10-15 seconds or under the broiler for a few seconds (watch closely!) to re-toast the marshmallows a bit. It helps revive the melty magic and makes leftovers just as delightful as the first serving.
FAQs
-
Can I use regular marshmallows instead of mini marshmallows in this Decadent S’mores Bars Recipe?
Yes, you can use regular marshmallows, but mini marshmallows melt more evenly and create a better texture layer in the bars. If you only have regular marshmallows, chop them into smaller pieces to mimic the mini size, which helps them distribute more uniformly.
-
Is it necessary to use Hershey chocolate bars, or can I use chocolate chips?
While Hershey bars give that classic s’mores flavor and smooth melt, you can absolutely use good-quality chocolate chips if that’s what you have. Semi-sweet or milk chocolate chips work well. Just spread them evenly over the crust to get a consistent chocolate layer.
-
How do I prevent the crust from falling apart when cutting the bars?
Press the crust firmly into the pan before baking, and allow the bars to cool completely before slicing. Using a sharp knife and wiping it clean between cuts also helps achieve neat squares without crumbling.
-
Can I make the Decadent S’mores Bars Recipe gluten-free?
Definitely! Use gluten-free graham cracker crumbs, which are widely available. The rest of the ingredients are naturally gluten-free, but always double-check to avoid any hidden gluten.
-
How long do these s’mores bars keep fresh?
Stored in an airtight container at room temperature, these bars stay fresh for about 3 days. Beyond that, they may start to lose their texture, so it’s best to enjoy them sooner or freeze for later enjoyment.
Final Thoughts
This Decadent S’mores Bars Recipe is honestly one of my favorite quick dessert hacks. It’s that perfect blend of nostalgia and convenience, giving you the campfire treat you love without needing an actual campfire. Whenever I make these bars, I can’t help but smile knowing how easily they bring people together over shared gooey bites. Give them a try the next time you want a simple, crowd-pleasing dessert — I promise, you’ll be making them again and again!
Print
Decadent S’mores Bars Recipe
- Prep Time: 10 minutes
- Cook Time: 15 minutes
- Total Time: 25 minutes
- Yield: 9 to 12 bars 1x
- Category: Dessert
- Method: Baking
- Cuisine: American
Description
This easy and delicious S’mores Bar recipe brings all the classic campfire flavors into a convenient, no-fire-needed dessert. With a buttery graham cracker crust, rich melted chocolate, and a gooey marshmallow topping, these bars are perfect for satisfying your sweet tooth any time of year.
Ingredients
Crust
- 2 cups graham cracker crumbs
- 8–12 tablespoons melted butter
- ½ cup powdered sugar
Topping
- 4 Hershey Chocolate Bars (4.4 ounce bars each)
- 1 package mini marshmallows
Instructions
- Prepare the crust: Preheat your oven to 350°F (175°C). In a mixing bowl, combine the graham cracker crumbs, melted butter (start with 8 tablespoons and add more if needed to get a sandy, moldable texture), and powdered sugar. Mix well until the mixture resembles wet sand.
- Press crust into pan: Lightly grease an 8×8 inch baking dish. Press the graham cracker crust mixture evenly into the bottom of the dish, creating a compact and uniform layer.
- Bake the crust: Place the crust in the preheated oven and bake for about 8-10 minutes until it’s set and lightly golden. This will help it hold together under the toppings.
- Add chocolate layer: Remove the crust from the oven and immediately place the Hershey chocolate bars evenly over the warm crust, allowing them to begin melting.
- Top with marshmallows: Sprinkle the mini marshmallows evenly over the melted chocolate layer.
- Bake until marshmallows are toasted: Return the baking dish to the oven and bake for another 3-5 minutes, or until the marshmallows are puffed and golden brown on top.
- Cool and serve: Allow the bars to cool completely at room temperature before slicing into squares to serve. This helps the layers set and makes for easier cutting.
Notes
- Use more or less butter depending on the texture of the graham cracker mixture; it should hold together when pressed.
- You can substitute regular marshmallows if mini ones are unavailable, just spread them evenly.
- For a richer chocolate flavor, use semi-sweet or milk chocolate bars of your choice.
- Store leftovers in an airtight container at room temperature for up to 3 days.
- For a gluten-free version, use gluten-free graham cracker crumbs.
Keywords: s’mores bars, graham cracker crust, easy dessert, no campfire dessert, chocolate marshmallow bars