Chocolate Christmas Candy with Sprinkles and Candy Canes Recipe
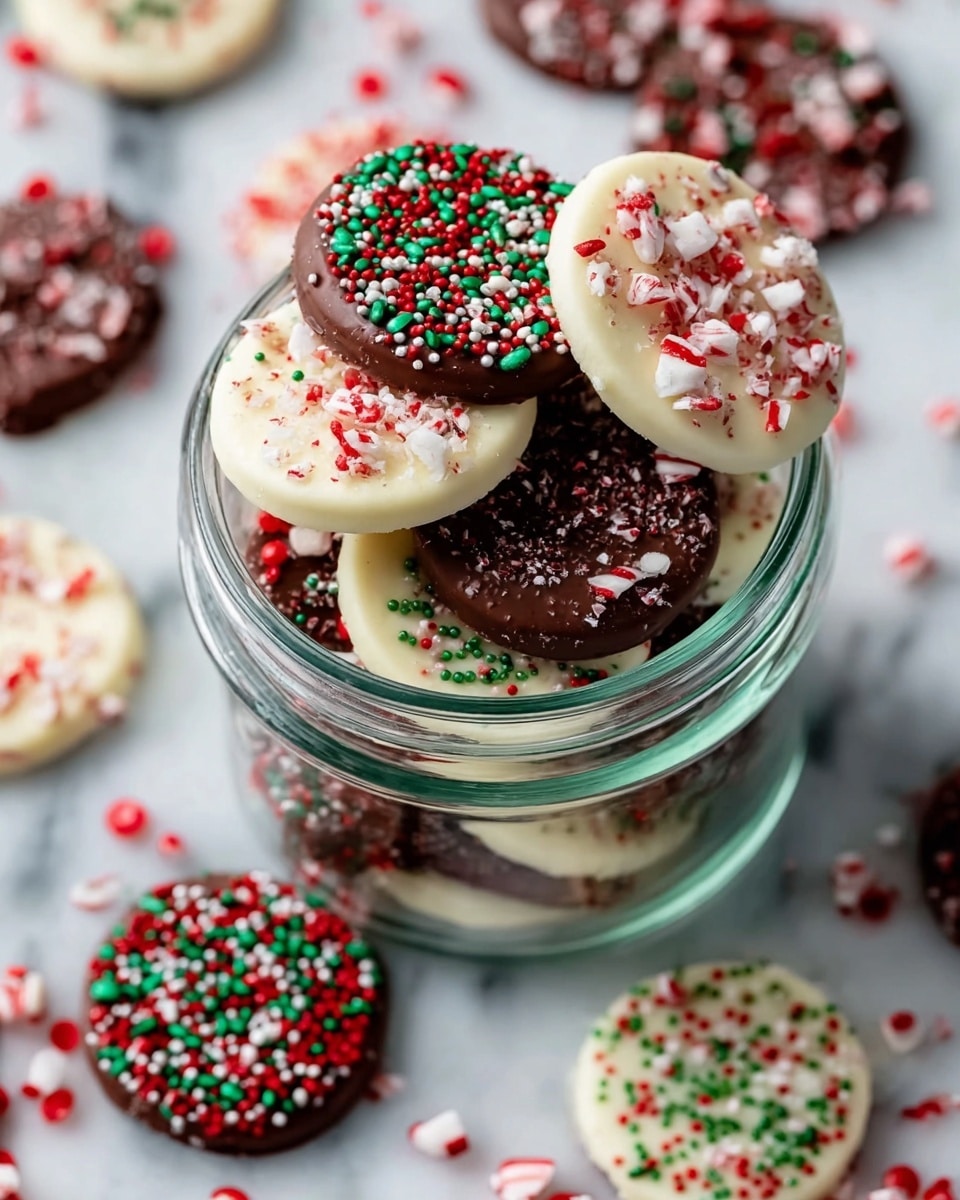
If you’re looking to add a little extra magic to your holiday treats, this Chocolate Christmas Candy with Sprinkles and Candy Canes Recipe is an absolute winner. It’s one of those joyful little desserts that brings color, crunch, and festive cheer all in one bite. I’ve made this recipe countless times during the Christmas season, and each batch seems to disappear faster than I expect! It’s easy, beautiful, and perfect for gift-giving or serving at holiday parties.
What makes this recipe stand out for me is the playful combination of semi-sweet and white chocolates, mingled with crunchy candy canes and cheerful sprinkles. Not only does it taste amazing, but it adds that classic Christmas aesthetic to your dessert table. Whether you’re baking with kids or just want a quick, no-fuss sweet treat, you’ll love how simple yet stunning this Chocolate Christmas Candy with Sprinkles and Candy Canes Recipe is to make.
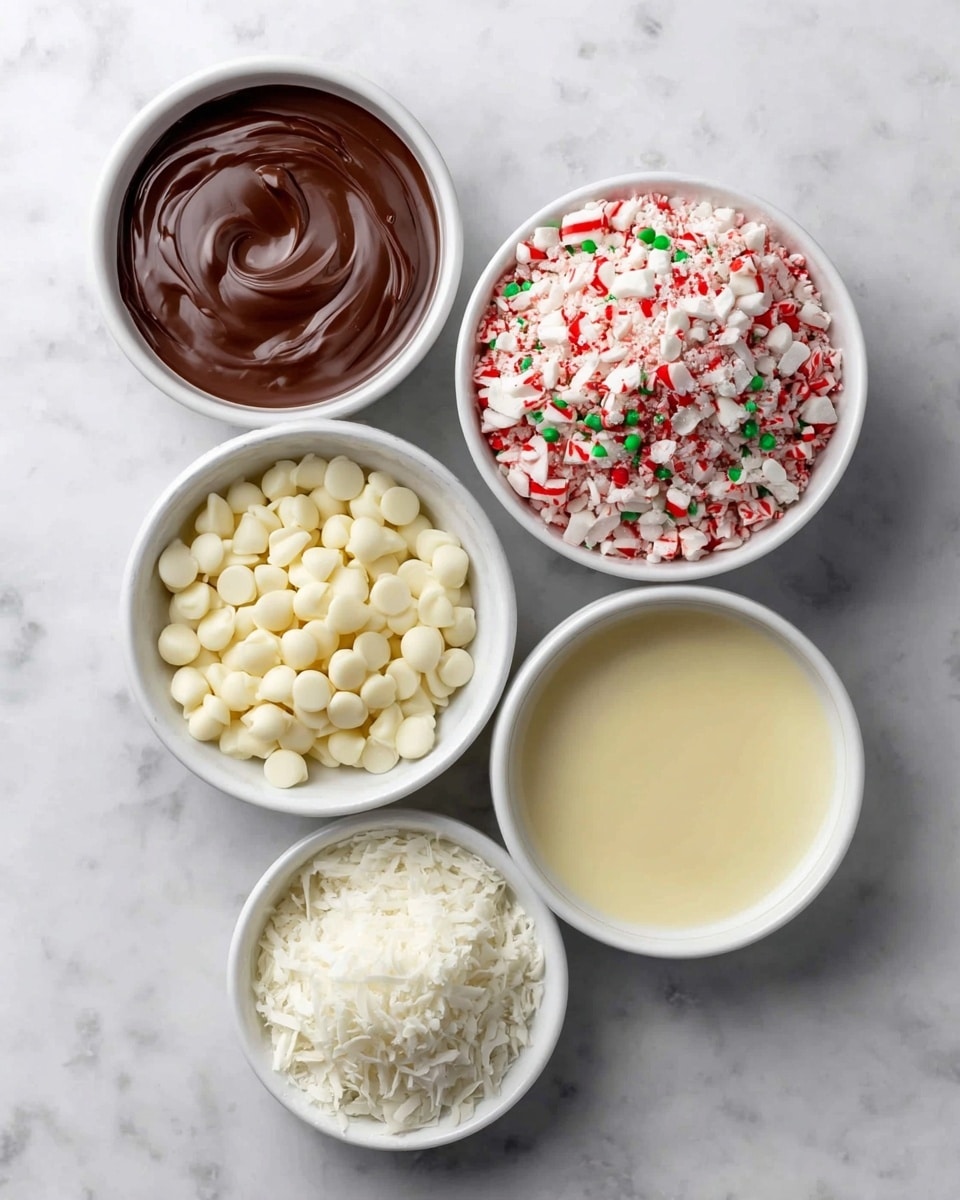
Ingredients You’ll Need
The ingredients here are straightforward and synergize beautifully to create that perfect holiday candy experience. I always recommend using good quality melting chocolates—they melt smoothly and set up with the perfect shine. For sprinkles and candy canes, fresh crushed ones add the best texture and flavor.
- Semi-sweet melting chocolates: Choose discs or chips designed for melting to avoid seizing, and they add a rich chocolate depth.
- White chocolate melting wafers: These melt easily and give a beautiful contrast; I like the vanilla note they add.
- White non-pareil sprinkles: These lend a delightful crunch and snowy aesthetic.
- Red, green, and white non-pareil sprinkles: The festive colors bring your candy to life with a joyful sparkle.
- Crushed candy canes: Freshly crushed candy canes add that cool peppermint kick and a satisfying crunch.
Variations
I like to keep this recipe flexible because holiday baking should be fun and personal! Sometimes I swap sprinkles depending on the theme or use dark chocolate if I want a more intense flavor. Feel free to make this recipe your own – it’s all about creating those happy holiday vibes in your kitchen.
- Nutty Delight: Adding chopped roasted nuts to the mix gives a lovely crunch and a nutty twist—I’ve done this a few times and the texture contrast is fantastic.
- All White Chocolate: For a sweeter, creamier version, use only white chocolate wafers. This is perfect if you’re making it for kids or prefer a mellow flavor.
- Vegan/Dairy-Free Version: Use vegan melting chocolate alternatives—I’ve tested a few that work well, just watch the melting temperature carefully.
- Extra Peppermint Punch: Sprinkle crushed candy canes not only on top but through the chocolate layers for bursts of refreshing flavor throughout.
How to Make Chocolate Christmas Candy with Sprinkles and Candy Canes Recipe
Step 1: Melt the Chocolates Gently
Start by melting the semi-sweet and white chocolates separately. I usually use the double boiler method—it’s super reliable. Fill a small pot with an inch or two of simmering water and place a heatproof bowl over it that doesn’t touch the water. Stir the chocolates as they melt to avoid burning. If you’re short on time, you can microwave in short bursts (15 seconds), stirring between each, but watch carefully because chocolate burns fast. Once melted smooth, set each bowl aside.
Step 2: Prepare Your Candy Base
Line a baking sheet with parchment paper or a silicone mat—that’s where your candy will chill and set. Pour the semi-sweet chocolate onto the sheet in a thin, even layer using an offset spatula or the back of a spoon. This helps it set nicely and gives you a chocolate canvas for the decorations.
Step 3: Swirl and Sprinkle
Drizzle the melted white chocolate over the semi-sweet layer in thin ribbons—try swirling gently to create pretty marbled effects. While the chocolates are still soft, sprinkle liberally with the white, red, and green non-pareil sprinkles along with crushed candy canes. I love pressing the decorations lightly so they stick but don’t break the chocolate’s surface.
Step 4: Chill Until Set
Put the baking sheet in the refrigerator for at least 30-40 minutes or until the chocolate hardens completely. I usually make this a couple of hours ahead so it sets perfectly and I can cut it into bite-sized pieces when ready. Ambient temperature impacts setting time, so check that your chocolate is firm before slicing.
Step 5: Break and Serve
Once set, break your candy bark into irregular pieces for that classic homemade look. I find this adds charm because no two pieces are the same, and it’s a perfect way to control serving sizes. Package these in festive bags or boxes for gifting or pile them on a holiday platter to share with guests.
How to Serve Chocolate Christmas Candy with Sprinkles and Candy Canes Recipe
Garnishes
When serving, I sometimes add a sprinkle of extra crushed candy canes on top for a fresh pop of peppermint scent and a hint of texture. Another trick I’ve tried is dusting a little edible glitter or shimmer dust to make the candy truly shine under holiday lights—it’s a showstopper!
Side Dishes
This chocolate candy pairs wonderfully with warm drinks—think hot cocoa, mulled wine, or even a rich coffee. During my holiday gatherings, I serve these alongside a selection of cookies and fruitcakes to round out the festive spread.
Creative Ways to Present
For gift-giving, try layering pieces in clear jars with ribbons and holiday tags. I’ve also wrapped individual portions in foil and placed them inside mini gift boxes for coworkers and neighbors. Displaying these candies on tiered cake stands or wooden boards adds a rustic charm, especially with pine sprigs or cinnamon sticks as decor.
Make Ahead and Storage
Storing Leftovers
Store any leftovers in an airtight container at room temperature or in a cool pantry spot, away from direct heat or sunlight. I’ve found this keeps the candy crisp and fresh for up to two weeks, though usually, they don’t last that long!
Freezing
If you want to keep these candies longer, freezing works well. Just wrap the pieces tightly in plastic wrap and place them in a freezer bag to avoid moisture. When I’ve done this, the texture remains great once thawed, and the candy still tastes just as festive.
Reheating
Since this is a no-bake candy, reheating isn’t usually necessary, but if your candy softens too much, just let it sit in a cool place or the fridge for a bit to firm back up. Avoid heat to keep that delicate snap and shine intact.
FAQs
-
Can I use regular chocolate chips instead of melting chocolates?
Regular chocolate chips aren’t formulated to melt smoothly and may seize or separate during melting, leading to a gritty texture. I recommend using melting chocolates or candy wafers because they melt evenly and set with a nice glossy finish, which is crucial for this Chocolate Christmas Candy with Sprinkles and Candy Canes Recipe.
-
How do I prevent the chocolates from blooming or turning grayish?
Chocolate bloom happens when fat or sugar crystals rise to the surface, often because of temperature fluctuations. To avoid this, make sure you temper or gently melt your chocolates and store your finished candy in a cool, consistent environment. Following my storage tips will help keep your Chocolate Christmas Candy with Sprinkles and Candy Canes looking glossy and delicious.
-
Can I substitute the candy canes with something else?
Absolutely! If peppermint candy canes aren’t your thing, try crushed toffee bits, roasted nuts, or even mini chocolate chips for a different flavor and texture. Just remember, candy canes add a festive peppermint flavor that really complements the chocolate in this recipe.
-
Is this recipe kid-friendly to make?
Definitely! In fact, this Chocolate Christmas Candy with Sprinkles and Candy Canes Recipe is one of my favorite no-bake treats to make with kids because it’s simple and doesn’t involve any hot ovens. Just supervise the melting step and let the little ones handle sprinkling and breaking the chocolate once set—it’s always a hit!
-
How long does the candy last once made?
Stored properly in an airtight container away from heat and humidity, this candy lasts about two weeks. Beyond that, it might start to lose its crisp texture, but honestly, it’s usually gone before then in my house!
Final Thoughts
This Chocolate Christmas Candy with Sprinkles and Candy Canes Recipe has become my go-to festive treat year after year because it’s as fun to make as it is to eat. I love how it brings out the spirit of the holidays in the simplest way. If you want a sweet project that’s low fuss but truly brightens your holiday table, I can’t recommend this enough—grab your chocolates, sprinkle away, and enjoy the delicious memories you’ll make along the way.
Print
Chocolate Christmas Candy with Sprinkles and Candy Canes Recipe
- Prep Time: 15 minutes
- Cook Time: 5 minutes
- Total Time: 20 minutes
- Yield: Approximately 24 pieces depending on mold size 1x
- Category: Dessert
- Method: No-Cook
- Cuisine: American
Description
A festive and delightful Chocolate Christmas Candy recipe featuring two types of melting chocolates decorated with holiday-themed sprinkles and crushed candy canes. Perfect for gifting or adding a sweet touch to your Christmas celebrations.
Ingredients
Chocolate Bases
- 2 cups semi-sweet melting chocolates
- 2 cups white chocolate melting wafers
Decorations
- ½ cup white non-pareil sprinkles
- ½ cup red, green, and white non-pareil sprinkles
- ½ cup crushed candy canes
Instructions
- Prepare the Chocolate Bases: Melt the semi-sweet melting chocolates in a microwave-safe bowl or using a double boiler, stirring until smooth and fully melted. Repeat the process separately for the white chocolate melting wafers.
- Pour the Chocolate: Spoon or pour the melted semi-sweet chocolate into festive molds or onto parchment paper to create desired shapes. Do the same for the melted white chocolate, either in separate molds or alongside the semi-sweet chocolate for variety.
- Add Decorations: While the chocolate is still wet, sprinkle the white non-pareil sprinkles and the mixture of red, green, and white non-pareil sprinkles over the semi-sweet chocolate. For white chocolate, generously sprinkle crushed candy canes for a colorful and textured finish.
- Set the Chocolate: Allow the decorated chocolates to cool at room temperature or place them in the refrigerator for faster setting until completely hardened.
- Remove and Serve: Once the chocolates have fully set, carefully pop them out of the molds or break into pieces if set on parchment. Store in an airtight container until ready to serve or gift.
Notes
- Use high-quality melting chocolates for the smoothest finish and best taste.
- Be cautious not to overheat chocolates while melting to avoid burning.
- Sprinkle decorations immediately after pouring the chocolate to ensure they stick well.
- Can be customized with different sprinkles or nuts based on preference.
- Store the finished candies in a cool, dry place to prevent melting or blooming.
Keywords: Christmas candy, chocolate candy, holiday treats, festive chocolates, homemade chocolate, candy canes, Christmas dessert