Butterfinger Pie with Cream Cheese, Peanut Butter, and Cool Whip In a Chocolate Cracker Crust Recipe
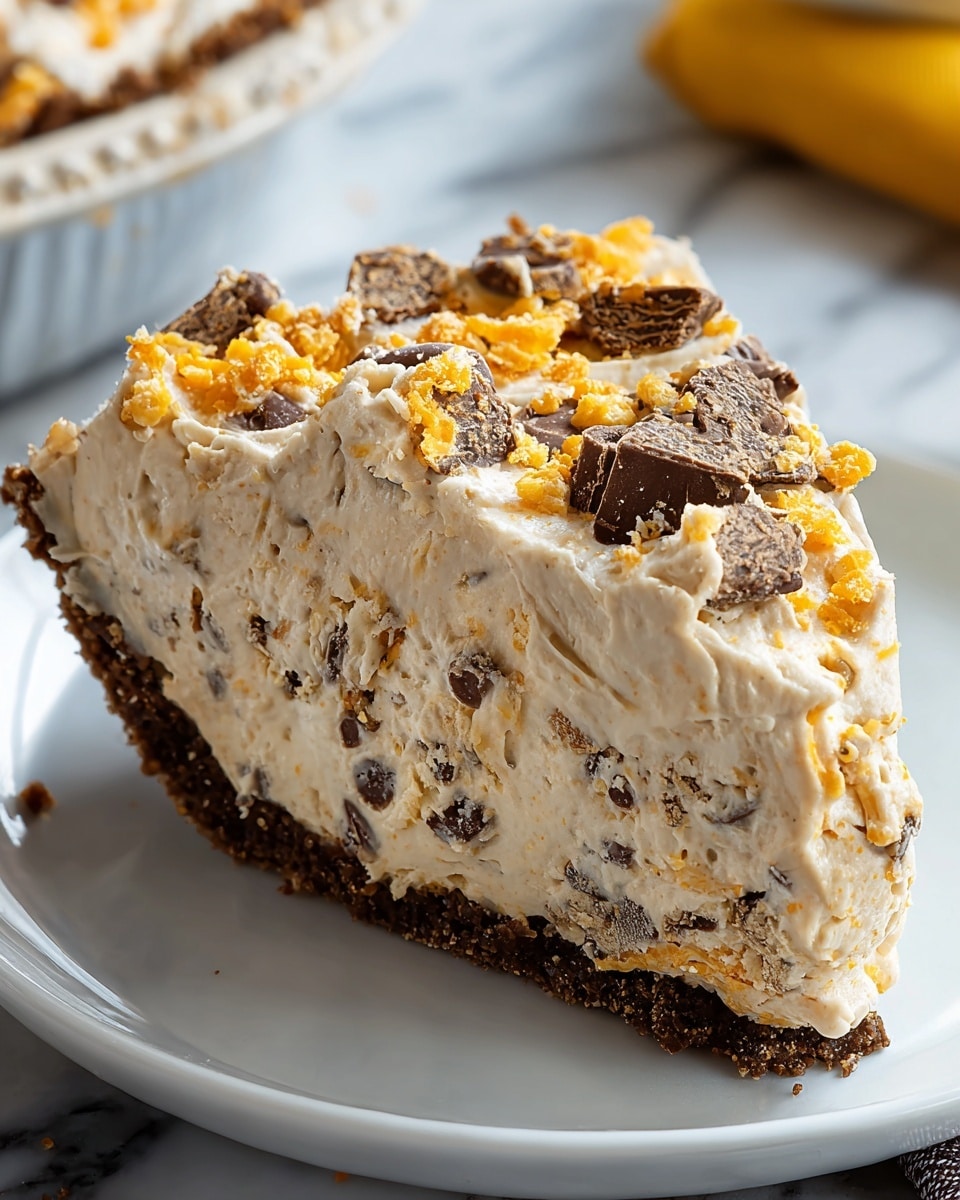
Oh, you’re going to love this Butterfinger Pie with Cream Cheese, Peanut Butter, and Cool Whip In a Chocolate Cracker Crust Recipe—it’s one of those no-fuss desserts that feels fancy and tastes like a dream. The combination of creamy peanut butter and tangy cream cheese with the crunch of Butterfinger bars really sets it apart. I usually whip this up when I want a quick, crowd-pleasing treat that doesn’t require turning on the oven.
What makes this Butterfinger Pie with Cream Cheese, Peanut Butter, and Cool Whip In a Chocolate Cracker Crust Recipe so special is the simplicity and the texture play—it’s smooth, fluffy, and just has enough bite from those crushed candy bars. Whether you’re making it for a potluck, family dinner, or just a weekend dessert, it always delivers and makes me feel like a dessert pro without breaking a sweat.
Ingredients You’ll Need
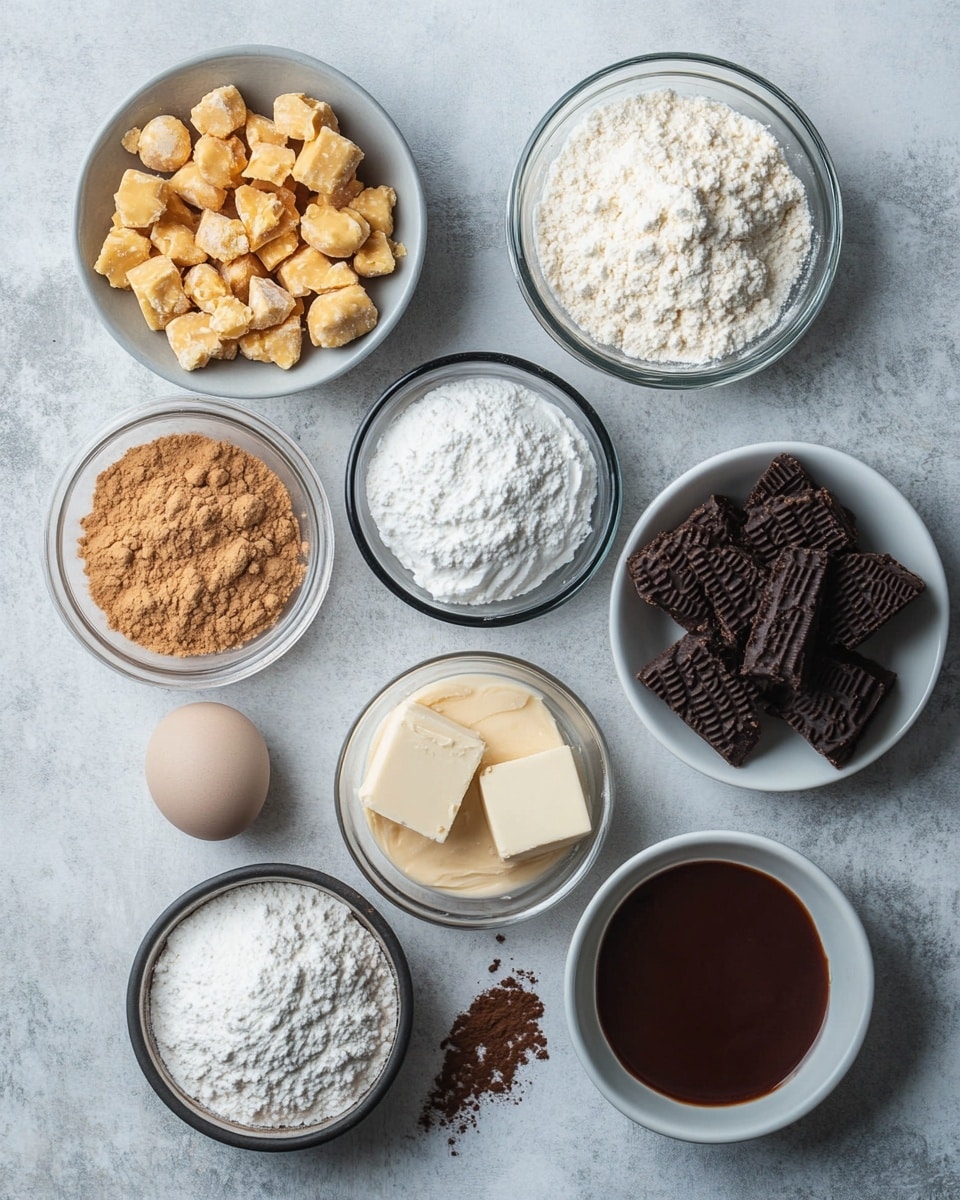
Each ingredient in this Butterfinger Pie with Cream Cheese, Peanut Butter, and Cool Whip In a Chocolate Cracker Crust Recipe plays a key role in creating the perfect balance of creamy, sweet, and crunchy. When you shop, look for good quality peanut butter and fresh, thawed Cool Whip to ensure the best texture.
- Cream Cheese: Make sure it’s softened to room temperature to blend smoothly for that creamy base.
- Peanut Butter: I prefer creamy peanut butter here for an even, rich flavor that mixes easily.
- Vanilla Extract: A splash really amps up the flavor—don’t skip it!
- Powdered Sugar: It sweetens without graininess, keeping the pie silky.
- Butterfinger Bars: Crushing these over the filling adds that iconic candy crunch — reserve a couple for garnish.
- Cool Whip: Thawed and fluffy, it lightens the whole mixture beautifully.
- Chocolate Cracker Crust: Whether you choose an Oreo or chocolate graham crust, it adds a chocolatey, sturdy base perfect for this pie.
Variations
I like to experiment a bit with this Butterfinger Pie with Cream Cheese, Peanut Butter, and Cool Whip In a Chocolate Cracker Crust Recipe depending on who I’m serving it to or what I have on hand. Feel free to make it your own and tweak it to suit your taste buds or dietary needs.
- Crunchy Peanut Butter: I’ve tried swapping creamy for crunchy peanut butter, and it gives an extra nutty texture that’s pretty fantastic.
- Low-Sugar Version: For a lighter option, you can reduce the powdered sugar or use a sugar substitute, but be mindful that the candy bars add quite a bit of sweetness.
- Homemade Crust: Though I love the convenience of store-bought crust, making your own chocolate graham cracker crust adds a personal touch and freshness.
- Mixed Candy Bars: Sometimes I mix in some Snickers or Reese’s pieces along with Butterfinger for a candy bar party in every bite!
How to Make Butterfinger Pie with Cream Cheese, Peanut Butter, and Cool Whip In a Chocolate Cracker Crust Recipe
Step 1: Blend the Creamy Base
Start by placing the room temperature cream cheese and creamy peanut butter into a large mixing bowl. I use my electric mixer on medium speed to beat them into a smooth, velvety mixture—this usually takes about 2-3 minutes. If your cream cheese isn’t soft enough, you might get lumps, so don’t rush this step! After it’s silky, add the vanilla extract and beat it in thoroughly.
Step 2: Sweeten and Add Candy Crunch
Slowly add the powdered sugar, continuing to beat until everything is blended and the texture is smooth and thick. This sweetens the mixture perfectly without being overpowering. Next, gently fold in the crushed Butterfinger bars with a spatula. I like to fold instead of beat here to keep those crunchy chunks intact so you get nice bites of candy in every slice.
Step 3: Lighten with Cool Whip
Now comes the magic of Cool Whip—slowly fold in the thawed container in small batches. This lightens the thick peanut butter and cream cheese mix, giving the pie its fluffy, mousse-like texture. Be gentle but thorough so the whipped topping stays airy.
Step 4: Assemble and Chill
Spread the filling evenly into your ready-made chocolate cracker crust—an Oreo crust is my personal favorite, but a chocolate graham crust works beautifully too. Sprinkle the reserved Butterfinger pieces generously on top for a pretty presentation and extra crunch. Then, this pie needs a minimum of 4 hours in the fridge to set up properly. If you can, I actually recommend overnight chilling—it helps the flavors meld and the texture firm up perfectly.
How to Serve Butterfinger Pie with Cream Cheese, Peanut Butter, and Cool Whip In a Chocolate Cracker Crust Recipe
Garnishes
I always stick to those reserved crushed Butterfinger bars on top—they add a wonderful finishing touch that’s both beautiful and delicious. Sometimes I sprinkle a little extra chopped peanuts for contrast or drizzle a thin line of melted chocolate to fancy it up when serving guests. Whipped cream dollops are optional but never regretted!
Side Dishes
This Butterfinger pie is rich and sweet, so I love pairing it with something light and refreshing. Fresh berries or a simple fruit salad complement the flavors and balance the richness perfectly. If you’re serving it at a party, a cup of black coffee or a glass of milk rounds out the experience really nicely.
Creative Ways to Present
For birthdays or holiday gatherings, I’ve decorated the pie with mini Butterfingers and crushed peanuts around the rim of the pie plate. Another fun idea is to use mini cupcake liners and portion out individual mini Butterfinger pies—great for easy serving and super cute! Layering the pie in a trifle bowl with extra candy pieces can make a playful, shareable dessert centerpiece too.
Make Ahead and Storage
Storing Leftovers
Once made, I store this Butterfinger Pie with Cream Cheese, Peanut Butter, and Cool Whip In a Chocolate Cracker Crust Recipe covered in the fridge with plastic wrap or an airtight lid. It keeps beautifully for up to 4 days without losing any creaminess or crunch—though those Butterfinger pieces can soften a bit, so I recommend adding extra topping just before serving if possible.
Freezing
I’ve frozen this pie a couple of times wrapped tightly in foil and plastic wrap to avoid freezer burn. It freezes well for up to a month, though I find the texture is best when eaten fresh or refrigerated. When thawing, place it in the fridge overnight rather than at room temp to preserve the creamy texture.
Reheating
This pie is meant to be enjoyed cold, so I don’t recommend reheating. Just pull it from the fridge a few minutes before serving to take the chill off, and you’ll have that perfect creamy texture ready to impress.
FAQs
-
Can I make the chocolate cracker crust from scratch for this Butterfinger Pie?
Absolutely! Making your own crust is straightforward—just crush chocolate graham crackers or Oreos, mix with melted butter, and press into your pie dish. It adds fresh flavor and lets you control sweetness and texture, which I find worth the extra effort if you have the time.
-
What’s the best way to crush Butterfinger bars without turning them to dust?
I like to place the fun-sized bars in a zip-top bag and use a rolling pin or the bottom of a sturdy cup to gently crush them. That way, you get bits of various sizes for crunch without ending up with powder.
-
Can I substitute Cool Whip with homemade whipped cream?
You can! Homemade whipped cream adds a fresh, rich taste but tends to be less stable than Cool Whip, so be sure to use it fresh and serve soon after making the pie for best results.
-
Is this Butterfinger Pie suitable for kids’ parties?
Definitely! Kids adore the peanut butter and candy crunch combo, and it’s quick to make in advance, which helps keep the party stress-free.
-
How do I make sure the pie sets properly and isn’t too runny?
Make sure to chill the pie for at least 4 hours or overnight so it firms up nicely. Using fully thawed and properly folded Cool Whip helps maintain the fluffy but stable texture, and room temperature cream cheese blends better for a smooth filling.
Final Thoughts
I keep coming back to this Butterfinger Pie with Cream Cheese, Peanut Butter, and Cool Whip In a Chocolate Cracker Crust Recipe because it’s that perfect combination of easy, delicious, and impressive. It’s one of those desserts that feels like a treat but doesn’t require a lot of fuss or ingredients. Honestly, it’s saved me more than once for last-minute guests or holiday dinners, and whenever I serve it, people ask for the recipe. You’ll enjoy how it feels special without the stress—and I can’t wait for you to try it!
Print
Butterfinger Pie with Cream Cheese, Peanut Butter, and Cool Whip In a Chocolate Cracker Crust Recipe
- Prep Time: 15 minutes
- Cook Time: 0 minutes
- Total Time: 4 hours 15 minutes
- Yield: 8 servings 1x
- Category: Dessert
- Method: No-Cook
- Cuisine: American
Description
This Butterfinger Pie is a luscious no-bake dessert combining creamy peanut butter, smooth cream cheese, and crushed fun-sized Butterfinger bars for a crunchy, sweet surprise in every bite. Set in a chocolate cookie crust and topped with whipped topping and extra Butterfinger pieces, it’s a delightful treat perfect for any occasion.
Ingredients
Filling
- 1 (8-ounce) package cream cheese, room temperature
- 1/2 cup creamy peanut butter
- 2 teaspoons vanilla extract
- 1 1/2 cups powdered sugar
- 1 (12.5-ounce) bag fun-sized Butterfinger bars, crushed (reserve 2 bars for topping)
- 1 (8-ounce) container Cool Whip, thawed
Crust
- 1 store-bought Oreo or chocolate graham cracker crust
Instructions
- Prepare Cream Cheese Mixture: Place cream cheese and peanut butter in a large mixing bowl. Add vanilla extract and beat with an electric mixer until the mixture is smooth and creamy.
- Add Sweetener: Beat in the powdered sugar gradually until fully incorporated and the mixture maintains a smooth texture.
- Incorporate Butterfinger Bars: Gently fold in the crushed Butterfinger bars into the cream cheese mixture, ensuring an even distribution without overmixing to maintain crunch.
- Fold in Cool Whip: Carefully fold the thawed Cool Whip into the mixture to keep the filling light and fluffy.
- Assemble the Pie: Spread the creamy filling evenly into the prepared store-bought crust. Sprinkle the reserved crushed Butterfinger bars evenly on top as a decorative and crunchy garnish.
- Chill: Refrigerate the pie for at least 4 hours to allow it to set properly before serving.
Notes
- Ensure the cream cheese is at room temperature to avoid lumps and promote smooth mixing.
- Use an electric mixer for best texture, but folding by hand works if done gently.
- This pie is best served chilled and is ideal for make-ahead desserts.
- For a gluten-free version, select a gluten-free cookie crust and verify Butterfinger bars’ ingredients.
- Store leftover pie covered in the refrigerator and consume within 3 days for best freshness.
Keywords: Butterfinger Pie, no-bake pie, peanut butter dessert, easy pie recipe, chocolate crust pie, creamy pie, holiday dessert