Baked Italian Grinder Sandwiches Recipe
If you’re craving that perfect balance of melty cheese, savory Italian meats, and a touch of spice all nestled inside a crusty sub roll, you’ve landed in the right place. This Baked Italian Grinder Sandwiches Recipe is one of my absolute favorites when I’m feeding a crowd or just want an elevated sandwich night at home. It’s warm, comforting, and bursting with flavor that’s hard to beat.
What makes this recipe special is how the herbs and spices blend into a buttery garlic topping, crisping up the bread while the cheeses melt perfectly inside. Trust me, once you bake these grinders, you’ll never want to eat a cold deli sandwich the same way again. Let me walk you through the whole process so you can nail it every time.
Ingredients You’ll Need
Each ingredient here plays a big role in creating the ultimate Italian grinder experience—from the herbs in the buttery mixture to the classic array of deli meats and cheeses. When shopping, fresh deli slices and high-quality bread make a big difference.
- Italian sub rolls: Choose sturdy rolls with a crisp crust that can hold all the fillings without getting soggy.
- Unsalted butter: Melts beautifully and lets you control the salt level when mixing with spices.
- Garlic powder: Adds that savory punch without the bulk of fresh garlic.
- Onion powder: Brings subtle sweetness and depth to the buttery topping.
- Dried oregano: Classic Italian herb that adds earthiness.
- Dried basil: Pairs perfectly with oregano for a herbaceous aroma.
- Red pepper flakes: Gives just the right amount of heat — adjust to your taste.
- Salt and black pepper: For seasoning the butter and balancing flavors.
- Deli-sliced salami: A flavorful, slightly spicy cured meat.
- Deli-sliced ham: Adds a touch of sweetness and tenderness.
- Deli-sliced pepperoni: For that classic zesty Italian bite.
- Deli-sliced mozzarella cheese: Melts smoothly and pulls delightfully.
- Deli-sliced provolone cheese: Slightly sharper than mozzarella, adds depth.
- Grated Parmesan cheese: Sprinkled on top for extra savory crunch.
- Roasted red peppers: Provide sweetness and a smoky dimension.
- Sliced black olives: Bring a briny contrast to the rich meats and cheeses.
- Banana peppers: Add a tangy brightness that lifts the entire sandwich.
- Fresh basil leaves: Tossed in at the end for fresh herbal notes and color.

Variations
I love encouraging folks to make this Baked Italian Grinder Sandwiches Recipe their own. Over time, I’ve tweaked mine depending on what’s in season or what my family prefers, and it’s always a hit. Feel free to swap out ingredients based on your cravings or dietary needs.
- Vegetarian version: Replace the meats with grilled veggies like eggplant or zucchini and extra cheese—I did this for my cousin once, and even meat-eaters loved it!
- Spicy kick: Add jalapeños or substitute pepperoni with spicy soppressata for more heat.
- Keto-friendly: Use low-carb wraps or bread alternatives and pack in extra meats and cheeses.
- Seasonal twist: Swap roasted peppers for sun-dried tomatoes in summer for a bright, tangy flavor.
How to Make Baked Italian Grinder Sandwiches Recipe
Step 1: Prepare Your Herb-Butter Mixture
Start by melting the unsalted butter in a small bowl, then whisk in garlic powder, onion powder, oregano, basil, red pepper flakes, salt, and black pepper. This flavorful butter blend is what transforms the bread into a golden, crispy, aromatic crust. I always give it a quick taste to tweak the seasoning before spreading it.
Step 2: Assemble the Sandwich Loaf
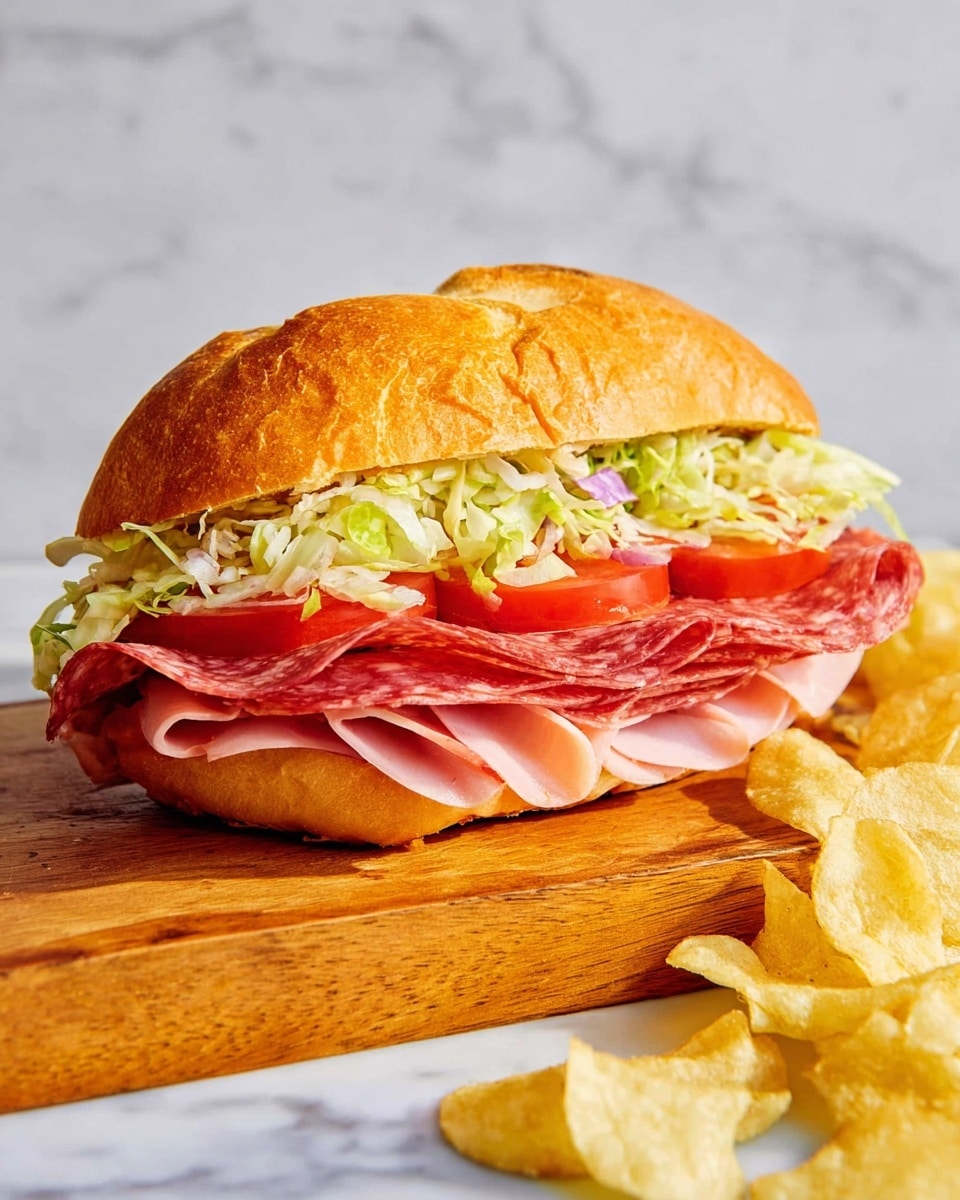
Slice the Italian sub roll lengthwise but not all the way through; you want the sandwich to stay intact like a hinge. Then generously layer your salami, ham, pepperoni, mozzarella, and provolone. Next, scatter the roasted red peppers, black olives, banana peppers, and fresh basil leaves over the meats and cheeses. Don’t be shy with the fillings—more is more in this recipe!
Step 3: Butter and Bake Your Grinder
Spread the herb-butter mixture evenly on the outside of the sandwich, covering both the top and bottom. Sprinkle Parmesan cheese over the top for an unbeatable savory crust. Wrap the entire sandwich in foil and bake in a preheated oven at 350°F (175°C) for about 20-25 minutes, then unwrap and bake another 5-7 minutes to crisp up the bread. Keep an eye on it—when the cheese inside is gooey and the bread is golden, you’re done.
How to Serve Baked Italian Grinder Sandwiches Recipe
Garnishes
I love finishing my baked Italian grinders with a sprinkle of fresh basil or a drizzle of a good-quality balsamic glaze if I’m feeling fancy. Sometimes I add a few pickled pepperoncini on the side to cut through the richness. These little details really elevate the sandwich presentation and flavor.
Side Dishes
My go-to sides are simple and fresh: a crisp green salad with a light vinaigrette balances the heaviness of the sandwich. I also like serving crunchy kettle chips or a bowl of tomato soup for dipping—perfect, especially on cooler evenings.
Creative Ways to Present
For gatherings, I sometimes slice the baked Italian grinder into smaller portions and arrange them on a wooden board, surrounded by olives, pickles, and small bowls of dipping oils. It makes for a rustic, inviting spread that guests love. You could also add colorful toothpicks for easier serving and a polished touch.
Make Ahead and Storage
Storing Leftovers
I’ve found that tightly wrapping leftover baked grinders in foil or plastic wrap and storing them in the fridge keeps them fresh for up to 3 days. When I want to pack lunches, this recipe shines because it reheats beautifully without losing flavor or texture.
Freezing
Freezing the assembled but unbaked sandwich works well too—just wrap it tightly and store in a freezer bag for up to a month. When you’re ready, thaw overnight in the fridge before baking as usual. I recommend freezing in individual servings if you want to avoid thawing the entire loaf.
Reheating
To reheat, I pop my leftover baked Italian grinders in a 350°F oven for about 10-15 minutes, wrapped in foil to keep moist. If you want a crispier exterior, unwrap for the last 5 minutes. Microwave is an option but can get a bit soggy—oven reheating really preserves that fresh-baked charm.
FAQs
-
Can I use different breads for the Baked Italian Grinder Sandwiches Recipe?
Absolutely! While Italian sub rolls provide the best crunch and size, you can experiment with hoagie rolls, crusty French bread, or even ciabatta. Just make sure the bread is sturdy enough to hold the fillings and withstand baking without becoming too soggy.
-
Is it possible to make this Baked Italian Grinder Sandwiches Recipe gluten-free?
Yes! Simply swap the Italian sub rolls for gluten-free sandwich rolls or wraps. The filling and butter mixture stay the same, so you won’t miss any flavor or texture. Just watch the baking time as gluten-free breads can brown quicker.
-
How spicy is this Baked Italian Grinder Sandwiches Recipe?
The recipe has a mild to moderate spice level due to red pepper flakes and banana peppers, but you can easily adjust the heat by adding more flakes, jalapeños, or spicy meats like soppressata. If you prefer no heat at all, simply omit the red pepper flakes.
-
Can I prepare this recipe in advance for a party?
Definitely! You can assemble the sandwich the day before, keep it wrapped in the fridge, and bake it fresh when guests arrive. This lowers your stress and guarantees a warm, fresh sandwich every time.
-
What cheeses work best for melting in Baked Italian Grinder Sandwiches Recipe?
Mozzarella and provolone are classic choices because they melt wonderfully and complement the meats. You could also experiment with fontina or even a mild cheddar if you like a slightly different flavor profile.
Final Thoughts
This Baked Italian Grinder Sandwiches Recipe has earned a permanent spot in my regular rotation because it’s the perfect comfort food that feels special without being fussy. Whether you’re making it for a simple family dinner or a casual party, it always brings people together around the table. I hope once you try it, it’ll be your go-to too—you’re going to love that crispy, cheesy, flavorful goodness baked right in.
Print
Baked Italian Grinder Sandwiches Recipe
- Prep Time: 15 minutes
- Cook Time: 20 minutes
- Total Time: 35 minutes
- Yield: 4 sandwiches 1x
- Category: Sandwiches
- Method: Baking
- Cuisine: Italian-American
Description
Delight in these hearty Baked Italian Grinder Sandwiches, packed with layers of savory deli meats, melted cheeses, and vibrant Italian herbs. This recipe elevates the classic sub sandwich by baking it to golden perfection, infusing every bite with buttery, garlicky goodness and a festive medley of peppers and olives. Perfect for a crowd or an indulgent meal, these grinders bring comforting Italian flavors straight to your table.
Ingredients
Bread and Butter Mixture
- 1 loaf Italian sub rolls
- 1/2 cup unsalted butter, melted
- 1 tablespoon garlic powder
- 1 tablespoon onion powder
- 1 tablespoon dried oregano
- 1 tablespoon dried basil
- 1 teaspoon red pepper flakes
- 1/2 teaspoon salt
- 1/4 teaspoon black pepper
Meats
- 1/2 pound deli-sliced salami
- 1/2 pound deli-sliced ham
- 1/2 pound deli-sliced pepperoni
Cheeses
- 1/2 pound deli-sliced mozzarella cheese
- 1/2 pound deli-sliced provolone cheese
- 1/4 cup grated Parmesan cheese
Vegetables and Herbs
- 1/4 cup roasted red peppers, sliced
- 1/4 cup sliced black olives
- 1/4 cup banana peppers, sliced
- 1/4 cup fresh basil leaves
Instructions
- Preheat the oven: Begin by preheating your oven to 350°F (175°C) to prepare for baking the sandwiches.
- Prepare the butter mixture: In a bowl, combine the melted unsalted butter with garlic powder, onion powder, dried oregano, dried basil, red pepper flakes, salt, and black pepper. Mix well to create a flavorful spread.
- Slice the roll: Carefully slice the Italian sub roll lengthwise without cutting all the way through, creating a hinge to hold the fillings.
- Apply the butter mixture: Using a brush or spoon, generously spread the butter herb mixture inside the cut of the sub roll, ensuring even coverage for a savory crust.
- Layer the meats and cheeses: Begin layering the deli-sliced salami, ham, and pepperoni evenly inside the roll. Follow with layers of mozzarella and provolone cheese, and sprinkle grated Parmesan cheese on top to add a rich finish.
- Add the vegetables and herbs: Place the sliced roasted red peppers, black olives, banana peppers, and fresh basil leaves over the cheese layer to infuse fresh and tangy flavors.
- Close and wrap the sandwich: Carefully close the sandwich, pressing gently to compact the ingredients. Wrap the entire sandwich tightly in aluminum foil to retain moisture during baking.
- Bake the sandwich: Place the wrapped sandwich on a baking sheet and bake in the preheated oven for approximately 20 minutes, until the cheeses have melted and the bread is warm and slightly crispy.
- Unwrap and serve: Remove the sandwich from the oven, carefully unwrap the foil, slice into portions as desired, and serve warm for the best taste experience.
Notes
- For an extra crunchy crust, unwrap the sandwich for the last 5 minutes of baking.
- You can customize the meats and cheeses to your preference or dietary needs.
- Adding fresh vegetables just before serving keeps them crisp and vibrant.
- Leftovers can be refrigerated and reheated wrapped in foil to preserve moisture.
- Use a serrated knife to slice the sandwich cleanly without crushing it.
Keywords: Italian grinder, baked sandwich, sub sandwich, deli meat sandwich, Italian sub, cheesy sandwich, baked Italian grinder